# Stepwik Docs
> Stepwik turns static documentation into interactive, step-by-step labs and courses, with AI tools to generate and publish content in minutes.
This file contains the full Stepwik documentation for AI assistants and agents.
Hub: https://stepwik.com/docs
Index: https://stepwik.com/llms.txt
Sitemap: https://stepwik.com/sitemap-docs.xml
# Getting Started
What Stepwik is, how to take a lab, publish your first lab, and set up your account.
## Introduction
URL: https://stepwik.com/docs/getting-started/introduction
What Stepwik is, the use cases it serves, key concepts, and where to go next.
## What is Stepwik?
Stepwik turns static documentation into interactive, step-by-step labs and courses, with AI tools to generate and publish content in minutes.
Instead of sending users to a wall of text, you give them a guided **lab**: a structured, hands-on guide they can follow at their own pace. Teams use Stepwik to onboard customers faster, teach developers how to use their APIs, and run internal training programs, all from one workspace with built-in analytics, AI authoring tools, and publishing controls.
 ## What you can build
Replace long setup guides with interactive labs that walk new users through your product hands-on.
Publish API tutorials and SDK walkthroughs developers can complete step by step.
Run internal courses for onboarding, compliance, or process docs, with certificates on Organization.
## Key concepts
| Term | What it means |
| --- | --- |
| Lab | A single, interactive, step-by-step guide. The primary content unit in Stepwik. |
| Course | A collection of labs grouped into a structured learning path. |
| Studio | The Stepwik authoring environment where you create and manage all your content. |
| Step | An individual section within a lab. Each step has its own title and content. |
| Stepflow | A guided UI / product walkthrough built from screenshots and annotated steps. |
## Get started in minutes
Sign up at [stepwik.com/signup](/signup) with email or Google. No credit card required.
Land in [Studio](/docs/getting-started/studio) and create a blank lab, or [generate with AI](/docs/ai-and-capture/generate-labs) from GitHub, PDF, or Google Slides.
Set visibility and share the link. See [Publish and share](/docs/labs/publish-and-share).
Stepwik's free tier includes **unlimited labs**, up to **2 co-authors**, a `*.stepwik.com` subdomain, and basic analytics. Courses, Unlisted/Private visibility, AI generation, and the Chrome Extension require Pro or above.
## Next steps
Find a published lab, work through steps, and track progress as a learner.
Create and publish your first interactive lab in under five minutes.
Learn the authoring workspace and sidebar.
Structure, visibility, and best practices for labs.
Draft a lab from GitHub, PDF, or Google Slides (Pro+).
---
## Quickstart
URL: https://stepwik.com/docs/getting-started/quickstart
Sign up, open Studio, create your first interactive lab, and publish a shareable link, all in under five minutes.
Getting from zero to a published lab takes just a few minutes. You'll sign up for a free account, open Stepwik Studio, build a lab by adding titled steps and content, then publish and share a link. No credit card, no configuration needed.
Go to [stepwik.com/signup](/signup) and create your account using your email address or Google. Your free account includes unlimited labs, subdomain publishing, and basic analytics. No credit card required.
After signing in, you land in [Stepwik Studio](/studio), your authoring workspace. This is where you create, organize, and manage all your labs and courses. Open **Labs**, then click **Create Lab** to begin (or **Generate with AI** if you prefer a draft from GitHub, PDF, or Google Slides).
If you belong to an organization, switch workspaces from the Studio org switcher before you create anything so ownership stays correct.
Give your lab a title that clearly describes what the learner will accomplish (for example, "Deploy your first API in 10 minutes"). Then use **Add Step** to create the steps that make up your lab. Each step gets its own title and content area.
**Tips for a good first lab**
- Keep it under 10-15 minutes of learner time
- One outcome per step
- Prefer code blocks and checklists over long paragraphs
- Open with context (goals and prerequisites); end with a summary
Click into any step to open the editor. The editor works like a Notion-style rich text environment. Type prose, insert code blocks with syntax highlighting, add images or videos, and format with Markdown shortcuts. Work through each step until your lab is complete.
Paste Markdown directly into a step and it renders automatically, the fastest way to migrate an existing README or tutorial.
When your lab is ready, click **Publish**. Stepwik assigns your lab a URL under your subdomain (for example, `yourname.stepwik.com/your-lab-title`). Copy the link and share it anywhere: in docs, emails, Slack, or social media.
On the free plan, published labs are **Public**. Unlisted and Private visibility require Pro or above. While drafting, keep the lab unpublished so only you and co-authors see it in Studio.
Want to skip the blank page? Use [Generate with AI](/docs/ai-and-capture/generate-labs) from a **GitHub** repo, **PDF**, or **Google Slides** deck (Pro+), or install the [Chrome Extension](/docs/ai-and-capture/chrome-extension) to capture a live page.
## Next steps
Find a published lab and learn how to work through steps as a reader.
Configure your profile, notifications, plan, and subdomain.
Learn the sidebar, overview, labs list, and developer tools.
Turn a GitHub repo, PDF, or Google Slides deck into a draft lab (Pro+).
Track views, funnels, and learner progress on published labs.
---
## Take a lab
URL: https://stepwik.com/docs/getting-started/take-a-lab
Find a published lab, work through steps with Next and Prev, track progress, and continue learning on Stepwik.
This guide is for **learners**: people who open a published lab (or course) to follow it, not authors who create content in Studio.
A lab walks you through one task step by step. You open it on Stepwik Explore, a shared link, or an author/org portal subdomain.
## Find a lab
| Where | What you get |
| --- | --- |
| [Explore](/explore) | Public labs and courses on Stepwik |
| [Courses](/courses) | Public course paths that group labs |
| Shared link | Direct URL such as `/labs/{slug}` or a `*.stepwik.com` portal link |
| Org / portal hub | Labs published on an author or organization subdomain |
Public labs are readable without signing in. Sign in if you want progress synced across devices, [reader feedback](/docs/labs/reader-feedback), and [My Progress](/docs/getting-started/my-progress) / [/my-progress](/my-progress).
## Work through a lab
The cover shows the title, description, level, duration, and author. Primary actions:
- **Start codelab** — begin at the first step (no saved progress yet)
- **Continue** — resume where you left off
- **Review lab** — reopen a lab you already completed
Use **Next** and **Prev** at the bottom of the reader. The left sidebar lists every step; completed steps show a checkmark. On mobile, open the sections list from the bottom bar.
Use **Mark section complete** (check control) when you finish a step. You usually complete steps in order: the previous step must be complete before you can mark the next one.
On the last step, finish the lab after the final section is complete. You will see a completion confirmation. You can return later with **Review lab**.
Guest progress is stored in the browser. Sign in (and merge guest progress when prompted) so completion follows you on other devices.
## Courses and portals
- **Courses** group labs into an ordered path. Open a course, then start or continue each lab in sequence. Progress is tracked per lab inside the course.
- **Portals** (author or org `*.stepwik.com` hubs) show that workspace’s published content. Same reader: cover → steps → Next / Prev.
See [Courses](/docs/teams-and-portals/courses) and [Domain and SEO](/docs/teams-and-portals/domain-and-seo).
## Continue later
| Place | Best for |
| --- | --- |
| [/my-progress](/my-progress) | Continue learning outside Studio |
| Studio → **My Progress** | Org workspaces only: in-progress and completed labs |
Details: [My Progress](/docs/getting-started/my-progress).
## Send feedback
If you are signed in, use **Feedback** on the lab reader (desktop social rail, also in fullscreen) to send a note about the current step. Authors triage messages in Studio. See [Reader feedback](/docs/labs/reader-feedback).
## Want to create labs instead?
Use the [Quickstart](/docs/getting-started/quickstart) to create and publish your first lab in Studio.
## Related
Create and publish your first lab as an author.
Resume in-progress labs in an org Studio workspace.
How learners send notes and how authors triage them.
Follow labs as part of a learning path.
---
## Account setup
URL: https://stepwik.com/docs/getting-started/account-setup
Create your account, configure profile and notifications, set a subdomain, and choose a plan.
Your Stepwik account unlocks Studio, your public profile, subdomain hub, and billing.
## Create an account
Go to [stepwik.com/signup](/signup):
- **Email and password**: verify via the confirmation email
- **Google**: Continue with Google
## Profile
Path: Studio → **Profile**
| Field | Notes |
| --- | --- |
| Name / username | Username checked for availability; public URL `/u/{username}` |
| Bio | Shown on your public profile |
| Avatar | Profile image |
| Social links | LinkedIn, GitHub, Website, YouTube, X, Instagram |
| Password | Set or change (email accounts) |
| Auth status | Google vs email sign-in |
## Notifications
Path: Studio → **Settings → Notifications**
Toggle **Weekly email notification** (`personal_weekly_update`) on or off.
## Subdomain
Path: Studio → **Domain** (personal) or **Manage → Domain** (org)
Set a 3-15 character lowercase alphanumeric handle. See [Domain and SEO](/docs/teams-and-portals/domain-and-seo).
## Plans and billing
Start on Freemium. Manage upgrades, payment methods, and invoices from [Billing](/docs/getting-started/billing).
| Capability | Freemium | Pro | Organization |
| --- | --- | --- | --- |
| Labs | Unlimited | Unlimited | Unlimited |
| Courses | - | Yes | Yes |
| Generate with AI (GitHub / PDF / Slides) | - | Yes | Yes |
| Chrome Extension | - | Yes | Yes |
| AI Rewrite | Yes | Yes | Yes |
| Private / Unlisted | - | Yes | Yes |
| Subdomain | Yes | Yes | Yes |
| Team workspace | - |: | Yes |
Exact pricing and enterprise options are on Studio **Pricing** / sales.
## Password reset
Use [forgot password](https://stepwik.com/forgot-password) for email accounts. Google sign-in is managed in your Google account.
## Related
How the authoring workspace is organized.
Resume org labs from Studio.
Upgrade, cancel, seats, and invoices.
Set your subdomain and portal metadata.
Publish your first lab in under five minutes.
---
## Studio
URL: https://stepwik.com/docs/getting-started/studio
How the Stepwik Studio workspace is organized and what each area is for.
Studio is the authenticated authoring workspace. You always work inside a **workspace**:
- **Personal**: your individual account (`/studio/user/personal/…`)
- **Organization**: a shared team workspace
Switch workspaces from the org switcher. Content does not move between workspaces unless you submit or recreate it.
## Sidebar map
| Area | Purpose | Docs |
| --- | --- | --- |
| **Overview** | Combined lab/course views chart plus count cards | This page |
| **My Progress** | Org only: continue or review labs you started | [My Progress](/docs/getting-started/my-progress) |
| **Labs** | List, create, generate, edit, settings, history, stats, pending review | [Labs](/docs/labs/overview) |
| **Courses** | Learning paths (when enabled on your plan) | [Courses](/docs/teams-and-portals/courses) |
| **Stepflows** | Screenshot walkthroughs (when enabled) | [Stepflows](/docs/ai-and-capture/stepflows) |
| **Domain / SEO** | Personal portal subdomain and SEO | [Domain and SEO](/docs/teams-and-portals/domain-and-seo) |
| **Billing** | Personal plan and invoices | [Billing](/docs/getting-started/billing) |
| **Organization settings** | Org manage pages (members, roles, submissions, …) | [Organizations](/docs/teams-and-portals/organizations), [Create and join](/docs/teams-and-portals/create-and-join-organization) |
| **Profile / Settings** | Public profile and notification prefs | [Account setup](/docs/getting-started/account-setup) |
| **Build with Stepwik** | Developer tools | [Developers](/docs/developers/overview) |
Header CTA: **Generate with AI** → [Generate labs](/docs/ai-and-capture/generate-labs).
## Overview page
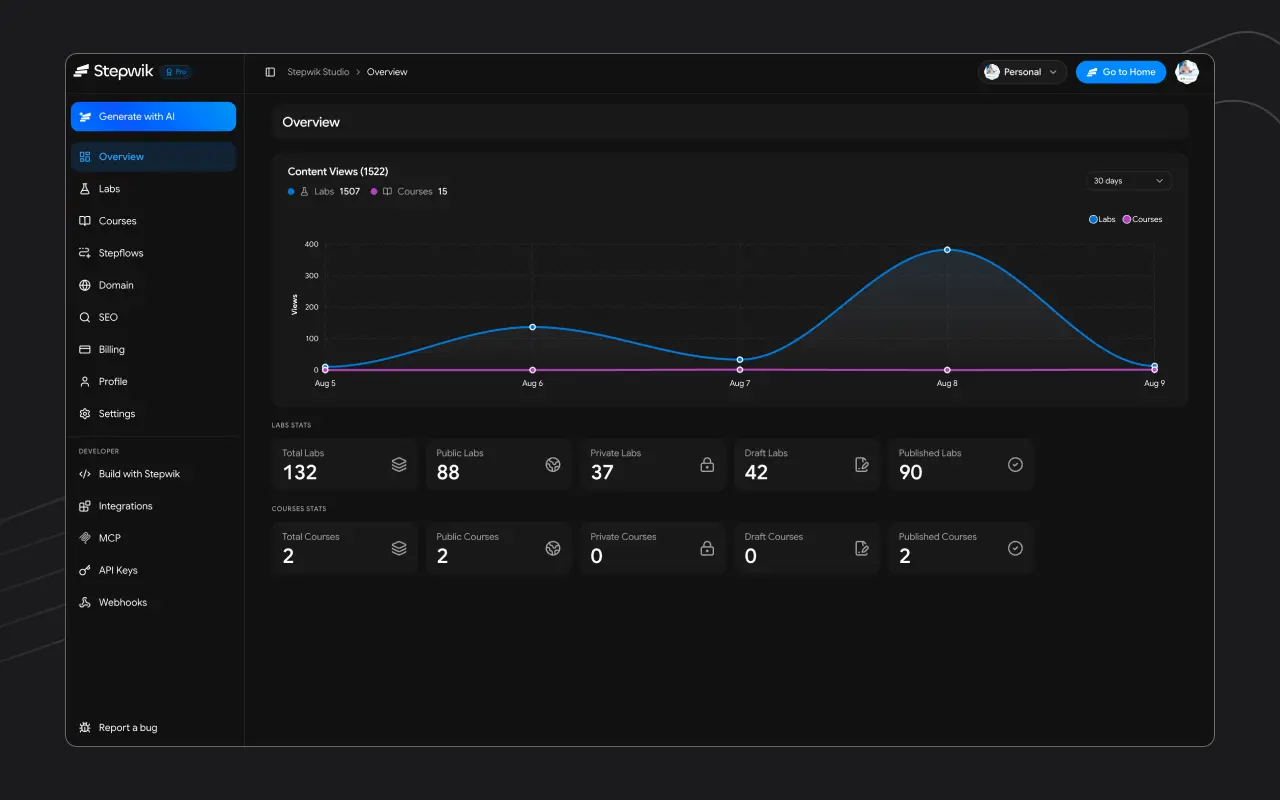
On **Overview** you typically see:
- Views over time for labs + courses (1 / 2 / 7 / 30 / 90 day ranges)
- Lab stats cards (for example total, published, draft, private, public)
- Course stats cards when courses are enabled
Per-item deep analytics live on each lab or course [Stats](/docs/analytics/overview) page.
## Creating content
**Labs → Create Lab**: start from an empty titled lab.
**Generate with AI** from GitHub, PDF, or Google Slides.
**Courses → Create**: group labs into a learning path.
**Stepflows** (+ Chrome extension capture).
Create a blank lab, AI draft, course, or stepflow in the matching Studio area.
Author in the [editor](/docs/labs/editor), then preview before you share.
Set visibility and publish: see [Publish and share](/docs/labs/publish-and-share). Optionally add the lab to a [course](/docs/teams-and-portals/courses).
## Developer tools
Embeds and connected services for labs.
Connect AI clients to draft private labs.
Authenticate Studio API requests.
Event delivery (coming soon).
Link Google and other accounts.
Try endpoints from the browser.
## Organization settings
See [Organizations](/docs/teams-and-portals/organizations) for the full Manage menu, including [members and roles](/docs/teams-and-portals/members-and-roles) and [lab submissions](/docs/teams-and-portals/lab-submissions).
## Related
Follow the quickstart to draft, publish, and share a lab.
Resume org labs you started or completed.
Structure steps, visibility, and the Studio labs list.
Title, slug, tags, cover, and descriptions.
Build drafts from GitHub, PDF, or Google Slides.
API keys, MCP, integrations, and the playground.
---
## Billing
URL: https://stepwik.com/docs/getting-started/billing
View your plan, upgrade, cancel, manage payment methods, seats, and download invoices in Studio.
Billing is managed inside Studio for both personal and organization workspaces.
## Paths
| Workspace | Path |
| --- | --- |
| Personal | **Billing** (and **Pricing** / checkout when upgrading) |
| Organization | **Manage → Billing** (and **Manage → Pricing**) |
Organization billing requires the matching org permission.
## What you can do
| Action | Notes |
| --- | --- |
| View plan | Current plan, amount, status, next billing date |
| Upgrade | Open pricing / checkout |
| Cancel | Available for non-Freemium, non-Enterprise plans |
| Revert cancellation | Restore a plan scheduled to end |
| Change billing address | Update invoice address |
| Change payment method | Update card / payment details |
| Seat add-ons | Organization plans that support seats |
| Invoices | List past invoices and download receipts |
Upgrade from the workspace that should own the subscription (personal vs org).
Seat limits affect how many members you can invite: see [Members and roles](/docs/teams-and-portals/members-and-roles).
Content features such as AI generation and private visibility follow your active plan.
## Related
Profile, notifications, subdomain, and plan overview.
Shared team workspaces, seats, and org billing.
Where billing and pricing live in the sidebar.
---
## My Progress
URL: https://stepwik.com/docs/getting-started/my-progress
Continue in-progress labs and review completed ones inside an organization Studio workspace.
**My Progress** is the Studio view of labs you have started or finished in an **organization** workspace. Use it to resume learning without hunting through the public explore feed.
Path: Studio (org workspace) → **My Progress**
My Progress in Studio is available only in **organization** workspaces, and only if your role can view labs. Personal workspaces do not show this sidebar item. A public **Continue learning** experience also exists at [/my-progress](/my-progress) outside Studio.
## Tabs
| Tab | Shows |
| --- | --- |
| **In progress** | Labs you started but have not completed |
| **Completed** | Labs marked completed for your account in this org |
## Table
For each lab you see:
- Cover, title, and level
- Progress bar / completion status
- Last updated time
- **Continue** (or open) to return to the lab reader
Search filters the list by title. Pagination controls how many rows appear per page.
## Typical flow
Use the org switcher to open the organization workspace.
Click **My Progress** in the left sidebar.
Pick **In progress**, find the lab, and continue where you left off.
Authors reviewing learner analytics should use per-lab [Stats](/docs/analytics/overview) instead. My Progress is for **your** learning status, not workspace-wide funnels.
## Related
Find labs, work through steps, and track progress as a learner.
Sidebar map and workspace types.
Org workspaces, members, and shared content.
Lab and course stats for authors.
---
# Labs
Structure labs, use the editor, publish with the right visibility, and collaborate.
## Labs overview
URL: https://stepwik.com/docs/labs/overview
What labs are, how they are structured in Stepwik, and best practices for engaging interactive labs.
A **lab** is a structured, step-by-step interactive guide that leads a learner through a concrete task, such as installing a tool, building a feature, or completing a workflow. Unlike static documentation, labs present content one step at a time, keeping learners focused and reducing cognitive load.
Learners open a published lab at `/labs/{slug}` and move through steps with **Next** and **Prev**. See [Take a lab](/docs/getting-started/take-a-lab) for the full learner flow.
## What makes up a lab
Every lab on Stepwik follows the same structure:
- **Title**: a short, action-oriented headline (e.g., "Deploy a Node.js App to Fly.io")
- **Description**: a brief summary shown in search results and on the lab card
- **Steps**: the core of the lab; each step has its own title and rich content area where you add text, code blocks, images, or embeds
## Labs vs. courses
| | Lab | Course |
| --- | --- | --- |
| Scope | Single topic or task | Organized collection of labs |
| Structure | Title → Steps | Title → Modules (each module is a lab) |
| Completion | Per-lab progress | Course-level progress and certificate (Org) |
| Plan required | Free and above | Pro and above |
Use a lab when you're covering one well-defined task. Use a [course](/docs/teams-and-portals/courses) when you want to group multiple labs into a learning path, for example an onboarding sequence or a certification program.
Courses require a Pro plan or above. You can create unlimited labs on the free plan.
## Visibility options
When you publish a lab, you choose who can access it:
- **Public**: discoverable via search and shareable by link; no sign-in required
- **Unlisted**: accessible only by direct link; not indexed by search engines (Pro+)
- **Private**: visible only to you and collaborators with explicit access (Pro+)
- **Draft**: not yet published; only visible to you and co-authors in Studio
See [Publish and share](/docs/labs/publish-and-share) for embed, SEO, and unpublish details.
## Best practices for structuring a lab
**Keep steps short and focused.** Each step should accomplish one thing. If a step requires more than a few paragraphs, consider splitting it.
**Write clear step titles.** Use action phrases like "Install the CLI", "Configure your environment", or "Run the first query". Learners scan step titles to orient themselves.
**Include code examples for every command.** Use code blocks with language tags so syntax highlighting works correctly. Don't ask learners to type commands from memory.
**Open with context.** The first step should explain what the learner will accomplish and what they need to have ready (prerequisites, tools, accounts).
**End with a summary step.** Recap what was built or configured and point to logical next steps or related labs.
Paste Markdown directly into the editor and it renders automatically. This is the fastest way to migrate existing content into Stepwik.
## Studio Labs list
In Studio → **Labs** you manage:
| Tab / action | Purpose |
| --- | --- |
| Published / Draft | Filter by status |
| Pending review | Moderation queue (when enabled) |
| Create | Blank lab |
| Generate with AI | GitHub, PDF, or Google Slides |
| Edit | Open the [editor](/docs/labs/editor) |
| Settings | [Title, tags, cover, and more](/docs/labs/lab-settings) |
| History | [Per-section Document versions](/docs/labs/version-history) |
| Stats | [Per-lab analytics](/docs/analytics/overview) |
| View | Studio preview of the learner experience |
## Lab lifecycle
Create blank, generate with AI, capture with the Chrome extension, or import a private draft via MCP.
Structure steps in the Studio editor; invite co-authors if needed.
Set [lab settings](/docs/labs/lab-settings) (level, tags, cover) and visibility.
Publish immediately, or request review in moderated orgs.
Use [stats](/docs/analytics/overview), [version history](/docs/labs/version-history), and [AI Rewrite](/docs/ai-and-capture/ai-rewrite).
## Related
Slash commands, Markdown paste, code blocks, and step management.
Title, slug, category, level, tags, and cover image.
Save, compare, and restore section versions.
Visibility, embeds, SEO, and unpublishing published labs.
How learners read and complete a published lab.
Invite co-authors, leave comments, and track revisions.
Collect and triage messages from learners on published labs.
Draft a lab from GitHub, PDF, or Google Slides.
Create and publish your first interactive lab in minutes.
---
## Editor
URL: https://stepwik.com/docs/labs/editor
A complete guide to the Stepwik rich text editor: slash commands, Markdown support, code blocks, AI Rephrase, and step management.
The Stepwik editor is a Notion-like rich text environment designed specifically for technical content. You can mix prose, code blocks, images, and embeds within each step without switching between tools. Every change is saved automatically, so you can focus on writing without worrying about losing progress.
## What you can build
Replace long setup guides with interactive labs that walk new users through your product hands-on.
Publish API tutorials and SDK walkthroughs developers can complete step by step.
Run internal courses for onboarding, compliance, or process docs, with certificates on Organization.
## Key concepts
| Term | What it means |
| --- | --- |
| Lab | A single, interactive, step-by-step guide. The primary content unit in Stepwik. |
| Course | A collection of labs grouped into a structured learning path. |
| Studio | The Stepwik authoring environment where you create and manage all your content. |
| Step | An individual section within a lab. Each step has its own title and content. |
| Stepflow | A guided UI / product walkthrough built from screenshots and annotated steps. |
## Get started in minutes
Sign up at [stepwik.com/signup](/signup) with email or Google. No credit card required.
Land in [Studio](/docs/getting-started/studio) and create a blank lab, or [generate with AI](/docs/ai-and-capture/generate-labs) from GitHub, PDF, or Google Slides.
Set visibility and share the link. See [Publish and share](/docs/labs/publish-and-share).
Stepwik's free tier includes **unlimited labs**, up to **2 co-authors**, a `*.stepwik.com` subdomain, and basic analytics. Courses, Unlisted/Private visibility, AI generation, and the Chrome Extension require Pro or above.
## Next steps
Find a published lab, work through steps, and track progress as a learner.
Create and publish your first interactive lab in under five minutes.
Learn the authoring workspace and sidebar.
Structure, visibility, and best practices for labs.
Draft a lab from GitHub, PDF, or Google Slides (Pro+).
---
## Quickstart
URL: https://stepwik.com/docs/getting-started/quickstart
Sign up, open Studio, create your first interactive lab, and publish a shareable link, all in under five minutes.
Getting from zero to a published lab takes just a few minutes. You'll sign up for a free account, open Stepwik Studio, build a lab by adding titled steps and content, then publish and share a link. No credit card, no configuration needed.
Go to [stepwik.com/signup](/signup) and create your account using your email address or Google. Your free account includes unlimited labs, subdomain publishing, and basic analytics. No credit card required.
After signing in, you land in [Stepwik Studio](/studio), your authoring workspace. This is where you create, organize, and manage all your labs and courses. Open **Labs**, then click **Create Lab** to begin (or **Generate with AI** if you prefer a draft from GitHub, PDF, or Google Slides).
If you belong to an organization, switch workspaces from the Studio org switcher before you create anything so ownership stays correct.
Give your lab a title that clearly describes what the learner will accomplish (for example, "Deploy your first API in 10 minutes"). Then use **Add Step** to create the steps that make up your lab. Each step gets its own title and content area.
**Tips for a good first lab**
- Keep it under 10-15 minutes of learner time
- One outcome per step
- Prefer code blocks and checklists over long paragraphs
- Open with context (goals and prerequisites); end with a summary
Click into any step to open the editor. The editor works like a Notion-style rich text environment. Type prose, insert code blocks with syntax highlighting, add images or videos, and format with Markdown shortcuts. Work through each step until your lab is complete.
Paste Markdown directly into a step and it renders automatically, the fastest way to migrate an existing README or tutorial.
When your lab is ready, click **Publish**. Stepwik assigns your lab a URL under your subdomain (for example, `yourname.stepwik.com/your-lab-title`). Copy the link and share it anywhere: in docs, emails, Slack, or social media.
On the free plan, published labs are **Public**. Unlisted and Private visibility require Pro or above. While drafting, keep the lab unpublished so only you and co-authors see it in Studio.
Want to skip the blank page? Use [Generate with AI](/docs/ai-and-capture/generate-labs) from a **GitHub** repo, **PDF**, or **Google Slides** deck (Pro+), or install the [Chrome Extension](/docs/ai-and-capture/chrome-extension) to capture a live page.
## Next steps
Find a published lab and learn how to work through steps as a reader.
Configure your profile, notifications, plan, and subdomain.
Learn the sidebar, overview, labs list, and developer tools.
Turn a GitHub repo, PDF, or Google Slides deck into a draft lab (Pro+).
Track views, funnels, and learner progress on published labs.
---
## Take a lab
URL: https://stepwik.com/docs/getting-started/take-a-lab
Find a published lab, work through steps with Next and Prev, track progress, and continue learning on Stepwik.
This guide is for **learners**: people who open a published lab (or course) to follow it, not authors who create content in Studio.
A lab walks you through one task step by step. You open it on Stepwik Explore, a shared link, or an author/org portal subdomain.
## Find a lab
| Where | What you get |
| --- | --- |
| [Explore](/explore) | Public labs and courses on Stepwik |
| [Courses](/courses) | Public course paths that group labs |
| Shared link | Direct URL such as `/labs/{slug}` or a `*.stepwik.com` portal link |
| Org / portal hub | Labs published on an author or organization subdomain |
Public labs are readable without signing in. Sign in if you want progress synced across devices, [reader feedback](/docs/labs/reader-feedback), and [My Progress](/docs/getting-started/my-progress) / [/my-progress](/my-progress).
## Work through a lab
The cover shows the title, description, level, duration, and author. Primary actions:
- **Start codelab** — begin at the first step (no saved progress yet)
- **Continue** — resume where you left off
- **Review lab** — reopen a lab you already completed
Use **Next** and **Prev** at the bottom of the reader. The left sidebar lists every step; completed steps show a checkmark. On mobile, open the sections list from the bottom bar.
Use **Mark section complete** (check control) when you finish a step. You usually complete steps in order: the previous step must be complete before you can mark the next one.
On the last step, finish the lab after the final section is complete. You will see a completion confirmation. You can return later with **Review lab**.
Guest progress is stored in the browser. Sign in (and merge guest progress when prompted) so completion follows you on other devices.
## Courses and portals
- **Courses** group labs into an ordered path. Open a course, then start or continue each lab in sequence. Progress is tracked per lab inside the course.
- **Portals** (author or org `*.stepwik.com` hubs) show that workspace’s published content. Same reader: cover → steps → Next / Prev.
See [Courses](/docs/teams-and-portals/courses) and [Domain and SEO](/docs/teams-and-portals/domain-and-seo).
## Continue later
| Place | Best for |
| --- | --- |
| [/my-progress](/my-progress) | Continue learning outside Studio |
| Studio → **My Progress** | Org workspaces only: in-progress and completed labs |
Details: [My Progress](/docs/getting-started/my-progress).
## Send feedback
If you are signed in, use **Feedback** on the lab reader (desktop social rail, also in fullscreen) to send a note about the current step. Authors triage messages in Studio. See [Reader feedback](/docs/labs/reader-feedback).
## Want to create labs instead?
Use the [Quickstart](/docs/getting-started/quickstart) to create and publish your first lab in Studio.
## Related
Create and publish your first lab as an author.
Resume in-progress labs in an org Studio workspace.
How learners send notes and how authors triage them.
Follow labs as part of a learning path.
---
## Account setup
URL: https://stepwik.com/docs/getting-started/account-setup
Create your account, configure profile and notifications, set a subdomain, and choose a plan.
Your Stepwik account unlocks Studio, your public profile, subdomain hub, and billing.
## Create an account
Go to [stepwik.com/signup](/signup):
- **Email and password**: verify via the confirmation email
- **Google**: Continue with Google
## Profile
Path: Studio → **Profile**
| Field | Notes |
| --- | --- |
| Name / username | Username checked for availability; public URL `/u/{username}` |
| Bio | Shown on your public profile |
| Avatar | Profile image |
| Social links | LinkedIn, GitHub, Website, YouTube, X, Instagram |
| Password | Set or change (email accounts) |
| Auth status | Google vs email sign-in |
## Notifications
Path: Studio → **Settings → Notifications**
Toggle **Weekly email notification** (`personal_weekly_update`) on or off.
## Subdomain
Path: Studio → **Domain** (personal) or **Manage → Domain** (org)
Set a 3-15 character lowercase alphanumeric handle. See [Domain and SEO](/docs/teams-and-portals/domain-and-seo).
## Plans and billing
Start on Freemium. Manage upgrades, payment methods, and invoices from [Billing](/docs/getting-started/billing).
| Capability | Freemium | Pro | Organization |
| --- | --- | --- | --- |
| Labs | Unlimited | Unlimited | Unlimited |
| Courses | - | Yes | Yes |
| Generate with AI (GitHub / PDF / Slides) | - | Yes | Yes |
| Chrome Extension | - | Yes | Yes |
| AI Rewrite | Yes | Yes | Yes |
| Private / Unlisted | - | Yes | Yes |
| Subdomain | Yes | Yes | Yes |
| Team workspace | - |: | Yes |
Exact pricing and enterprise options are on Studio **Pricing** / sales.
## Password reset
Use [forgot password](https://stepwik.com/forgot-password) for email accounts. Google sign-in is managed in your Google account.
## Related
How the authoring workspace is organized.
Resume org labs from Studio.
Upgrade, cancel, seats, and invoices.
Set your subdomain and portal metadata.
Publish your first lab in under five minutes.
---
## Studio
URL: https://stepwik.com/docs/getting-started/studio
How the Stepwik Studio workspace is organized and what each area is for.
Studio is the authenticated authoring workspace. You always work inside a **workspace**:
- **Personal**: your individual account (`/studio/user/personal/…`)
- **Organization**: a shared team workspace
Switch workspaces from the org switcher. Content does not move between workspaces unless you submit or recreate it.
## Sidebar map
| Area | Purpose | Docs |
| --- | --- | --- |
| **Overview** | Combined lab/course views chart plus count cards | This page |
| **My Progress** | Org only: continue or review labs you started | [My Progress](/docs/getting-started/my-progress) |
| **Labs** | List, create, generate, edit, settings, history, stats, pending review | [Labs](/docs/labs/overview) |
| **Courses** | Learning paths (when enabled on your plan) | [Courses](/docs/teams-and-portals/courses) |
| **Stepflows** | Screenshot walkthroughs (when enabled) | [Stepflows](/docs/ai-and-capture/stepflows) |
| **Domain / SEO** | Personal portal subdomain and SEO | [Domain and SEO](/docs/teams-and-portals/domain-and-seo) |
| **Billing** | Personal plan and invoices | [Billing](/docs/getting-started/billing) |
| **Organization settings** | Org manage pages (members, roles, submissions, …) | [Organizations](/docs/teams-and-portals/organizations), [Create and join](/docs/teams-and-portals/create-and-join-organization) |
| **Profile / Settings** | Public profile and notification prefs | [Account setup](/docs/getting-started/account-setup) |
| **Build with Stepwik** | Developer tools | [Developers](/docs/developers/overview) |
Header CTA: **Generate with AI** → [Generate labs](/docs/ai-and-capture/generate-labs).
## Overview page
On **Overview** you typically see:
- Views over time for labs + courses (1 / 2 / 7 / 30 / 90 day ranges)
- Lab stats cards (for example total, published, draft, private, public)
- Course stats cards when courses are enabled
Per-item deep analytics live on each lab or course [Stats](/docs/analytics/overview) page.
## Creating content
**Labs → Create Lab**: start from an empty titled lab.
**Generate with AI** from GitHub, PDF, or Google Slides.
**Courses → Create**: group labs into a learning path.
**Stepflows** (+ Chrome extension capture).
Create a blank lab, AI draft, course, or stepflow in the matching Studio area.
Author in the [editor](/docs/labs/editor), then preview before you share.
Set visibility and publish: see [Publish and share](/docs/labs/publish-and-share). Optionally add the lab to a [course](/docs/teams-and-portals/courses).
## Developer tools
Embeds and connected services for labs.
Connect AI clients to draft private labs.
Authenticate Studio API requests.
Event delivery (coming soon).
Link Google and other accounts.
Try endpoints from the browser.
## Organization settings
See [Organizations](/docs/teams-and-portals/organizations) for the full Manage menu, including [members and roles](/docs/teams-and-portals/members-and-roles) and [lab submissions](/docs/teams-and-portals/lab-submissions).
## Related
Follow the quickstart to draft, publish, and share a lab.
Resume org labs you started or completed.
Structure steps, visibility, and the Studio labs list.
Title, slug, tags, cover, and descriptions.
Build drafts from GitHub, PDF, or Google Slides.
API keys, MCP, integrations, and the playground.
---
## Billing
URL: https://stepwik.com/docs/getting-started/billing
View your plan, upgrade, cancel, manage payment methods, seats, and download invoices in Studio.
Billing is managed inside Studio for both personal and organization workspaces.
## Paths
| Workspace | Path |
| --- | --- |
| Personal | **Billing** (and **Pricing** / checkout when upgrading) |
| Organization | **Manage → Billing** (and **Manage → Pricing**) |
Organization billing requires the matching org permission.
## What you can do
| Action | Notes |
| --- | --- |
| View plan | Current plan, amount, status, next billing date |
| Upgrade | Open pricing / checkout |
| Cancel | Available for non-Freemium, non-Enterprise plans |
| Revert cancellation | Restore a plan scheduled to end |
| Change billing address | Update invoice address |
| Change payment method | Update card / payment details |
| Seat add-ons | Organization plans that support seats |
| Invoices | List past invoices and download receipts |
Upgrade from the workspace that should own the subscription (personal vs org).
Seat limits affect how many members you can invite: see [Members and roles](/docs/teams-and-portals/members-and-roles).
Content features such as AI generation and private visibility follow your active plan.
## Related
Profile, notifications, subdomain, and plan overview.
Shared team workspaces, seats, and org billing.
Where billing and pricing live in the sidebar.
---
## My Progress
URL: https://stepwik.com/docs/getting-started/my-progress
Continue in-progress labs and review completed ones inside an organization Studio workspace.
**My Progress** is the Studio view of labs you have started or finished in an **organization** workspace. Use it to resume learning without hunting through the public explore feed.
Path: Studio (org workspace) → **My Progress**
My Progress in Studio is available only in **organization** workspaces, and only if your role can view labs. Personal workspaces do not show this sidebar item. A public **Continue learning** experience also exists at [/my-progress](/my-progress) outside Studio.
## Tabs
| Tab | Shows |
| --- | --- |
| **In progress** | Labs you started but have not completed |
| **Completed** | Labs marked completed for your account in this org |
## Table
For each lab you see:
- Cover, title, and level
- Progress bar / completion status
- Last updated time
- **Continue** (or open) to return to the lab reader
Search filters the list by title. Pagination controls how many rows appear per page.
## Typical flow
Use the org switcher to open the organization workspace.
Click **My Progress** in the left sidebar.
Pick **In progress**, find the lab, and continue where you left off.
Authors reviewing learner analytics should use per-lab [Stats](/docs/analytics/overview) instead. My Progress is for **your** learning status, not workspace-wide funnels.
## Related
Find labs, work through steps, and track progress as a learner.
Sidebar map and workspace types.
Org workspaces, members, and shared content.
Lab and course stats for authors.
---
# Labs
Structure labs, use the editor, publish with the right visibility, and collaborate.
## Labs overview
URL: https://stepwik.com/docs/labs/overview
What labs are, how they are structured in Stepwik, and best practices for engaging interactive labs.
A **lab** is a structured, step-by-step interactive guide that leads a learner through a concrete task, such as installing a tool, building a feature, or completing a workflow. Unlike static documentation, labs present content one step at a time, keeping learners focused and reducing cognitive load.
Learners open a published lab at `/labs/{slug}` and move through steps with **Next** and **Prev**. See [Take a lab](/docs/getting-started/take-a-lab) for the full learner flow.
## What makes up a lab
Every lab on Stepwik follows the same structure:
- **Title**: a short, action-oriented headline (e.g., "Deploy a Node.js App to Fly.io")
- **Description**: a brief summary shown in search results and on the lab card
- **Steps**: the core of the lab; each step has its own title and rich content area where you add text, code blocks, images, or embeds
## Labs vs. courses
| | Lab | Course |
| --- | --- | --- |
| Scope | Single topic or task | Organized collection of labs |
| Structure | Title → Steps | Title → Modules (each module is a lab) |
| Completion | Per-lab progress | Course-level progress and certificate (Org) |
| Plan required | Free and above | Pro and above |
Use a lab when you're covering one well-defined task. Use a [course](/docs/teams-and-portals/courses) when you want to group multiple labs into a learning path, for example an onboarding sequence or a certification program.
Courses require a Pro plan or above. You can create unlimited labs on the free plan.
## Visibility options
When you publish a lab, you choose who can access it:
- **Public**: discoverable via search and shareable by link; no sign-in required
- **Unlisted**: accessible only by direct link; not indexed by search engines (Pro+)
- **Private**: visible only to you and collaborators with explicit access (Pro+)
- **Draft**: not yet published; only visible to you and co-authors in Studio
See [Publish and share](/docs/labs/publish-and-share) for embed, SEO, and unpublish details.
## Best practices for structuring a lab
**Keep steps short and focused.** Each step should accomplish one thing. If a step requires more than a few paragraphs, consider splitting it.
**Write clear step titles.** Use action phrases like "Install the CLI", "Configure your environment", or "Run the first query". Learners scan step titles to orient themselves.
**Include code examples for every command.** Use code blocks with language tags so syntax highlighting works correctly. Don't ask learners to type commands from memory.
**Open with context.** The first step should explain what the learner will accomplish and what they need to have ready (prerequisites, tools, accounts).
**End with a summary step.** Recap what was built or configured and point to logical next steps or related labs.
Paste Markdown directly into the editor and it renders automatically. This is the fastest way to migrate existing content into Stepwik.
## Studio Labs list
In Studio → **Labs** you manage:
| Tab / action | Purpose |
| --- | --- |
| Published / Draft | Filter by status |
| Pending review | Moderation queue (when enabled) |
| Create | Blank lab |
| Generate with AI | GitHub, PDF, or Google Slides |
| Edit | Open the [editor](/docs/labs/editor) |
| Settings | [Title, tags, cover, and more](/docs/labs/lab-settings) |
| History | [Per-section Document versions](/docs/labs/version-history) |
| Stats | [Per-lab analytics](/docs/analytics/overview) |
| View | Studio preview of the learner experience |
## Lab lifecycle
Create blank, generate with AI, capture with the Chrome extension, or import a private draft via MCP.
Structure steps in the Studio editor; invite co-authors if needed.
Set [lab settings](/docs/labs/lab-settings) (level, tags, cover) and visibility.
Publish immediately, or request review in moderated orgs.
Use [stats](/docs/analytics/overview), [version history](/docs/labs/version-history), and [AI Rewrite](/docs/ai-and-capture/ai-rewrite).
## Related
Slash commands, Markdown paste, code blocks, and step management.
Title, slug, category, level, tags, and cover image.
Save, compare, and restore section versions.
Visibility, embeds, SEO, and unpublishing published labs.
How learners read and complete a published lab.
Invite co-authors, leave comments, and track revisions.
Collect and triage messages from learners on published labs.
Draft a lab from GitHub, PDF, or Google Slides.
Create and publish your first interactive lab in minutes.
---
## Editor
URL: https://stepwik.com/docs/labs/editor
A complete guide to the Stepwik rich text editor: slash commands, Markdown support, code blocks, AI Rephrase, and step management.
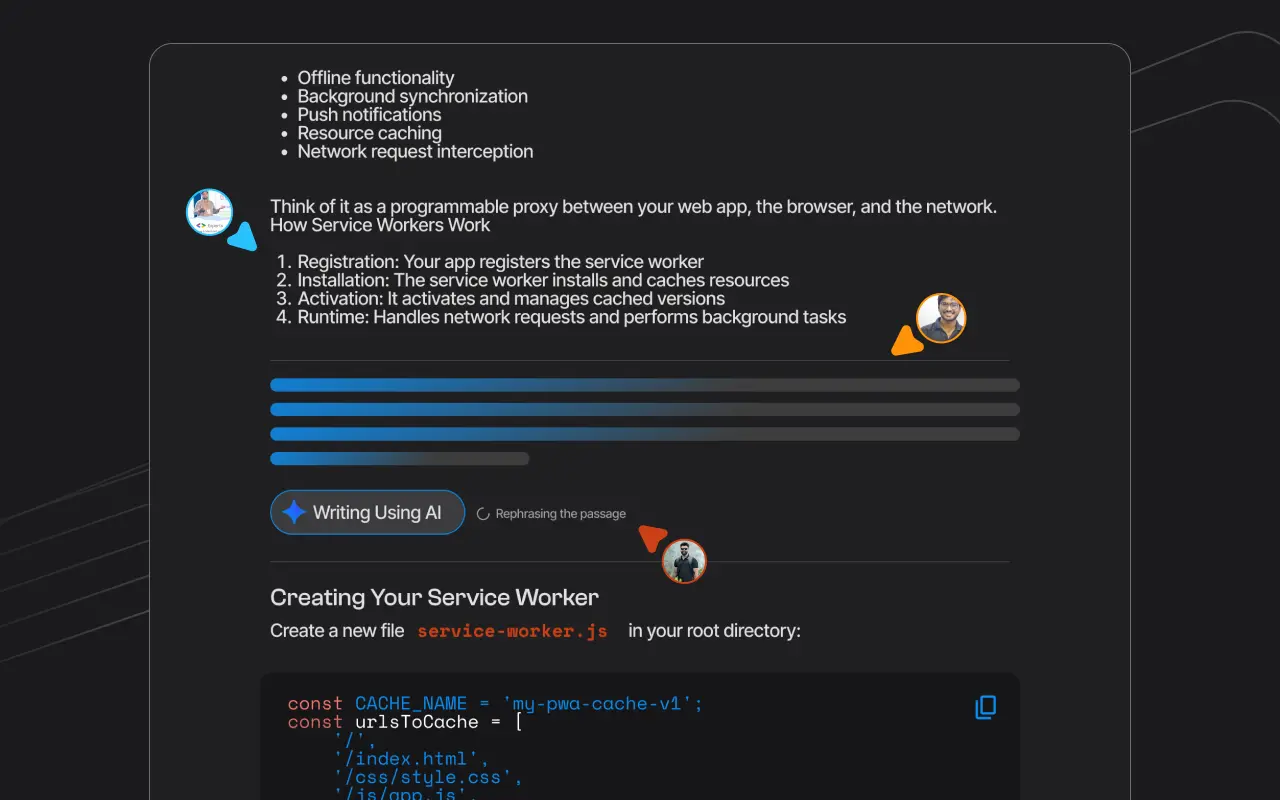
The Stepwik editor is a Notion-like rich text environment designed specifically for technical content. You can mix prose, code blocks, images, and embeds within each step without switching between tools. Every change is saved automatically, so you can focus on writing without worrying about losing progress.
 ## Supported content types
- **Paragraphs**: standard text with bold, italic, inline code, and link formatting
- **Headings**: H1, H2, and H3 to organize longer steps
- **Code blocks**: multi-line code with language selection for syntax highlighting
- **Images**: upload directly or paste a URL
- **Videos**: embed YouTube, Loom, or any iframe-compatible video source
- **Embeds**: CodePen, GitHub Gists, and other embed-friendly resources
## Using slash commands
Type `/` anywhere in the editor to open the command palette. Select a block type to insert it at the cursor position.
| Command | What it inserts |
| --- | --- |
| `/code` | Code block with language picker |
| `/h1`, `/h2`, `/h3` | Heading blocks |
| `/image` | Image upload or URL input |
| `/video` | Video embed |
| `/divider` | Horizontal rule to separate content visually |
Slash commands are the fastest way to insert a code block mid-sentence without reaching for the toolbar.
## Markdown support
You can paste Markdown directly into any step and it renders automatically. Headings, bold, italic, inline code, fenced code blocks, and lists all convert on paste. This makes it easy to move content from a README, blog post, or existing doc into Stepwik without reformatting by hand.
You can paste content like headings, lists, bold/italic, inline code, and fenced code blocks (for example a `bash` install command followed by `npm start`). Paste into any step and the editor converts it to formatted blocks instantly.
Markdown copy-paste is especially useful for teams migrating existing tutorials into Stepwik. Bring in a full README and have a structured lab in minutes.
## AI Rephrase
Select any text in the editor and choose **AI Rephrase** from the context menu (or the toolbar). The AI rewrites the selected content for clarity and readability, useful for simplifying jargon or making instructions easier to follow.
AI Rephrase is available on **all plans**, including the free tier. For fuller rewrites, see [AI Rewrite](/docs/ai-and-capture/ai-rewrite).
## Keyboard shortcuts
| Action | Shortcut |
| --- | --- |
| Bold | `Cmd/Ctrl + B` |
| Italic | `Cmd/Ctrl + I` |
| Inline code | `Cmd/Ctrl + E` |
| Undo | `Cmd/Ctrl + Z` |
| Redo | `Cmd/Ctrl + Shift + Z` |
| Open slash menu | `/` at start of line |
## Managing steps
Steps are listed in the left sidebar of the editor. Each step has its own content area.
Click **+ Add Step** at the bottom of the step list or press the add button in the sidebar.
Drag a step up or down in the sidebar to change its position in the lab sequence.
Click the step title in the sidebar or at the top of the editor area and type a new name.
Hover over a step in the sidebar, click the **···** menu, and select **Delete**.
Deleting a step permanently removes all content inside it. There is no recovery option once the step is deleted. Prefer [comments](/docs/labs/collaboration) to flag steps for removal during active co-authoring sessions.
## Auto-save
The editor saves your work automatically as you type. You do not need to press a save button. A **Saved** indicator in the toolbar confirms your latest changes have been committed. If you lose your connection temporarily, the editor queues changes locally and syncs them when connectivity is restored.
## Related
Structure, visibility, and best practices for interactive labs.
Choose visibility and share via link, embed, or social.
Rewrite dense technical prose into clearer learner instructions.
Co-author in real time with comments and revision history.
---
## Publish and share
URL: https://stepwik.com/docs/labs/publish-and-share
Control who sees your labs with Public, Unlisted, Private, and Draft, then share via link, embed, or social.
When your lab is ready, publishing it takes a single click, but choosing the right visibility setting shapes who can find and access your content.
## Publish your lab
Open your lab in Stepwik Studio, then click **Publish** in the top-right corner. Stepwik saves a snapshot of your content and makes it accessible based on your chosen visibility setting.
You can edit and republish a lab at any time. Republishing updates the live version immediately.
## Visibility options
| Visibility | Who can access | Plan |
| --- | --- | --- |
| **Public** | Anyone with the link; indexed and may appear in search | Free and above |
| **Unlisted** | Anyone with the direct link; not indexed | Pro and above |
| **Private** | Only you and collaborators | Pro and above |
| **Internal** | Visible inside your organization workspace | Organization |
| **Course only** | Only when assigned inside a course | Pro and above |
| **Draft** | Only you and co-authors in Studio (not published) | Free and above |
Unlisted, Private, Internal, and Course only require a paid plan (Pro or Organization as applicable). Free plan labs must be **Public** when published. Keep work as a draft until you're ready to go live.
In some organization workspaces, editors must **Request review** before publish. Moderators approve from Labs **Pending review**. See [Lab submissions](/docs/teams-and-portals/lab-submissions).
## Share your lab
Once published, you have three ways to distribute your content.
### Direct link
Copy the lab URL from your browser or from Studio → **Share**. Send it via email, Slack, or anywhere else your audience is.
### Embed on your website
Stepwik generates an embed snippet for every published lab:
In Studio, click **Share** next to your published lab.
Select the **Embed** tab and copy the iframe snippet.
Paste the snippet into any HTML page, CMS, or documentation platform that supports iframes.
### Share on social
Click **Share → Social** to get pre-formatted links for X (Twitter), LinkedIn, and other platforms. Stepwik auto-generates an Open Graph image so your lab previews well in social feeds.
## SEO for public labs
Public labs get automatic SEO handling: no configuration required. Stepwik generates:
- A title tag from your lab title
- A meta description from your lab description
- Open Graph tags for social sharing previews
- A canonical URL to prevent duplicate content
Write a clear, descriptive title and a one- to two-sentence description in your lab settings. These become your SEO title and meta description.
## Change visibility after publishing
Navigate to your lab in Stepwik Studio.
Click the Settings icon or go to **Publish → Visibility**.
Choose Public, Unlisted, or Private and confirm. The change takes effect immediately.
## Unpublish a lab
To take a lab offline, go to Studio → **Publish → Unpublish**. The content is preserved in Studio and can be republished at any time. Anyone who visits the old URL will see a "not found" page.
Unpublishing immediately removes public access. If you've shared the link widely, let your audience know before unpublishing.
## Branded sharing
Share links use your workspace subdomain (`*.stepwik.com`). Configure the hub under [Domain and SEO](/docs/teams-and-portals/domain-and-seo). Custom domains are marked Coming soon in Studio. See [Branding](/docs/teams-and-portals/branding).
## Related
Structure, visibility options, and lab lifecycle basics.
Invite co-authors before you share widely.
Track views, funnels, and learner progress after publish.
Request review and moderate publish in organization workspaces.
Profile, plan, and workspace settings that affect sharing.
---
## Collaboration
URL: https://stepwik.com/docs/labs/collaboration
Invite co-authors to edit labs in real time, track changes, leave comments, and ship better content as a team.
Stepwik's real-time co-authoring lets multiple people edit a lab at the same time. Changes appear live, without conflicts or version mismatches. Whether you're a DevRel engineer keeping docs in sync with a product release or a technical writer refining a tutorial with an engineer, collaborative editing removes the back-and-forth of shared documents.
## Supported content types
- **Paragraphs**: standard text with bold, italic, inline code, and link formatting
- **Headings**: H1, H2, and H3 to organize longer steps
- **Code blocks**: multi-line code with language selection for syntax highlighting
- **Images**: upload directly or paste a URL
- **Videos**: embed YouTube, Loom, or any iframe-compatible video source
- **Embeds**: CodePen, GitHub Gists, and other embed-friendly resources
## Using slash commands
Type `/` anywhere in the editor to open the command palette. Select a block type to insert it at the cursor position.
| Command | What it inserts |
| --- | --- |
| `/code` | Code block with language picker |
| `/h1`, `/h2`, `/h3` | Heading blocks |
| `/image` | Image upload or URL input |
| `/video` | Video embed |
| `/divider` | Horizontal rule to separate content visually |
Slash commands are the fastest way to insert a code block mid-sentence without reaching for the toolbar.
## Markdown support
You can paste Markdown directly into any step and it renders automatically. Headings, bold, italic, inline code, fenced code blocks, and lists all convert on paste. This makes it easy to move content from a README, blog post, or existing doc into Stepwik without reformatting by hand.
You can paste content like headings, lists, bold/italic, inline code, and fenced code blocks (for example a `bash` install command followed by `npm start`). Paste into any step and the editor converts it to formatted blocks instantly.
Markdown copy-paste is especially useful for teams migrating existing tutorials into Stepwik. Bring in a full README and have a structured lab in minutes.
## AI Rephrase
Select any text in the editor and choose **AI Rephrase** from the context menu (or the toolbar). The AI rewrites the selected content for clarity and readability, useful for simplifying jargon or making instructions easier to follow.
AI Rephrase is available on **all plans**, including the free tier. For fuller rewrites, see [AI Rewrite](/docs/ai-and-capture/ai-rewrite).
## Keyboard shortcuts
| Action | Shortcut |
| --- | --- |
| Bold | `Cmd/Ctrl + B` |
| Italic | `Cmd/Ctrl + I` |
| Inline code | `Cmd/Ctrl + E` |
| Undo | `Cmd/Ctrl + Z` |
| Redo | `Cmd/Ctrl + Shift + Z` |
| Open slash menu | `/` at start of line |
## Managing steps
Steps are listed in the left sidebar of the editor. Each step has its own content area.
Click **+ Add Step** at the bottom of the step list or press the add button in the sidebar.
Drag a step up or down in the sidebar to change its position in the lab sequence.
Click the step title in the sidebar or at the top of the editor area and type a new name.
Hover over a step in the sidebar, click the **···** menu, and select **Delete**.
Deleting a step permanently removes all content inside it. There is no recovery option once the step is deleted. Prefer [comments](/docs/labs/collaboration) to flag steps for removal during active co-authoring sessions.
## Auto-save
The editor saves your work automatically as you type. You do not need to press a save button. A **Saved** indicator in the toolbar confirms your latest changes have been committed. If you lose your connection temporarily, the editor queues changes locally and syncs them when connectivity is restored.
## Related
Structure, visibility, and best practices for interactive labs.
Choose visibility and share via link, embed, or social.
Rewrite dense technical prose into clearer learner instructions.
Co-author in real time with comments and revision history.
---
## Publish and share
URL: https://stepwik.com/docs/labs/publish-and-share
Control who sees your labs with Public, Unlisted, Private, and Draft, then share via link, embed, or social.
When your lab is ready, publishing it takes a single click, but choosing the right visibility setting shapes who can find and access your content.
## Publish your lab
Open your lab in Stepwik Studio, then click **Publish** in the top-right corner. Stepwik saves a snapshot of your content and makes it accessible based on your chosen visibility setting.
You can edit and republish a lab at any time. Republishing updates the live version immediately.
## Visibility options
| Visibility | Who can access | Plan |
| --- | --- | --- |
| **Public** | Anyone with the link; indexed and may appear in search | Free and above |
| **Unlisted** | Anyone with the direct link; not indexed | Pro and above |
| **Private** | Only you and collaborators | Pro and above |
| **Internal** | Visible inside your organization workspace | Organization |
| **Course only** | Only when assigned inside a course | Pro and above |
| **Draft** | Only you and co-authors in Studio (not published) | Free and above |
Unlisted, Private, Internal, and Course only require a paid plan (Pro or Organization as applicable). Free plan labs must be **Public** when published. Keep work as a draft until you're ready to go live.
In some organization workspaces, editors must **Request review** before publish. Moderators approve from Labs **Pending review**. See [Lab submissions](/docs/teams-and-portals/lab-submissions).
## Share your lab
Once published, you have three ways to distribute your content.
### Direct link
Copy the lab URL from your browser or from Studio → **Share**. Send it via email, Slack, or anywhere else your audience is.
### Embed on your website
Stepwik generates an embed snippet for every published lab:
In Studio, click **Share** next to your published lab.
Select the **Embed** tab and copy the iframe snippet.
Paste the snippet into any HTML page, CMS, or documentation platform that supports iframes.
### Share on social
Click **Share → Social** to get pre-formatted links for X (Twitter), LinkedIn, and other platforms. Stepwik auto-generates an Open Graph image so your lab previews well in social feeds.
## SEO for public labs
Public labs get automatic SEO handling: no configuration required. Stepwik generates:
- A title tag from your lab title
- A meta description from your lab description
- Open Graph tags for social sharing previews
- A canonical URL to prevent duplicate content
Write a clear, descriptive title and a one- to two-sentence description in your lab settings. These become your SEO title and meta description.
## Change visibility after publishing
Navigate to your lab in Stepwik Studio.
Click the Settings icon or go to **Publish → Visibility**.
Choose Public, Unlisted, or Private and confirm. The change takes effect immediately.
## Unpublish a lab
To take a lab offline, go to Studio → **Publish → Unpublish**. The content is preserved in Studio and can be republished at any time. Anyone who visits the old URL will see a "not found" page.
Unpublishing immediately removes public access. If you've shared the link widely, let your audience know before unpublishing.
## Branded sharing
Share links use your workspace subdomain (`*.stepwik.com`). Configure the hub under [Domain and SEO](/docs/teams-and-portals/domain-and-seo). Custom domains are marked Coming soon in Studio. See [Branding](/docs/teams-and-portals/branding).
## Related
Structure, visibility options, and lab lifecycle basics.
Invite co-authors before you share widely.
Track views, funnels, and learner progress after publish.
Request review and moderate publish in organization workspaces.
Profile, plan, and workspace settings that affect sharing.
---
## Collaboration
URL: https://stepwik.com/docs/labs/collaboration
Invite co-authors to edit labs in real time, track changes, leave comments, and ship better content as a team.
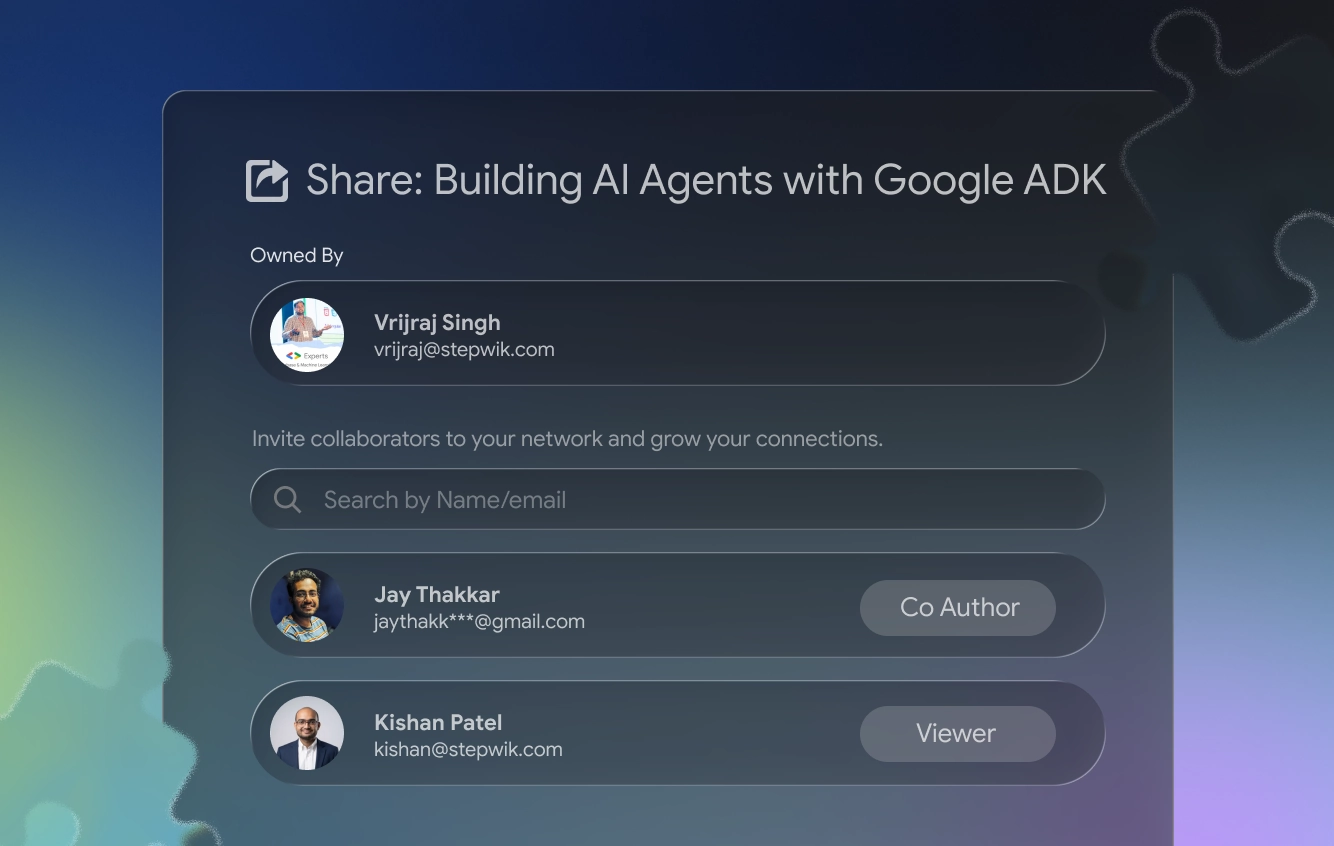
Stepwik's real-time co-authoring lets multiple people edit a lab at the same time. Changes appear live, without conflicts or version mismatches. Whether you're a DevRel engineer keeping docs in sync with a product release or a technical writer refining a tutorial with an engineer, collaborative editing removes the back-and-forth of shared documents.
 ## How real-time co-authoring works
When two or more co-authors have a lab open in Studio, their cursors and edits appear in real time. You see who is editing which step, and changes sync automatically. There's no need to manually save or merge work.
Real-time presence requires all co-authors to be logged into Stepwik and have the lab open in Studio. Edits made offline sync when the connection is restored.
## Invite a co-author
Navigate to your lab and open it in Stepwik Studio.
In the top toolbar, click **Share**, then select **Add co-author**.
Enter their email address and send the invitation. They'll receive an email with a link to access the lab.
Once they accept and open the lab, you'll both see each other's cursors and edits in real time.
Co-author limits apply **per lab**:
| Plan | Max co-authors per lab |
| --- | --- |
| Free | 2 |
| Pro | 5 |
| Organization | Custom: contact us |
## Track changes (version history)
Each lab **section** has Document versions:
In the section toolbar, click **History**.
Save a named version, or open a previous version to compare (green = added, red = removed).
Restore a version into the current section editor. Other sections are unchanged.
Full details: [Version history](/docs/labs/version-history).
## Comments and discussions
Leave inline comments on any step to flag issues, ask questions, or suggest improvements without changing the content itself.
- **Add a comment**: Select text or click the comment icon next to a step, then type your note.
- **Reply to a comment**: Comments support threaded replies so discussions stay in context.
- **Resolve a comment**: Mark a thread as resolved once the feedback has been addressed. Resolved comments are archived but not deleted.
Use comments to assign ownership during reviews: for example, "Sarah: please verify the command in step 3", instead of managing feedback in a separate document.
## Who benefits from real-time collaboration
Keep developer documentation up to date as code changes. Engineers update technical steps while technical writers polish language at the same time.
Co-author tutorials that combine developer accuracy with polished, learner-friendly writing.
Build onboarding courses together across HR, engineering, and product, then publish to a private hub for new hires.
Multiple contributors can improve public labs without forking or merging separate copies.
## Tips for effective collaboration
- **Assign sections before you start.** Decide upfront who owns which steps to reduce overlap and conflicts.
- **Use comments for questions.** If you're unsure about a step, comment on it rather than editing speculatively.
- **Review before publishing.** Have at least one co-author do a final read-through in preview mode before you click Publish.
- **Check history after a session.** A quick scan of recent revisions helps everyone stay aligned on what changed.
Deleting a step is immediate and affects all co-authors viewing the lab. Use comments to flag steps for removal rather than deleting them during an active editing session.
## Related
Save, compare, and restore per-section Document versions.
Messages from learners on published labs (not co-author comments).
Rich text editing, slash commands, and step management.
Set visibility and share once the team is ready.
Shared workspaces, roles, and team content ownership.
Plans and co-author limits for your workspace.
---
## Lab settings
URL: https://stepwik.com/docs/labs/lab-settings
Configure title, slug, category, level, descriptions, tags, and cover image from the Studio lab Settings dialog.
Every lab has metadata that appears on the cover page, in search, and in social previews. Edit it from **Settings** in the lab editor toolbar.
## Open Settings
Go to **Labs**, then open the lab in the editor.
Click **Settings** in the top toolbar (gear icon).
Update fields and click **Save**. Changes apply immediately to the draft; published labs update after you republish if your workflow requires it.
## Fields
| Field | Purpose |
| --- | --- |
| **Title** | Action-oriented headline (required) |
| **Slug** | URL segment for `/labs/{slug}`, usually derived from the title |
| **Category** | Browse category (for example Technology) |
| **Level** | Beginner, Intermediate, or Advanced |
| **Short description** | One-line summary for cards and SEO |
| **Long description** | Richer overview on the lab cover |
| **Tags** | At least one catalog tag for discovery |
| **Cover image** | Card and cover artwork |
Short description and title feed Open Graph / SEO for public labs. Keep them clear and specific.
## Tips
- Prefer titles like “Deploy a Node.js app to Fly.io” over vague names
- Pick a level that matches prerequisites in step 1
- Use tags learners would search for (language, cloud, framework)
- Upload a cover that works at card size (readable at ~320px wide)
## Related
Visibility, embeds, and social sharing after settings are set.
Author steps and content inside the lab.
Structure, lifecycle, and the Labs list in Studio.
---
## Version history
URL: https://stepwik.com/docs/labs/version-history
Save, compare, and restore section versions with Document versions (History) in the lab editor.
Stepwik keeps **per-section** version history while you edit a lab. Use it to snapshot a step, compare against the current draft, and restore an earlier state without undoing the whole lab.
## Open Document versions
In Studio, open the lab editor and select the step (section) you want to version.
In the section toolbar, click **History** (Document versions).
Save a named version, compare it to the current content, restore, or delete.
## What you can do
| Action | What it does |
| --- | --- |
| **Save version** | Store the current section content under a name you choose |
| **Auto-save snapshots** | Occasional automatic snapshots may appear while you work |
| **Compare** | Side-by-side (or unified) diff: green = added, red = removed |
| **Restore** | Replace the live section editor content with that version |
| **Delete** | Remove a saved version from the list |
Restore updates the **current section** in the editor. Other sections are unchanged. Save or rely on autosave before restoring if you want to keep today’s draft as a named version first.
## When to use it
- Before a large rewrite of a step
- After co-authoring, to roll back one step without touching the rest
- When reviewing what changed since yesterday’s draft
For inviting co-authors and live editing, see [Collaboration](/docs/labs/collaboration).
## Related
Co-authors, live presence, and comments.
Step management and rich text editing.
Publish after you are happy with the restored content.
---
## Reader feedback
URL: https://stepwik.com/docs/labs/reader-feedback
How learners send feedback on a published lab, and how authors review, resolve, or dismiss it in Studio.
**Reader feedback** lets signed-in learners send notes on a published lab. Authors triage messages in the Studio lab editor. This is separate from [co-author comments](/docs/labs/collaboration) and from [lab submission](/docs/teams-and-portals/lab-submissions) review notes.
## Learner: send feedback
Available on the published lab reader (Explore, portal, or subdomain), not on marketing docs pages.
You must be **signed in**. Guests do not see the Feedback control.
Open any section of a published lab while logged in.
On desktop, use the right social rail (**Feedback**). The control is also available in fullscreen mode.
In **Send feedback**, describe what worked, what was unclear, or what could be better (10-2000 characters). The dialog shows the lab title and current section.
Click **Send feedback**. The author receives an email with your message. You see a confirmation toast.
Feedback is sent with the current section index/title and page URL so authors know where you were reading.
## Author: review feedback in Studio
Path: Studio → open the lab in **Edit** → meta sidebar → **Reader feedback** → **Feedback**
Studio **view** (preview) mode does not include the Reader feedback panel. Use **edit**.
The sidebar summary shows counts such as **N new · M total**, **All caught up**, or **No feedback yet**.
### Statuses
| Status | Meaning |
| --- | --- |
| **New** | Not yet reviewed |
| **Reviewed** | Seen, still open |
| **Resolved** | Handled: reader is emailed |
| **Dismissed** | Declined: reader is emailed |
### Triage steps
In the lab editor meta sidebar, open **Reader feedback** → **Feedback**.
Filter by status (All / New / Reviewed / Resolved / Dismissed) or search by message, reporter, or section.
Expand a row for the full note. Optionally open **View reader page** to see the section context.
While status is **New** or **Reviewed**:
- **Review**: mark as reviewed
- **Resolve**: confirm *Resolve feedback?* (emails the reader)
- **Dismiss**: confirm *Reject feedback?* (emails the reader that it was declined)
Close the dialog when finished.
Resolve when you fixed the issue or answered the learner. Dismiss when the note is spam, off-topic, or not actionable.
## What this is not
| Feature | Difference |
| --- | --- |
| [Collaboration comments](/docs/labs/collaboration) | Inline notes between co-authors while editing |
| [Lab submissions](/docs/teams-and-portals/lab-submissions) | Org moderators approving personal→org publishes |
| [Analytics](/docs/analytics/overview) | Aggregate views and funnels, not individual messages |
## Related
Publish so learners can open the lab and send feedback.
How learners open steps, mark progress, and finish a lab.
Co-author comments and live editing.
Title and descriptions learners see on the cover.
Funnel and progress metrics alongside qualitative feedback.
---
# AI and Capture
Generate labs from URLs and prompts, rewrite content, and capture pages with the Chrome extension.
## Overview
URL: https://stepwik.com/docs/ai-and-capture/overview
Generate labs from GitHub, PDFs, and Google Slides; rewrite in the editor; capture pages and stepflows.
Stepwik’s AI and capture tools shorten the path from source material to a publishable lab. Use Studio generation for repos and decks, rewrite tools inside the editor, the Chrome extension for live pages, and Stepflows for screenshot walkthroughs.
## Features
Draft a lab from GitHub, PDF Slides, or Google Slides (Pro+).
Rewrite or rephrase selected editor text on all plans.
Capture a web page into a lab from Chrome (Pro+).
Build guided screenshot walkthroughs (feature-flagged in Studio).
## Recommended flow
Start from the best source you have: repo, deck, page, or screenshots.
Organize steps in the [editor](/docs/labs/editor).
Use Rewrite on dense paragraphs where clarity matters most.
Preview, then [publish](/docs/labs/publish-and-share).
Always verify commands, versions, and screenshots before learners see the lab.
## Related
Turn GitHub, PDF, or Google Slides into a structured draft.
Clarify technical prose without leaving the editor.
Capture live web pages into labs from Chrome.
Build annotated UI walkthroughs from screenshots.
Open Generate with AI and manage drafts in your workspace.
---
## Generate labs
URL: https://stepwik.com/docs/ai-and-capture/generate-labs
Turn a GitHub repository, PDF deck, or Google Slides presentation into a structured Stepwik lab with AI.
## How real-time co-authoring works
When two or more co-authors have a lab open in Studio, their cursors and edits appear in real time. You see who is editing which step, and changes sync automatically. There's no need to manually save or merge work.
Real-time presence requires all co-authors to be logged into Stepwik and have the lab open in Studio. Edits made offline sync when the connection is restored.
## Invite a co-author
Navigate to your lab and open it in Stepwik Studio.
In the top toolbar, click **Share**, then select **Add co-author**.
Enter their email address and send the invitation. They'll receive an email with a link to access the lab.
Once they accept and open the lab, you'll both see each other's cursors and edits in real time.
Co-author limits apply **per lab**:
| Plan | Max co-authors per lab |
| --- | --- |
| Free | 2 |
| Pro | 5 |
| Organization | Custom: contact us |
## Track changes (version history)
Each lab **section** has Document versions:
In the section toolbar, click **History**.
Save a named version, or open a previous version to compare (green = added, red = removed).
Restore a version into the current section editor. Other sections are unchanged.
Full details: [Version history](/docs/labs/version-history).
## Comments and discussions
Leave inline comments on any step to flag issues, ask questions, or suggest improvements without changing the content itself.
- **Add a comment**: Select text or click the comment icon next to a step, then type your note.
- **Reply to a comment**: Comments support threaded replies so discussions stay in context.
- **Resolve a comment**: Mark a thread as resolved once the feedback has been addressed. Resolved comments are archived but not deleted.
Use comments to assign ownership during reviews: for example, "Sarah: please verify the command in step 3", instead of managing feedback in a separate document.
## Who benefits from real-time collaboration
Keep developer documentation up to date as code changes. Engineers update technical steps while technical writers polish language at the same time.
Co-author tutorials that combine developer accuracy with polished, learner-friendly writing.
Build onboarding courses together across HR, engineering, and product, then publish to a private hub for new hires.
Multiple contributors can improve public labs without forking or merging separate copies.
## Tips for effective collaboration
- **Assign sections before you start.** Decide upfront who owns which steps to reduce overlap and conflicts.
- **Use comments for questions.** If you're unsure about a step, comment on it rather than editing speculatively.
- **Review before publishing.** Have at least one co-author do a final read-through in preview mode before you click Publish.
- **Check history after a session.** A quick scan of recent revisions helps everyone stay aligned on what changed.
Deleting a step is immediate and affects all co-authors viewing the lab. Use comments to flag steps for removal rather than deleting them during an active editing session.
## Related
Save, compare, and restore per-section Document versions.
Messages from learners on published labs (not co-author comments).
Rich text editing, slash commands, and step management.
Set visibility and share once the team is ready.
Shared workspaces, roles, and team content ownership.
Plans and co-author limits for your workspace.
---
## Lab settings
URL: https://stepwik.com/docs/labs/lab-settings
Configure title, slug, category, level, descriptions, tags, and cover image from the Studio lab Settings dialog.
Every lab has metadata that appears on the cover page, in search, and in social previews. Edit it from **Settings** in the lab editor toolbar.
## Open Settings
Go to **Labs**, then open the lab in the editor.
Click **Settings** in the top toolbar (gear icon).
Update fields and click **Save**. Changes apply immediately to the draft; published labs update after you republish if your workflow requires it.
## Fields
| Field | Purpose |
| --- | --- |
| **Title** | Action-oriented headline (required) |
| **Slug** | URL segment for `/labs/{slug}`, usually derived from the title |
| **Category** | Browse category (for example Technology) |
| **Level** | Beginner, Intermediate, or Advanced |
| **Short description** | One-line summary for cards and SEO |
| **Long description** | Richer overview on the lab cover |
| **Tags** | At least one catalog tag for discovery |
| **Cover image** | Card and cover artwork |
Short description and title feed Open Graph / SEO for public labs. Keep them clear and specific.
## Tips
- Prefer titles like “Deploy a Node.js app to Fly.io” over vague names
- Pick a level that matches prerequisites in step 1
- Use tags learners would search for (language, cloud, framework)
- Upload a cover that works at card size (readable at ~320px wide)
## Related
Visibility, embeds, and social sharing after settings are set.
Author steps and content inside the lab.
Structure, lifecycle, and the Labs list in Studio.
---
## Version history
URL: https://stepwik.com/docs/labs/version-history
Save, compare, and restore section versions with Document versions (History) in the lab editor.
Stepwik keeps **per-section** version history while you edit a lab. Use it to snapshot a step, compare against the current draft, and restore an earlier state without undoing the whole lab.
## Open Document versions
In Studio, open the lab editor and select the step (section) you want to version.
In the section toolbar, click **History** (Document versions).
Save a named version, compare it to the current content, restore, or delete.
## What you can do
| Action | What it does |
| --- | --- |
| **Save version** | Store the current section content under a name you choose |
| **Auto-save snapshots** | Occasional automatic snapshots may appear while you work |
| **Compare** | Side-by-side (or unified) diff: green = added, red = removed |
| **Restore** | Replace the live section editor content with that version |
| **Delete** | Remove a saved version from the list |
Restore updates the **current section** in the editor. Other sections are unchanged. Save or rely on autosave before restoring if you want to keep today’s draft as a named version first.
## When to use it
- Before a large rewrite of a step
- After co-authoring, to roll back one step without touching the rest
- When reviewing what changed since yesterday’s draft
For inviting co-authors and live editing, see [Collaboration](/docs/labs/collaboration).
## Related
Co-authors, live presence, and comments.
Step management and rich text editing.
Publish after you are happy with the restored content.
---
## Reader feedback
URL: https://stepwik.com/docs/labs/reader-feedback
How learners send feedback on a published lab, and how authors review, resolve, or dismiss it in Studio.
**Reader feedback** lets signed-in learners send notes on a published lab. Authors triage messages in the Studio lab editor. This is separate from [co-author comments](/docs/labs/collaboration) and from [lab submission](/docs/teams-and-portals/lab-submissions) review notes.
## Learner: send feedback
Available on the published lab reader (Explore, portal, or subdomain), not on marketing docs pages.
You must be **signed in**. Guests do not see the Feedback control.
Open any section of a published lab while logged in.
On desktop, use the right social rail (**Feedback**). The control is also available in fullscreen mode.
In **Send feedback**, describe what worked, what was unclear, or what could be better (10-2000 characters). The dialog shows the lab title and current section.
Click **Send feedback**. The author receives an email with your message. You see a confirmation toast.
Feedback is sent with the current section index/title and page URL so authors know where you were reading.
## Author: review feedback in Studio
Path: Studio → open the lab in **Edit** → meta sidebar → **Reader feedback** → **Feedback**
Studio **view** (preview) mode does not include the Reader feedback panel. Use **edit**.
The sidebar summary shows counts such as **N new · M total**, **All caught up**, or **No feedback yet**.
### Statuses
| Status | Meaning |
| --- | --- |
| **New** | Not yet reviewed |
| **Reviewed** | Seen, still open |
| **Resolved** | Handled: reader is emailed |
| **Dismissed** | Declined: reader is emailed |
### Triage steps
In the lab editor meta sidebar, open **Reader feedback** → **Feedback**.
Filter by status (All / New / Reviewed / Resolved / Dismissed) or search by message, reporter, or section.
Expand a row for the full note. Optionally open **View reader page** to see the section context.
While status is **New** or **Reviewed**:
- **Review**: mark as reviewed
- **Resolve**: confirm *Resolve feedback?* (emails the reader)
- **Dismiss**: confirm *Reject feedback?* (emails the reader that it was declined)
Close the dialog when finished.
Resolve when you fixed the issue or answered the learner. Dismiss when the note is spam, off-topic, or not actionable.
## What this is not
| Feature | Difference |
| --- | --- |
| [Collaboration comments](/docs/labs/collaboration) | Inline notes between co-authors while editing |
| [Lab submissions](/docs/teams-and-portals/lab-submissions) | Org moderators approving personal→org publishes |
| [Analytics](/docs/analytics/overview) | Aggregate views and funnels, not individual messages |
## Related
Publish so learners can open the lab and send feedback.
How learners open steps, mark progress, and finish a lab.
Co-author comments and live editing.
Title and descriptions learners see on the cover.
Funnel and progress metrics alongside qualitative feedback.
---
# AI and Capture
Generate labs from URLs and prompts, rewrite content, and capture pages with the Chrome extension.
## Overview
URL: https://stepwik.com/docs/ai-and-capture/overview
Generate labs from GitHub, PDFs, and Google Slides; rewrite in the editor; capture pages and stepflows.
Stepwik’s AI and capture tools shorten the path from source material to a publishable lab. Use Studio generation for repos and decks, rewrite tools inside the editor, the Chrome extension for live pages, and Stepflows for screenshot walkthroughs.
## Features
Draft a lab from GitHub, PDF Slides, or Google Slides (Pro+).
Rewrite or rephrase selected editor text on all plans.
Capture a web page into a lab from Chrome (Pro+).
Build guided screenshot walkthroughs (feature-flagged in Studio).
## Recommended flow
Start from the best source you have: repo, deck, page, or screenshots.
Organize steps in the [editor](/docs/labs/editor).
Use Rewrite on dense paragraphs where clarity matters most.
Preview, then [publish](/docs/labs/publish-and-share).
Always verify commands, versions, and screenshots before learners see the lab.
## Related
Turn GitHub, PDF, or Google Slides into a structured draft.
Clarify technical prose without leaving the editor.
Capture live web pages into labs from Chrome.
Build annotated UI walkthroughs from screenshots.
Open Generate with AI and manage drafts in your workspace.
---
## Generate labs
URL: https://stepwik.com/docs/ai-and-capture/generate-labs
Turn a GitHub repository, PDF deck, or Google Slides presentation into a structured Stepwik lab with AI.
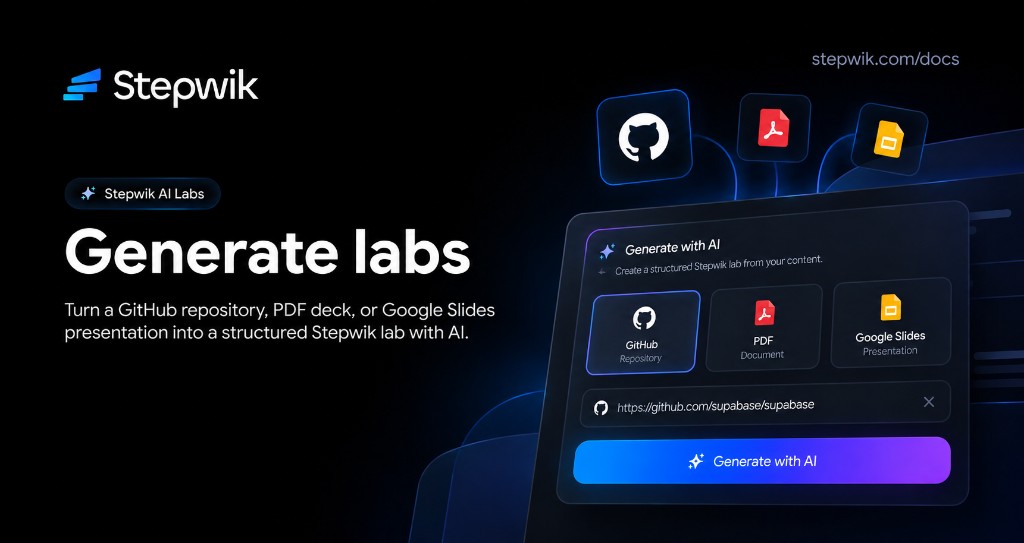 **Generate with AI** creates a full lab draft from one of three Studio sources: a **GitHub** repository, a **PDF** deck, or a **Google Slides** presentation. The result is a private draft you review in the editor before publishing.
Available on **Pro** and above. Freemium users can still write labs manually and use [AI Rewrite](/docs/ai-and-capture/ai-rewrite).
## Open Generate with AI
In Studio, click **Generate with AI** in the header (or go to **Labs → Generate**).
Pick a source tab: **GitHub**, **PDF Slides**, or **Google Slides**.
Provide the source, start generation, then open the draft when it finishes.
You can also deep-link with query params such as `?source=repo`, `?source=pdf`, or `?source=slides`.
## Sources
| Source | What you provide | Notes |
| --- | --- | --- |
|  **GitHub** | Repository URL | Connect GitHub under [Integrations](/docs/developers/github) to use private repos |
| **PDF Slides** | Upload a PDF file | Best for slide decks and structured presentations |
|  **Google Slides** | Pick a presentation | Connect Google Slides under [Integrations](/docs/developers/google-slides) |
## After generation
Open the draft in the [lab editor](/docs/labs/editor).
Fix step titles, code accuracy, and missing prerequisites.
Preview on desktop and mobile.
[Publish](/docs/labs/publish-and-share) when ready.
Generated labs are **drafts**. Publishing and visibility always stay under your control in Studio.
## Tips
- Prefer well-structured READMEs, docs folders, and decks with clear section headings.
- For private GitHub repos, connect the account first on **Developer → Integrations**.
- If the outline looks wrong, try another source or regenerate, then refine in the editor.
- Use the [Chrome Extension](/docs/ai-and-capture/chrome-extension) when you want to capture a live web page instead of a repo or deck.
## Related
All generation, rewrite, capture, and stepflow tools at a glance.
Connect GitHub to generate from private repositories.
Connect Google Slides to generate from presentations.
Capture a live web page into a lab from Chrome.
Polish generated drafts for clarity before publishing.
Draft private labs from AI clients connected to Stepwik.
---
## AI Rewrite
URL: https://stepwik.com/docs/ai-and-capture/ai-rewrite
Use Smart AI Rewrite and AI Rephrase to turn dense technical prose into clear, learner-friendly instructions, available on all plans.
Smart AI Rewrite and AI Rephrase help you polish lab content without leaving the editor. Both are available on **all plans**, including Freemium.
**Generate with AI** creates a full lab draft from one of three Studio sources: a **GitHub** repository, a **PDF** deck, or a **Google Slides** presentation. The result is a private draft you review in the editor before publishing.
Available on **Pro** and above. Freemium users can still write labs manually and use [AI Rewrite](/docs/ai-and-capture/ai-rewrite).
## Open Generate with AI
In Studio, click **Generate with AI** in the header (or go to **Labs → Generate**).
Pick a source tab: **GitHub**, **PDF Slides**, or **Google Slides**.
Provide the source, start generation, then open the draft when it finishes.
You can also deep-link with query params such as `?source=repo`, `?source=pdf`, or `?source=slides`.
## Sources
| Source | What you provide | Notes |
| --- | --- | --- |
|  **GitHub** | Repository URL | Connect GitHub under [Integrations](/docs/developers/github) to use private repos |
| **PDF Slides** | Upload a PDF file | Best for slide decks and structured presentations |
|  **Google Slides** | Pick a presentation | Connect Google Slides under [Integrations](/docs/developers/google-slides) |
## After generation
Open the draft in the [lab editor](/docs/labs/editor).
Fix step titles, code accuracy, and missing prerequisites.
Preview on desktop and mobile.
[Publish](/docs/labs/publish-and-share) when ready.
Generated labs are **drafts**. Publishing and visibility always stay under your control in Studio.
## Tips
- Prefer well-structured READMEs, docs folders, and decks with clear section headings.
- For private GitHub repos, connect the account first on **Developer → Integrations**.
- If the outline looks wrong, try another source or regenerate, then refine in the editor.
- Use the [Chrome Extension](/docs/ai-and-capture/chrome-extension) when you want to capture a live web page instead of a repo or deck.
## Related
All generation, rewrite, capture, and stepflow tools at a glance.
Connect GitHub to generate from private repositories.
Connect Google Slides to generate from presentations.
Capture a live web page into a lab from Chrome.
Polish generated drafts for clarity before publishing.
Draft private labs from AI clients connected to Stepwik.
---
## AI Rewrite
URL: https://stepwik.com/docs/ai-and-capture/ai-rewrite
Use Smart AI Rewrite and AI Rephrase to turn dense technical prose into clear, learner-friendly instructions, available on all plans.
Smart AI Rewrite and AI Rephrase help you polish lab content without leaving the editor. Both are available on **all plans**, including Freemium.
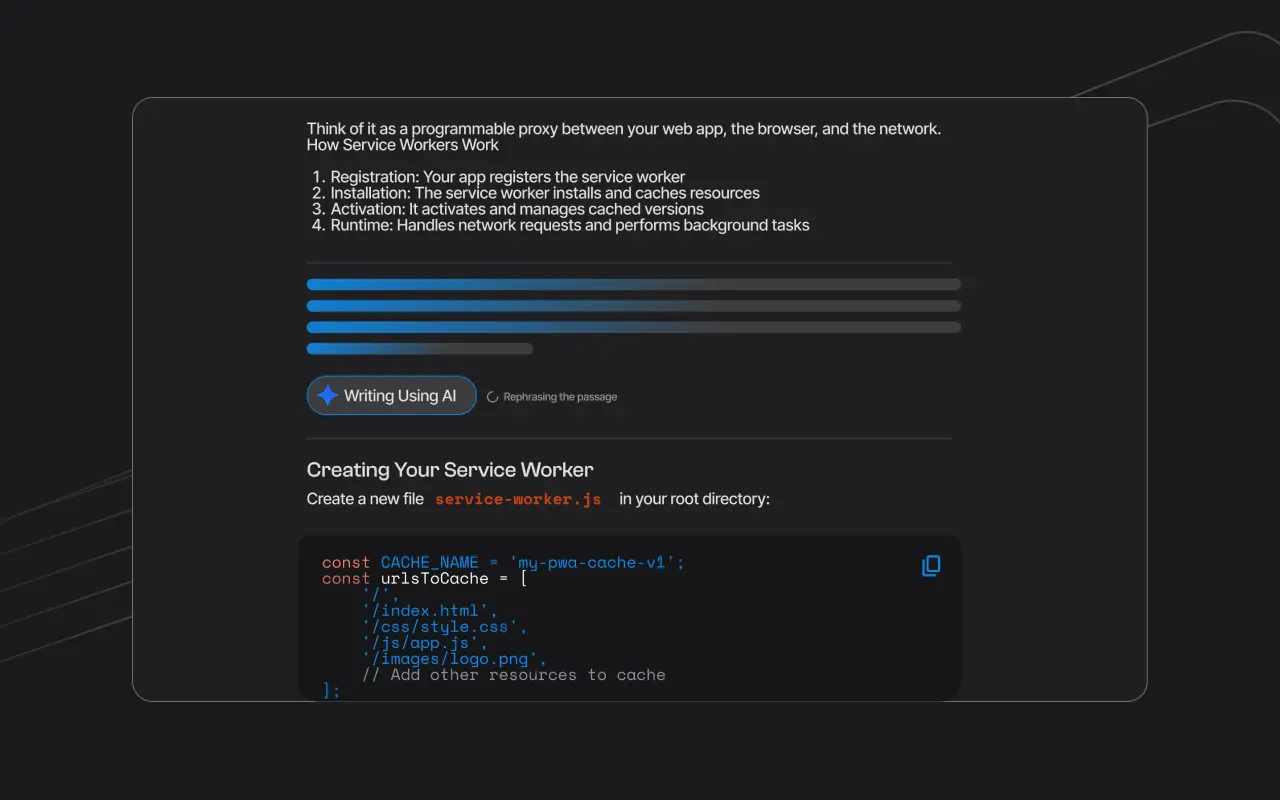 ## Smart AI Rewrite
Smart AI Rewrite helps you turn dense technical jargon into clear, learner-friendly instructions. Select any text in the editor, right-click or open the context menu, and choose **AI Rewrite**. The AI returns a revised version that preserves the meaning while improving readability.
Use Smart AI Rewrite when:
- You've pasted content from a highly technical source and it reads like a spec sheet
- You want to simplify instructions for a less experienced audience
- A step is too long and you want a tighter version
## AI Rephrase
AI Rephrase is a lighter version of Smart Rewrite: a quick one-click tool available directly in the editor toolbar. Select a sentence or paragraph and click **Rephrase** to get an alternative phrasing. Useful for varying sentence structure or removing filler language without a full rewrite.
See also slash commands and shortcuts in the [editor](/docs/labs/editor).
## Workflow tips
Paste or draft the step content first: don't rewrite empty placeholders.
Select the smallest useful span (a paragraph or instruction block) rather than an entire multi-step lab at once.
Compare the rewrite against your source of truth (repo, API docs, product UI).
Keep version numbers, package names, and command flags exact even when prose changes.
## Related
Where Rewrite and Rephrase live alongside slash commands.
Create a full draft from GitHub, PDF, or Google Slides first.
See how rewrite fits with generation and capture tools.
---
## Chrome Extension
URL: https://stepwik.com/docs/ai-and-capture/chrome-extension
Turn any technical blog, GitHub repo, or documentation page into a structured Stepwik lab in one click, directly from your browser.
## Smart AI Rewrite
Smart AI Rewrite helps you turn dense technical jargon into clear, learner-friendly instructions. Select any text in the editor, right-click or open the context menu, and choose **AI Rewrite**. The AI returns a revised version that preserves the meaning while improving readability.
Use Smart AI Rewrite when:
- You've pasted content from a highly technical source and it reads like a spec sheet
- You want to simplify instructions for a less experienced audience
- A step is too long and you want a tighter version
## AI Rephrase
AI Rephrase is a lighter version of Smart Rewrite: a quick one-click tool available directly in the editor toolbar. Select a sentence or paragraph and click **Rephrase** to get an alternative phrasing. Useful for varying sentence structure or removing filler language without a full rewrite.
See also slash commands and shortcuts in the [editor](/docs/labs/editor).
## Workflow tips
Paste or draft the step content first: don't rewrite empty placeholders.
Select the smallest useful span (a paragraph or instruction block) rather than an entire multi-step lab at once.
Compare the rewrite against your source of truth (repo, API docs, product UI).
Keep version numbers, package names, and command flags exact even when prose changes.
## Related
Where Rewrite and Rephrase live alongside slash commands.
Create a full draft from GitHub, PDF, or Google Slides first.
See how rewrite fits with generation and capture tools.
---
## Chrome Extension
URL: https://stepwik.com/docs/ai-and-capture/chrome-extension
Turn any technical blog, GitHub repo, or documentation page into a structured Stepwik lab in one click, directly from your browser.
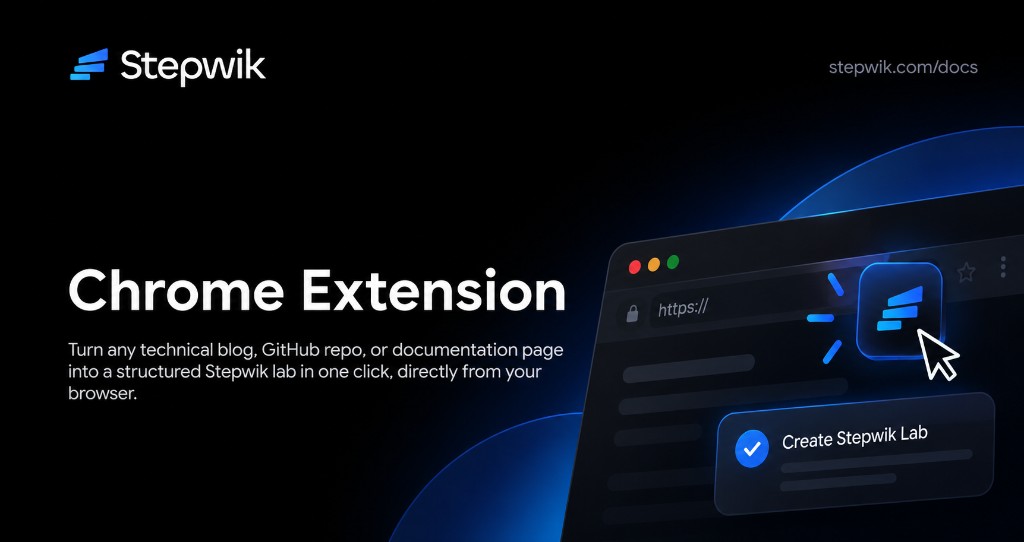 The Stepwik Chrome Extension brings the AI lab generator into your browser. When you're reading a blog post, browsing a GitHub README, or reviewing API documentation and you think "this would make a great lab", you can generate a structured, step-by-step lab without leaving the page, then open it in Stepwik Studio to edit and publish.
The Chrome Extension requires a **Pro plan or above**. If you're on Freemium, upgrade to Pro to unlock this feature.
## What the extension can generate from
The extension works with any publicly accessible web page, but produces the best results with structured technical content:
- Blog posts and tutorials: step-by-step guides, how-to articles
- GitHub READMEs: installation, usage, and configuration sections
- API documentation: endpoint references, quickstart guides
- Official documentation: framework docs, library references, product guides
## Installation
Visit [go.techferment.com/stepwik-extension](https://go.techferment.com/stepwik-extension) in Chrome.
Click **Add to Chrome** and confirm by clicking **Add extension**.
Click the extensions puzzle-piece icon in the Chrome toolbar, find Stepwik, and click the pin icon so the Stepwik button stays visible.
Click the Stepwik icon and sign in with your Stepwik account. You must be on a Pro plan or above to use the extension.
## How to use the extension
Navigate to the blog post, GitHub README, documentation page, or tutorial you want to convert.
Click the Stepwik icon in your Chrome toolbar. A popup confirms the page has been detected.
Click **Generate Lab**. The extension sends the page content to Stepwik's AI and generates a structured lab (typically a few seconds).
Review the preview: title, description, and step list: before opening it in Studio.
Click **Open in Studio** to rename steps, fix code examples, add images, and polish.
Set visibility and [publish](/docs/labs/publish-and-share) when ready.
Always review and edit AI-generated content before publishing. Verify that all commands, code examples, and version numbers are accurate for your target audience.
## Tips for the best results
- Use pages with clear structure: headings, numbered lists, and code blocks produce better labs than dense paragraphs.
- Prefer official sources: official docs and well-maintained READMEs yield more accurate code examples.
- Regenerate if needed: if the first generation doesn't capture the structure you want, try again or restructure steps in the editor.
- Add context in Studio: add a prerequisite step, a summary step, and audience context the source page may omit.
## Troubleshooting
The extension may be installed but not pinned. Click the puzzle-piece icon in the Chrome toolbar, find Stepwik, and pin it. If it isn't in the list at all, revisit [go.techferment.com/stepwik-extension](https://go.techferment.com/stepwik-extension) and reinstall.
The Chrome Extension is only available on Pro and Organization plans. Sign in and upgrade from **Account Settings → Subscription**.
The AI extracts structure from the page's HTML. Pages with minimal markup may produce less structured output. Try a different source page, or use [AI Content Generation](/docs/ai-and-capture/generate-labs) in Studio and paste the URL there.
Refresh the page and try again. If the error persists, sign out of the extension (Stepwik icon → **Sign out**), sign back in, and retry. If the issue continues, contact support.
## Related
Generate from GitHub, PDF, or Google Slides inside Studio.
Polish captured labs before you publish.
How capture fits with rewrite and generation tools.
Confirm your plan supports the Chrome Extension.
---
## Stepflows
URL: https://stepwik.com/docs/ai-and-capture/stepflows
Build guided product walkthroughs from screenshots with Stepflow AI, then publish and share.
A **stepflow** is a guided walkthrough for a product UI: useful for SOPs, onboarding, support playbooks, and feature demos. Learners follow annotated steps instead of reading a long prose tutorial.
Public stepflows live at `/stepflows/{slug}`. You manage them under Studio → **Stepflows**.
The Stepwik Chrome Extension brings the AI lab generator into your browser. When you're reading a blog post, browsing a GitHub README, or reviewing API documentation and you think "this would make a great lab", you can generate a structured, step-by-step lab without leaving the page, then open it in Stepwik Studio to edit and publish.
The Chrome Extension requires a **Pro plan or above**. If you're on Freemium, upgrade to Pro to unlock this feature.
## What the extension can generate from
The extension works with any publicly accessible web page, but produces the best results with structured technical content:
- Blog posts and tutorials: step-by-step guides, how-to articles
- GitHub READMEs: installation, usage, and configuration sections
- API documentation: endpoint references, quickstart guides
- Official documentation: framework docs, library references, product guides
## Installation
Visit [go.techferment.com/stepwik-extension](https://go.techferment.com/stepwik-extension) in Chrome.
Click **Add to Chrome** and confirm by clicking **Add extension**.
Click the extensions puzzle-piece icon in the Chrome toolbar, find Stepwik, and click the pin icon so the Stepwik button stays visible.
Click the Stepwik icon and sign in with your Stepwik account. You must be on a Pro plan or above to use the extension.
## How to use the extension
Navigate to the blog post, GitHub README, documentation page, or tutorial you want to convert.
Click the Stepwik icon in your Chrome toolbar. A popup confirms the page has been detected.
Click **Generate Lab**. The extension sends the page content to Stepwik's AI and generates a structured lab (typically a few seconds).
Review the preview: title, description, and step list: before opening it in Studio.
Click **Open in Studio** to rename steps, fix code examples, add images, and polish.
Set visibility and [publish](/docs/labs/publish-and-share) when ready.
Always review and edit AI-generated content before publishing. Verify that all commands, code examples, and version numbers are accurate for your target audience.
## Tips for the best results
- Use pages with clear structure: headings, numbered lists, and code blocks produce better labs than dense paragraphs.
- Prefer official sources: official docs and well-maintained READMEs yield more accurate code examples.
- Regenerate if needed: if the first generation doesn't capture the structure you want, try again or restructure steps in the editor.
- Add context in Studio: add a prerequisite step, a summary step, and audience context the source page may omit.
## Troubleshooting
The extension may be installed but not pinned. Click the puzzle-piece icon in the Chrome toolbar, find Stepwik, and pin it. If it isn't in the list at all, revisit [go.techferment.com/stepwik-extension](https://go.techferment.com/stepwik-extension) and reinstall.
The Chrome Extension is only available on Pro and Organization plans. Sign in and upgrade from **Account Settings → Subscription**.
The AI extracts structure from the page's HTML. Pages with minimal markup may produce less structured output. Try a different source page, or use [AI Content Generation](/docs/ai-and-capture/generate-labs) in Studio and paste the URL there.
Refresh the page and try again. If the error persists, sign out of the extension (Stepwik icon → **Sign out**), sign back in, and retry. If the issue continues, contact support.
## Related
Generate from GitHub, PDF, or Google Slides inside Studio.
Polish captured labs before you publish.
How capture fits with rewrite and generation tools.
Confirm your plan supports the Chrome Extension.
---
## Stepflows
URL: https://stepwik.com/docs/ai-and-capture/stepflows
Build guided product walkthroughs from screenshots with Stepflow AI, then publish and share.
A **stepflow** is a guided walkthrough for a product UI: useful for SOPs, onboarding, support playbooks, and feature demos. Learners follow annotated steps instead of reading a long prose tutorial.
Public stepflows live at `/stepflows/{slug}`. You manage them under Studio → **Stepflows**.
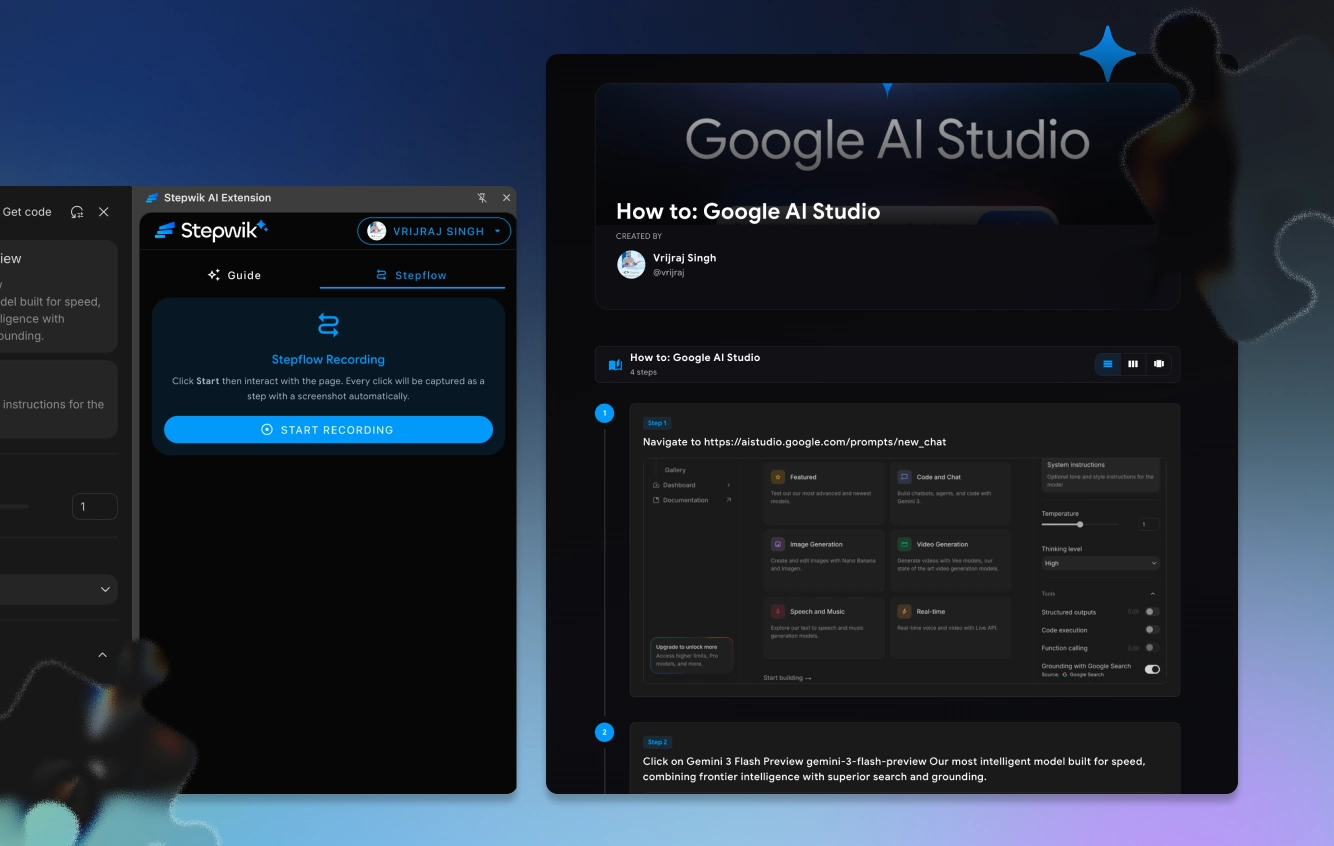 Stepflows complement AI lab generation: use [Generate labs](/docs/ai-and-capture/generate-labs) or the [Chrome Extension](/docs/ai-and-capture/chrome-extension) when the source is docs or a README; use Stepflow AI when the source of truth is a click-path through a UI.
## Stepflow AI
**Stepflow AI** helps turn a sequence of screenshots into draft steps:
Open Studio → **Stepflows** and create a new stepflow.
Capture or upload screenshots of the flow in order.
Let AI extract ordered steps and annotations.
Review numbering, hotspots, and copy in Studio.
Set visibility and publish the stepflow.
### Review checklist
- Step order matches the real click-path
- Hotspots point at the correct control
- Copy names UI labels exactly as shown in the product
- No leftover screenshots from an older product version
## When to use a stepflow vs a lab
| Use a **stepflow** when… | Use a **lab** when… |
| --- | --- |
| The lesson is primarily UI navigation | Learners need code, terminals, or deep explanations |
| Screenshots are the source of truth | You are teaching concepts end to end |
| Support / SOP style guidance | Curriculum or public education content |
| You need a short click-path next to a longer tutorial | The primary artifact is multi-section reading |
Many teams use both: a lab for the full tutorial, and a stepflow for the click-path inside the product.
## Visibility
Stepflows commonly support **Public**, **Private**, and **Unlisted**. Choose Unlisted for stakeholder review (Pro+), Public for open guides, and keep drafts unpublished while authoring. See [Publish and share](/docs/labs/publish-and-share) for plan limits on Unlisted/Private.
## Tips
- Capture screenshots at a consistent viewport width
- Prefer the happy path first; add alternate paths as separate stepflows if they diverge early
- Update screenshots whenever UI chrome changes: stale hotspots confuse support teams
- Link related labs from the stepflow description when learners need deeper context
## Pitfalls
Avoid mixing dark-mode and light-mode screenshots in one flow, annotating ephemeral toast messages that disappear in the real UI, or publishing before someone who knows the product clicks through once.
## Related
Open Stepflows from the Studio sidebar and manage drafts.
How stepflows fit with generation and Chrome capture.
Use labs when code and deep explanation matter more than UI clicks.
Product overview for Stepflow AI walkthroughs.
---
# Analytics
Track views, completion, drop-off, and certificates for published labs and courses.
## Overview
URL: https://stepwik.com/docs/analytics/overview
Use Studio lab and course stats to track views, funnels, devices, geography, and learner progress.
Studio analytics live on each published lab and course. Open a lab or course, then go to its **Stats** page to see engagement over time and how learners move through the content.
Drafts do not collect learner analytics until they are published.
Stepflows complement AI lab generation: use [Generate labs](/docs/ai-and-capture/generate-labs) or the [Chrome Extension](/docs/ai-and-capture/chrome-extension) when the source is docs or a README; use Stepflow AI when the source of truth is a click-path through a UI.
## Stepflow AI
**Stepflow AI** helps turn a sequence of screenshots into draft steps:
Open Studio → **Stepflows** and create a new stepflow.
Capture or upload screenshots of the flow in order.
Let AI extract ordered steps and annotations.
Review numbering, hotspots, and copy in Studio.
Set visibility and publish the stepflow.
### Review checklist
- Step order matches the real click-path
- Hotspots point at the correct control
- Copy names UI labels exactly as shown in the product
- No leftover screenshots from an older product version
## When to use a stepflow vs a lab
| Use a **stepflow** when… | Use a **lab** when… |
| --- | --- |
| The lesson is primarily UI navigation | Learners need code, terminals, or deep explanations |
| Screenshots are the source of truth | You are teaching concepts end to end |
| Support / SOP style guidance | Curriculum or public education content |
| You need a short click-path next to a longer tutorial | The primary artifact is multi-section reading |
Many teams use both: a lab for the full tutorial, and a stepflow for the click-path inside the product.
## Visibility
Stepflows commonly support **Public**, **Private**, and **Unlisted**. Choose Unlisted for stakeholder review (Pro+), Public for open guides, and keep drafts unpublished while authoring. See [Publish and share](/docs/labs/publish-and-share) for plan limits on Unlisted/Private.
## Tips
- Capture screenshots at a consistent viewport width
- Prefer the happy path first; add alternate paths as separate stepflows if they diverge early
- Update screenshots whenever UI chrome changes: stale hotspots confuse support teams
- Link related labs from the stepflow description when learners need deeper context
## Pitfalls
Avoid mixing dark-mode and light-mode screenshots in one flow, annotating ephemeral toast messages that disappear in the real UI, or publishing before someone who knows the product clicks through once.
## Related
Open Stepflows from the Studio sidebar and manage drafts.
How stepflows fit with generation and Chrome capture.
Use labs when code and deep explanation matter more than UI clicks.
Product overview for Stepflow AI walkthroughs.
---
# Analytics
Track views, completion, drop-off, and certificates for published labs and courses.
## Overview
URL: https://stepwik.com/docs/analytics/overview
Use Studio lab and course stats to track views, funnels, devices, geography, and learner progress.
Studio analytics live on each published lab and course. Open a lab or course, then go to its **Stats** page to see engagement over time and how learners move through the content.
Drafts do not collect learner analytics until they are published.
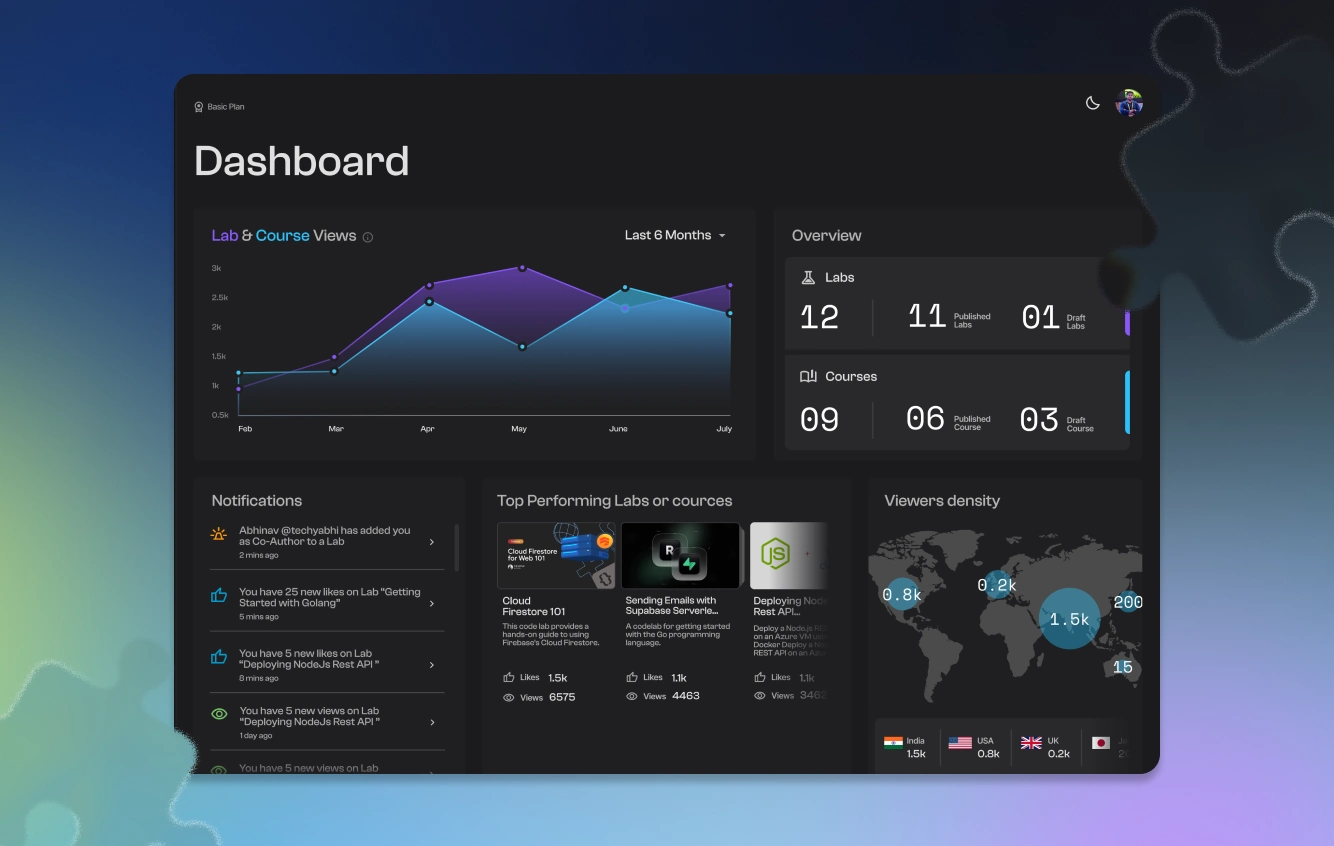 ## Open stats
In Studio, open **Labs** or **Courses**.
Open the item you want to inspect.
Go to **Stats** (`…/labs/{id}/stats` or `…/courses/{id}/stats`).
You can also review high-level activity on the workspace [Overview](/docs/getting-started/studio).
## Time ranges
On both lab and course stats:
- Last 7 days
- Last 30 days
- Last 90 days
- Since published
## Lab stats
### Overview tab
| Metric / chart | What it shows |
| --- | --- |
| **Total views** | Opens of the lab in the selected range |
| **Most visited country** | Top country by traffic |
| **Likes** | Learner likes |
| **Co-authors** | People with edit access |
| **Views chart** | Daily views over time |
| **Country map** | Geographic distribution |
| **Referral sources** | Where traffic came from |
| **Device distribution** | Desktop / mobile / other |
| **Step completion funnel** | How far learners get through steps |
### Progress tab
| Metric | What it shows |
| --- | --- |
| Learners tracked | People with recorded progress |
| Completed / In progress | Status counts |
| Completion rate | Share who finished |
| Average completion time | Typical time to finish |
| Per-section breakdown | Progress by lab section |
| Learner table | Status, sections done, time, last update (filterable) |
## Course stats
### Overview tab
Total views, top country, co-authors, views chart, country map, and referral sources.
### Progress tab
Learners tracked, completed / in progress, completion rate, average time, **per-lab** breakdown inside the course, and a learner table.
## Using stats to improve content
Find the steepest drop in the step funnel (labs).
Check time spent: long stays often mean complexity; very short stays often mean confusion or skip.
Edit that step, republish, and compare the next range.
For certificates and campaign-style completion programs, see [Certifications](/docs/analytics/certifications).
## Related
Issue verifiable certificates and run campaign leaderboards.
Publish so learner analytics can start collecting.
Course-level progress and per-lab breakdowns inside a path.
Workspace Overview charts and where Stats live in Studio.
---
## Certifications
URL: https://stepwik.com/docs/analytics/certifications
Award verifiable digital certificates and badges when learners complete a course. Coming soon.
Stepwik's certification engine will award a verifiable digital badge or certificate when a learner completes a course. Certificates will be shareable, tamper-proof, and verifiable by anyone.
## Current status
Certifications are **coming soon**. The feature is in the pipeline and is not available in Studio yet.
When it ships, this page will cover enabling certificates on courses, verifiable badge links, campaign leaderboards, and plan availability.
Until then, you can still track course completion in [Analytics](/docs/analytics/overview) and group labs into [Courses](/docs/teams-and-portals/courses).
## Related
Lab and course stats for views, funnels, and progress.
Group labs into a learning path.
Organization plan features for team learning programs.
---
# Developers
API keys, MCP, integrations, and Studio developer tools.
## Cursor
URL: https://stepwik.com/docs/developers/mcp-cursor
Connect Stepwik MCP in Cursor with mcp.json and an API key.
Connect Stepwik to [Cursor](https://cursor.com) so Agent can search labs, draft private content, and open Studio URLs.
## Steps
Create an [API key](/docs/developers/api-keys) in Studio and copy the secret.
Open or create `~/.cursor/mcp.json`.
Paste the config below and replace `stepwik__` with your real key.
Reload MCP in **Cursor Settings → MCP** (toggle the server off/on).
## Config path
```text
~/.cursor/mcp.json
```
## Config
```json
{
"mcpServers": {
"stepwik": {
"url": "https://mcp.stepwik.com/mcp",
"headers": {
"stepwik-api-key": "stepwik__"
}
}
}
}
```
## Multi-workspace (optional)
```json
{
"mcpServers": {
"stepwik-organization": {
"url": "https://mcp.stepwik.com/mcp?account=organization",
"headers": {
"stepwik-api-key": "stepwik_"
}
},
"stepwik-personal": {
"url": "https://mcp.stepwik.com/mcp?account=personal",
"headers": {
"stepwik-api-key": "stepwik_"
}
}
}
}
```
Use a separate API key per workspace entry.
## Verify
Ask Agent: “Who am I authenticated as in Stepwik?” You should get account / org context from `whoami`.
## Related
Endpoint, auth header, clients, and troubleshooting.
Create keys and scopes for your workspace.
Connect Stepwik MCP in VS Code with Copilot HTTP servers.
---
## Overview
URL: https://stepwik.com/docs/developers/overview
Connect AI tools and automations to Stepwik with API keys, MCP, integrations, and related developer tools.
Developer tools live in Studio under **Build with Stepwik**.
Claude, GitHub, Google Slides, embeds, Google Analytics.
Connect AI clients over Model Context Protocol.
Authenticate MCP, automations, and the playground.
Try authenticated requests in Studio.
Per-IDE install guides (Cursor, VS Code, Claude, …).
Review OAuth grants (for example Claude.ai).
Outbound org events: **Coming soon** in Studio.
## What you can automate
With MCP and keys, clients can typically:
- Search public and workspace labs / courses
- Create and update **private drafts**
- Read content you own or can access
- Inspect account / org context where scoped
MCP and API flows do not publish for you. Open the Studio draft URL, polish, then [publish](/docs/labs/publish-and-share).
## Personal vs organization keys
Create the key inside the workspace you intend to automate. Personal keys manage personal content; org keys manage that org’s content (within scopes and permissions).
## Limits at a glance
| Limit | Freemium | Pro / Organization |
| --- | --- | --- |
| Enterprise API + MCP requests / day | 50 | Unlimited |
| Burst rate limits | Per-route caps (e.g. 30 creates / 15 min) | Same burst rules |
Full endpoint list and per-route caps: [API Playground](/docs/developers/api-playground). Scopes and rotation: [API keys](/docs/developers/api-keys).
## Start here
[Create an API key](/docs/developers/api-keys) with least privilege.
Explore [Integrations](/docs/developers/integrations) for OAuth, embeds, and analytics.
[Connect MCP](/docs/developers/mcp) in your AI client.
Exercise every route in the [API Playground](/docs/developers/api-playground).
## Related
Authoring workspace where Developer tools live under Build with Stepwik.
AI generation from GitHub, PDF, slides, and more.
Product overview for the Stepwik MCP server.
Product overview for Enterprise API access.
---
## Whoami
URL: https://stepwik.com/docs/developers/api-whoami
Account context for the API key: user id, organization id, and scopes.
Use this first in the playground to confirm which workspace and scopes the key has.
## Related
Try this route interactively in Studio.
Create keys and choose scopes.
List organizations for the authenticated user.
---
## API keys
URL: https://stepwik.com/docs/developers/api-keys
Create scoped Stepwik API keys, understand plan and rate limits, and use keys with MCP and the API playground.
API keys authenticate MCP clients, automations, curl/SDK calls, and the Studio [API Playground](/docs/developers/api-playground). Treat the secret like a password. It can act within the key’s scopes on that workspace.
## Create a key
Open Studio → **Developer → API Keys** (under **Build with Stepwik**).
Create the key in the workspace you want to automate (**personal** or **organization**).
Name the key and enable scopes (start narrow).
Copy the secret immediately: you may not see it again.
Store it in a password manager or secret store (never in a public repo).
Keys look like:
```text
stepwik__
```
Send them as:
```http
stepwik-api-key: stepwik__
```
## Scopes
| Scope | What it allows | Available on |
| --- | --- | --- |
| `labs:read` | List and read labs | Personal + org |
| `labs:write` | Create and update private lab drafts | Personal + org |
| `courses:read` | List and read courses | Personal + org |
| `courses:write` | Create and update course drafts | Personal + org |
| `account:read` | `whoami` helpers and organization membership (`/organizations`) | Personal + org |
| `billing:read` | Subscription / billing summary | Personal + org |
| `logs:read` | API usage analytics and request logs | **Organization keys only** |
Default when creating a key in Studio: `labs:read` and `courses:read`.
Match scopes to the [playground endpoints](/docs/developers/api-playground) you need. Write scopes never publish; they only create/update **private drafts**.
## Limits
### Daily plan quota
Counted across Enterprise API HTTP calls and MCP usage for that subscription:
| Plan | Requests per UTC day |
| --- | --- |
| Freemium | **50** |
| Pro / Organization (API access enabled) | **Unlimited** |
Studio surfaces remaining daily requests in the playground when a numeric limit applies. Exhausted quota returns `PLAN_API_DAILY_LIMIT_EXCEEDED`.
### Burst rate limits (per key, 15 minutes)
| Traffic | Limit |
| --- | --- |
| `whoami` | 300 / 15 min |
| Account (`organizations`, `billing`) | 120 / 15 min |
| Labs read / format | 100 / 15 min |
| Courses read / format | 100 / 15 min |
| Lab / course **update** (`PUT`) | 60 / 15 min |
| Lab / course **create** (`POST`) | 30 / 15 min |
Full endpoint list: [API Playground](/docs/developers/api-playground).
## Use with MCP
```text
https://mcp.stepwik.com/mcp
```
```http
stepwik-api-key: stepwik__
```
See [MCP](/docs/developers/mcp) for client configs. Use a separate key per client or environment (laptop vs CI).
## Usage and logs
On **API Keys** in Studio:
| Tab | Purpose |
| --- | --- |
| Keys | Create, copy id, see scopes, revoke |
| Playground | Try every available Enterprise API route |
| Usage | Request counts, latency, top actions (analytics) |
| Logs | Request-level history (org; needs `logs:read` where gated) |
## Rotate and revoke
Create a new key with the same scopes.
Update every client that used the old secret.
Smoke-test with `GET /v1/eapi/whoami` or MCP `whoami`.
Revoke the old key in Studio.
## Safety
- One key per client or environment
- Never paste secrets into shared chats or screenshots
- Rotate production automations on a schedule
- Clear “remembered” playground keys on shared browsers
Revoke immediately if a device or CI secret is compromised.
## Related
Full endpoint catalog with scopes, parameters, and live requests.
Connect AI clients with the same key-authenticated API surface.
Review and revoke OAuth grants such as Claude.ai.
Map of Developer tools under Build with Stepwik.
---
## List organizations
URL: https://stepwik.com/docs/developers/api-organizations
List organizations for the authenticated user. Requires account:read.
## Related
Try this route interactively in Studio.
Create keys and choose scopes.
Confirm account context and scopes.
Subscription and billing summary.
---
## VS Code
URL: https://stepwik.com/docs/developers/mcp-vscode
Connect Stepwik MCP in VS Code 1.101+ with Copilot MCP HTTP servers.
Requires **VS Code 1.101+** with MCP support (GitHub Copilot).
## Steps
Create an [API key](/docs/developers/api-keys) in Studio.
Open the Command Palette → **MCP: Open User Configuration** (or edit a workspace file).
Add the `servers` block below with your API key.
Start the server from the **MCP Servers** view.
## Config paths
```text
~/.vscode/mcp.json (user)
.vscode/mcp.json (workspace)
```
## Config
```json
{
"servers": {
"stepwik": {
"type": "http",
"url": "https://mcp.stepwik.com/mcp",
"headers": {
"stepwik-api-key": "stepwik__"
}
}
}
}
```
VS Code uses `servers` + `type: "http"`, not the Cursor `mcpServers` shape.
## Verify
Open the MCP Servers view, confirm **stepwik** is running, then ask Copilot to call Stepwik `whoami`.
## Related
Endpoint, auth header, clients, and troubleshooting.
Create keys and scopes for your workspace.
Connect Stepwik MCP in Cursor with mcp.json and an API key.
---
## Billing
URL: https://stepwik.com/docs/developers/api-billing
Subscription and billing summary for the API key account. Requires billing:read.
Useful for automations that check plan limits before heavy API usage. See [API keys](/docs/developers/api-keys) for daily quotas.
## Related
Try this route interactively in Studio.
Scopes, rotation, and plan limits.
Confirm account context and scopes.
List organizations for the authenticated user.
---
## Claude Desktop
URL: https://stepwik.com/docs/developers/mcp-claude-desktop
Add Stepwik MCP to Claude Desktop via claude_desktop_config.json.
## Steps
Create an [API key](/docs/developers/api-keys) in Studio.
Open **Claude Desktop → Settings → Developer → Edit Config**.
Add the `mcpServers` block under the root JSON object.
**Restart Claude Desktop completely.**
## Config path (macOS)
```text
~/Library/Application Support/Claude/claude_desktop_config.json
```
On Windows, use the Claude Desktop config path under your AppData profile (Developer → Edit Config opens the correct file).
## Config
```json
{
"mcpServers": {
"stepwik": {
"url": "https://mcp.stepwik.com/mcp",
"headers": {
"stepwik-api-key": "stepwik__"
}
}
}
}
```
A partial restart may leave a stale MCP session. Quit Claude fully, then reopen.
## Claude.ai (OAuth)
Claude.ai can connect without pasting a key via connectors / OAuth. Approve access in Stepwik, then manage grants under [Connected apps](/docs/developers/connected-apps).
## Related
Endpoint, auth header, clients, and troubleshooting.
Create keys and scopes for your workspace.
Review and revoke OAuth grants for Claude and other clients.
---
## MCP
URL: https://stepwik.com/docs/developers/mcp
Connect Cursor, VS Code, Claude, Windsurf, and other AI clients to Stepwik over the Model Context Protocol.
The Stepwik **Model Context Protocol (MCP)** server lets AI assistants search and manage Stepwik content from your editor, including drafting private labs and courses you finish and publish in Studio.
## Open stats
In Studio, open **Labs** or **Courses**.
Open the item you want to inspect.
Go to **Stats** (`…/labs/{id}/stats` or `…/courses/{id}/stats`).
You can also review high-level activity on the workspace [Overview](/docs/getting-started/studio).
## Time ranges
On both lab and course stats:
- Last 7 days
- Last 30 days
- Last 90 days
- Since published
## Lab stats
### Overview tab
| Metric / chart | What it shows |
| --- | --- |
| **Total views** | Opens of the lab in the selected range |
| **Most visited country** | Top country by traffic |
| **Likes** | Learner likes |
| **Co-authors** | People with edit access |
| **Views chart** | Daily views over time |
| **Country map** | Geographic distribution |
| **Referral sources** | Where traffic came from |
| **Device distribution** | Desktop / mobile / other |
| **Step completion funnel** | How far learners get through steps |
### Progress tab
| Metric | What it shows |
| --- | --- |
| Learners tracked | People with recorded progress |
| Completed / In progress | Status counts |
| Completion rate | Share who finished |
| Average completion time | Typical time to finish |
| Per-section breakdown | Progress by lab section |
| Learner table | Status, sections done, time, last update (filterable) |
## Course stats
### Overview tab
Total views, top country, co-authors, views chart, country map, and referral sources.
### Progress tab
Learners tracked, completed / in progress, completion rate, average time, **per-lab** breakdown inside the course, and a learner table.
## Using stats to improve content
Find the steepest drop in the step funnel (labs).
Check time spent: long stays often mean complexity; very short stays often mean confusion or skip.
Edit that step, republish, and compare the next range.
For certificates and campaign-style completion programs, see [Certifications](/docs/analytics/certifications).
## Related
Issue verifiable certificates and run campaign leaderboards.
Publish so learner analytics can start collecting.
Course-level progress and per-lab breakdowns inside a path.
Workspace Overview charts and where Stats live in Studio.
---
## Certifications
URL: https://stepwik.com/docs/analytics/certifications
Award verifiable digital certificates and badges when learners complete a course. Coming soon.
Stepwik's certification engine will award a verifiable digital badge or certificate when a learner completes a course. Certificates will be shareable, tamper-proof, and verifiable by anyone.
## Current status
Certifications are **coming soon**. The feature is in the pipeline and is not available in Studio yet.
When it ships, this page will cover enabling certificates on courses, verifiable badge links, campaign leaderboards, and plan availability.
Until then, you can still track course completion in [Analytics](/docs/analytics/overview) and group labs into [Courses](/docs/teams-and-portals/courses).
## Related
Lab and course stats for views, funnels, and progress.
Group labs into a learning path.
Organization plan features for team learning programs.
---
# Developers
API keys, MCP, integrations, and Studio developer tools.
## Cursor
URL: https://stepwik.com/docs/developers/mcp-cursor
Connect Stepwik MCP in Cursor with mcp.json and an API key.
Connect Stepwik to [Cursor](https://cursor.com) so Agent can search labs, draft private content, and open Studio URLs.
## Steps
Create an [API key](/docs/developers/api-keys) in Studio and copy the secret.
Open or create `~/.cursor/mcp.json`.
Paste the config below and replace `stepwik__` with your real key.
Reload MCP in **Cursor Settings → MCP** (toggle the server off/on).
## Config path
```text
~/.cursor/mcp.json
```
## Config
```json
{
"mcpServers": {
"stepwik": {
"url": "https://mcp.stepwik.com/mcp",
"headers": {
"stepwik-api-key": "stepwik__"
}
}
}
}
```
## Multi-workspace (optional)
```json
{
"mcpServers": {
"stepwik-organization": {
"url": "https://mcp.stepwik.com/mcp?account=organization",
"headers": {
"stepwik-api-key": "stepwik_"
}
},
"stepwik-personal": {
"url": "https://mcp.stepwik.com/mcp?account=personal",
"headers": {
"stepwik-api-key": "stepwik_"
}
}
}
}
```
Use a separate API key per workspace entry.
## Verify
Ask Agent: “Who am I authenticated as in Stepwik?” You should get account / org context from `whoami`.
## Related
Endpoint, auth header, clients, and troubleshooting.
Create keys and scopes for your workspace.
Connect Stepwik MCP in VS Code with Copilot HTTP servers.
---
## Overview
URL: https://stepwik.com/docs/developers/overview
Connect AI tools and automations to Stepwik with API keys, MCP, integrations, and related developer tools.
Developer tools live in Studio under **Build with Stepwik**.
Claude, GitHub, Google Slides, embeds, Google Analytics.
Connect AI clients over Model Context Protocol.
Authenticate MCP, automations, and the playground.
Try authenticated requests in Studio.
Per-IDE install guides (Cursor, VS Code, Claude, …).
Review OAuth grants (for example Claude.ai).
Outbound org events: **Coming soon** in Studio.
## What you can automate
With MCP and keys, clients can typically:
- Search public and workspace labs / courses
- Create and update **private drafts**
- Read content you own or can access
- Inspect account / org context where scoped
MCP and API flows do not publish for you. Open the Studio draft URL, polish, then [publish](/docs/labs/publish-and-share).
## Personal vs organization keys
Create the key inside the workspace you intend to automate. Personal keys manage personal content; org keys manage that org’s content (within scopes and permissions).
## Limits at a glance
| Limit | Freemium | Pro / Organization |
| --- | --- | --- |
| Enterprise API + MCP requests / day | 50 | Unlimited |
| Burst rate limits | Per-route caps (e.g. 30 creates / 15 min) | Same burst rules |
Full endpoint list and per-route caps: [API Playground](/docs/developers/api-playground). Scopes and rotation: [API keys](/docs/developers/api-keys).
## Start here
[Create an API key](/docs/developers/api-keys) with least privilege.
Explore [Integrations](/docs/developers/integrations) for OAuth, embeds, and analytics.
[Connect MCP](/docs/developers/mcp) in your AI client.
Exercise every route in the [API Playground](/docs/developers/api-playground).
## Related
Authoring workspace where Developer tools live under Build with Stepwik.
AI generation from GitHub, PDF, slides, and more.
Product overview for the Stepwik MCP server.
Product overview for Enterprise API access.
---
## Whoami
URL: https://stepwik.com/docs/developers/api-whoami
Account context for the API key: user id, organization id, and scopes.
Use this first in the playground to confirm which workspace and scopes the key has.
## Related
Try this route interactively in Studio.
Create keys and choose scopes.
List organizations for the authenticated user.
---
## API keys
URL: https://stepwik.com/docs/developers/api-keys
Create scoped Stepwik API keys, understand plan and rate limits, and use keys with MCP and the API playground.
API keys authenticate MCP clients, automations, curl/SDK calls, and the Studio [API Playground](/docs/developers/api-playground). Treat the secret like a password. It can act within the key’s scopes on that workspace.
## Create a key
Open Studio → **Developer → API Keys** (under **Build with Stepwik**).
Create the key in the workspace you want to automate (**personal** or **organization**).
Name the key and enable scopes (start narrow).
Copy the secret immediately: you may not see it again.
Store it in a password manager or secret store (never in a public repo).
Keys look like:
```text
stepwik__
```
Send them as:
```http
stepwik-api-key: stepwik__
```
## Scopes
| Scope | What it allows | Available on |
| --- | --- | --- |
| `labs:read` | List and read labs | Personal + org |
| `labs:write` | Create and update private lab drafts | Personal + org |
| `courses:read` | List and read courses | Personal + org |
| `courses:write` | Create and update course drafts | Personal + org |
| `account:read` | `whoami` helpers and organization membership (`/organizations`) | Personal + org |
| `billing:read` | Subscription / billing summary | Personal + org |
| `logs:read` | API usage analytics and request logs | **Organization keys only** |
Default when creating a key in Studio: `labs:read` and `courses:read`.
Match scopes to the [playground endpoints](/docs/developers/api-playground) you need. Write scopes never publish; they only create/update **private drafts**.
## Limits
### Daily plan quota
Counted across Enterprise API HTTP calls and MCP usage for that subscription:
| Plan | Requests per UTC day |
| --- | --- |
| Freemium | **50** |
| Pro / Organization (API access enabled) | **Unlimited** |
Studio surfaces remaining daily requests in the playground when a numeric limit applies. Exhausted quota returns `PLAN_API_DAILY_LIMIT_EXCEEDED`.
### Burst rate limits (per key, 15 minutes)
| Traffic | Limit |
| --- | --- |
| `whoami` | 300 / 15 min |
| Account (`organizations`, `billing`) | 120 / 15 min |
| Labs read / format | 100 / 15 min |
| Courses read / format | 100 / 15 min |
| Lab / course **update** (`PUT`) | 60 / 15 min |
| Lab / course **create** (`POST`) | 30 / 15 min |
Full endpoint list: [API Playground](/docs/developers/api-playground).
## Use with MCP
```text
https://mcp.stepwik.com/mcp
```
```http
stepwik-api-key: stepwik__
```
See [MCP](/docs/developers/mcp) for client configs. Use a separate key per client or environment (laptop vs CI).
## Usage and logs
On **API Keys** in Studio:
| Tab | Purpose |
| --- | --- |
| Keys | Create, copy id, see scopes, revoke |
| Playground | Try every available Enterprise API route |
| Usage | Request counts, latency, top actions (analytics) |
| Logs | Request-level history (org; needs `logs:read` where gated) |
## Rotate and revoke
Create a new key with the same scopes.
Update every client that used the old secret.
Smoke-test with `GET /v1/eapi/whoami` or MCP `whoami`.
Revoke the old key in Studio.
## Safety
- One key per client or environment
- Never paste secrets into shared chats or screenshots
- Rotate production automations on a schedule
- Clear “remembered” playground keys on shared browsers
Revoke immediately if a device or CI secret is compromised.
## Related
Full endpoint catalog with scopes, parameters, and live requests.
Connect AI clients with the same key-authenticated API surface.
Review and revoke OAuth grants such as Claude.ai.
Map of Developer tools under Build with Stepwik.
---
## List organizations
URL: https://stepwik.com/docs/developers/api-organizations
List organizations for the authenticated user. Requires account:read.
## Related
Try this route interactively in Studio.
Create keys and choose scopes.
Confirm account context and scopes.
Subscription and billing summary.
---
## VS Code
URL: https://stepwik.com/docs/developers/mcp-vscode
Connect Stepwik MCP in VS Code 1.101+ with Copilot MCP HTTP servers.
Requires **VS Code 1.101+** with MCP support (GitHub Copilot).
## Steps
Create an [API key](/docs/developers/api-keys) in Studio.
Open the Command Palette → **MCP: Open User Configuration** (or edit a workspace file).
Add the `servers` block below with your API key.
Start the server from the **MCP Servers** view.
## Config paths
```text
~/.vscode/mcp.json (user)
.vscode/mcp.json (workspace)
```
## Config
```json
{
"servers": {
"stepwik": {
"type": "http",
"url": "https://mcp.stepwik.com/mcp",
"headers": {
"stepwik-api-key": "stepwik__"
}
}
}
}
```
VS Code uses `servers` + `type: "http"`, not the Cursor `mcpServers` shape.
## Verify
Open the MCP Servers view, confirm **stepwik** is running, then ask Copilot to call Stepwik `whoami`.
## Related
Endpoint, auth header, clients, and troubleshooting.
Create keys and scopes for your workspace.
Connect Stepwik MCP in Cursor with mcp.json and an API key.
---
## Billing
URL: https://stepwik.com/docs/developers/api-billing
Subscription and billing summary for the API key account. Requires billing:read.
Useful for automations that check plan limits before heavy API usage. See [API keys](/docs/developers/api-keys) for daily quotas.
## Related
Try this route interactively in Studio.
Scopes, rotation, and plan limits.
Confirm account context and scopes.
List organizations for the authenticated user.
---
## Claude Desktop
URL: https://stepwik.com/docs/developers/mcp-claude-desktop
Add Stepwik MCP to Claude Desktop via claude_desktop_config.json.
## Steps
Create an [API key](/docs/developers/api-keys) in Studio.
Open **Claude Desktop → Settings → Developer → Edit Config**.
Add the `mcpServers` block under the root JSON object.
**Restart Claude Desktop completely.**
## Config path (macOS)
```text
~/Library/Application Support/Claude/claude_desktop_config.json
```
On Windows, use the Claude Desktop config path under your AppData profile (Developer → Edit Config opens the correct file).
## Config
```json
{
"mcpServers": {
"stepwik": {
"url": "https://mcp.stepwik.com/mcp",
"headers": {
"stepwik-api-key": "stepwik__"
}
}
}
}
```
A partial restart may leave a stale MCP session. Quit Claude fully, then reopen.
## Claude.ai (OAuth)
Claude.ai can connect without pasting a key via connectors / OAuth. Approve access in Stepwik, then manage grants under [Connected apps](/docs/developers/connected-apps).
## Related
Endpoint, auth header, clients, and troubleshooting.
Create keys and scopes for your workspace.
Review and revoke OAuth grants for Claude and other clients.
---
## MCP
URL: https://stepwik.com/docs/developers/mcp
Connect Cursor, VS Code, Claude, Windsurf, and other AI clients to Stepwik over the Model Context Protocol.
The Stepwik **Model Context Protocol (MCP)** server lets AI assistants search and manage Stepwik content from your editor, including drafting private labs and courses you finish and publish in Studio.
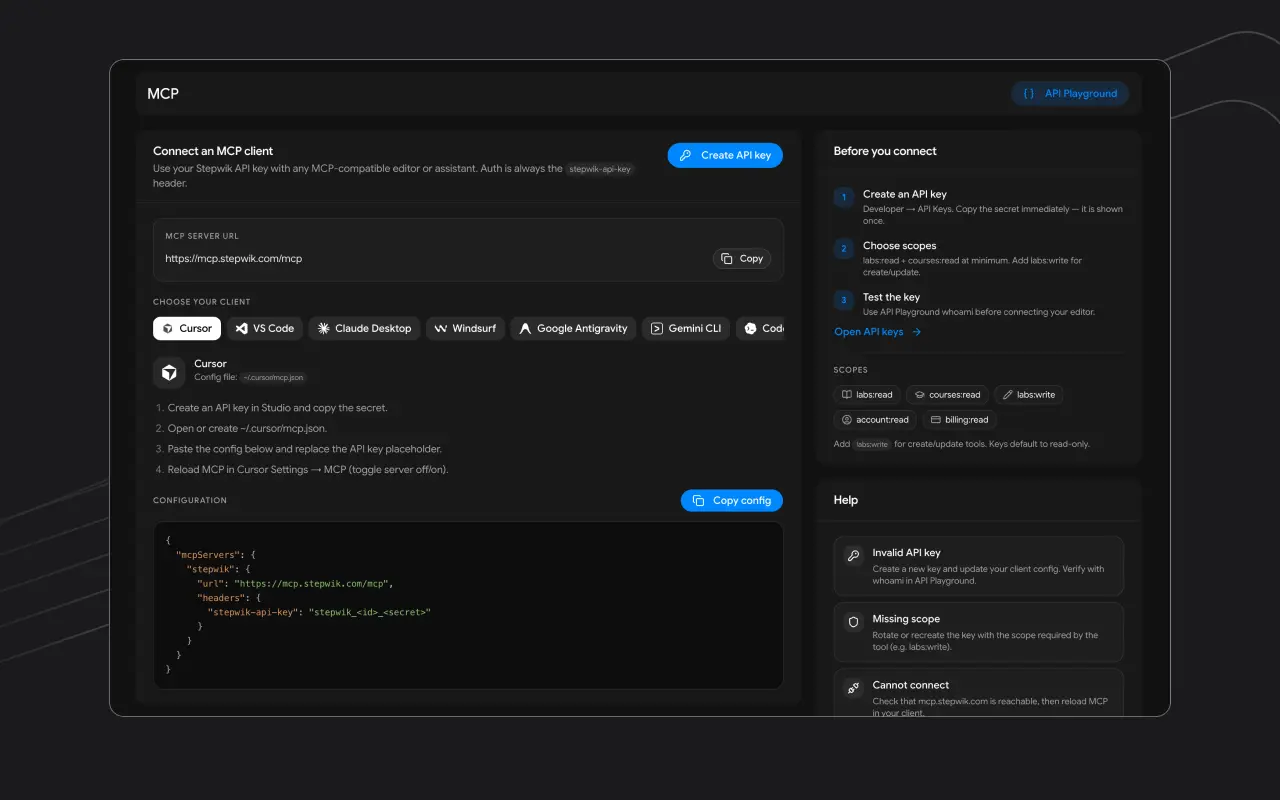 ## Endpoint
```text
https://mcp.stepwik.com/mcp
```
Authenticate with:
```http
stepwik-api-key: stepwik__
```
Create the key in Studio → **Developer → API Keys** for the workspace you want to automate. See [API keys](/docs/developers/api-keys) for scopes and limits.
## Prerequisites
A Stepwik account ([sign up](/signup) if needed).
An [API key](/docs/developers/api-keys) (`labs:read` / `courses:read` to start; add write scopes for drafts).
An MCP-capable client from the list below.
## Client setup guides
| Client | Config style | Guide |
| --- | --- | --- |
|  Cursor | `mcpServers` + `url` | [Cursor](/docs/developers/mcp-cursor) |
|  VS Code | `servers` + `type: http` | [VS Code](/docs/developers/mcp-vscode) |
|  Claude Desktop | `mcpServers` + `url` | [Claude Desktop](/docs/developers/mcp-claude-desktop) |
|  Windsurf | `mcpServers` + `url` | [Windsurf](/docs/developers/mcp-windsurf) |
|  Google Antigravity | `serverUrl` | [Antigravity](/docs/developers/mcp-antigravity) |
|  Gemini CLI | `httpUrl` | [Gemini CLI](/docs/developers/mcp-gemini-cli) |
|  Codex | TOML `mcp_servers` | [Codex](/docs/developers/mcp-codex) |
|  OpenCode | `mcp.remote` | [OpenCode](/docs/developers/mcp-opencode) |
|  Google Jules | Host editor MCP | [Jules](/docs/developers/mcp-jules) |
|  Kimi Code | `mcpServers` + `url` | [Kimi Code](/docs/developers/mcp-kimi-code) |
| Other | Streamable HTTP | [Other clients](/docs/developers/mcp-other) |
Studio → **Developer → MCP** also shows copy-paste snippets for the same clients.
## Personal vs organization
The **API key** chooses the workspace. For both contexts in one client, use separate servers:
```text
https://mcp.stepwik.com/mcp?account=personal
https://mcp.stepwik.com/mcp?account=organization
```
## OAuth clients
Some clients (for example Claude.ai) can connect without pasting a key. Authorize in the client, approve in Stepwik, and revoke from [Connected apps](/docs/developers/connected-apps).
## What works well
- `whoami` to confirm account / org context
- Search public labs and courses
- List workspace labs
- Create or update **private** drafts, then open the Studio `draft_url`
First prompts: “Who am I in Stepwik?”, “Search public labs about API onboarding.”, “Create a private draft lab that walks through X.”
## Tool catalog
MCP tool names still use **codelab** for labs (for example `create_codelab`). In Studio and the rest of the product docs, the same content is a **lab**. Prefer approved tags from `list_tags`; never invent tag labels.
### Discovery (public, no write scopes)
| Tool | Params | Returns / notes |
| --- | --- | --- |
| `get_stepwik_overview` | _(none)_ | Platform overview and public lab index (`llms.txt`) |
| `list_tags` | `q?`, `group?` | Approved tag catalog. Call before create/update. |
| `search_public_labs` | `q?`, `tags?`, `page?`, `per_page?` (max 50) | Public published labs |
| `search_public_courses` | `q?`, `tags?`, `page?`, `per_page?` | Public published courses |
| `get_public_lab` | `slug` | Full public lab by slug |
| `get_public_course` | `slug` | Full public course by slug |
| `get_public_stepflow` | `slug` | Public stepflow by slug |
### Account and workspace (API key)
| Tool | Scope | Params | Notes |
| --- | --- | --- | --- |
| `whoami` | valid key | _(none)_ | User/org id, account type, key id, scopes |
| `list_my_organizations` | `account:read` | _(none)_ | Memberships (personal key) or key’s org |
| `get_billing_info` | `billing:read` | _(none)_ | Plan / billing summary for the key’s account |
| `list_my_labs` | `labs:read` | `q?`, `tags?`, `page?`, `per_page?`, `type?` | Workspace labs (`type` e.g. `published` / `draft`) |
| `list_my_courses` | `courses:read` | `q?`, `tags?`, `page?`, `per_page?`, `type?` | Workspace courses |
| `get_lab_metadata` | `labs:read` | `slug` | Lab metadata; prefer `get_codelab` for full markdown |
| `get_course_metadata` | `courses:read` | `slug` | Course metadata; prefer `get_course` for ordered labs |
### Create and update drafts (API key)
| Tool | Scope | Required params | Important rules |
| --- | --- | --- | --- |
| `get_codelab_import_format` | `labs:read` / write flows | _(none)_ | Call before `create_codelab` for schema and writing guidelines |
| `create_codelab` | `labs:write` | `title`, `description_short`, `level`, `sections` | Private draft only. `title` 5–70 chars; `description_short` 25–160; `level` Beginner/Intermediate/Advanced; each section needs `title`, `content`, `order`; **section `content` must start with `##` matching the section title**. Optional `tags` (max 5 from `list_tags`), `duration`, `category`. Always show returned `draft_url`. |
| `get_codelab` | `labs:read` | `slug` | Full owned/co-authored/org lab with markdown sections |
| `update_codelab` | `labs:write` | `slug` | Send only fields to change. To change body, send full `sections` array (read first with `get_codelab`). |
| `get_course_import_format` | `courses:read` / write flows | _(none)_ | Call before `create_course` |
| `create_course` | `courses:write` | `title`, `description_short`, `level`, `tags` | Private draft. `tags` min 1 max 10 from `list_tags`. Optional `labs` (`slug` or `_id` + `order`). Show `draft_url`. |
| `get_course` | `courses:read` | `slug` | Full course + ordered labs |
| `update_course` | `courses:write` | `slug` | Partial updates. To replace the path, send full `labs` array. |
### Common failures
| Symptom | Likely cause | What to do |
| --- | --- | --- |
| Auth / invalid token | Missing or wrong `stepwik-api-key` header | Create an active key in Studio → **Developer → API Keys**; header name must be exact |
| Empty workspace / wrong org | Key bound to another account | Confirm with `whoami`; use `?account=personal` or `?account=organization` if you run two servers |
| Cannot create or update drafts | Missing `labs:write` / `courses:write` | Add write scopes on the key and reconnect the client |
| Validation error on create | Title/description length, empty sections, or section markdown not starting with `## Title` | Call `get_codelab_import_format` / `get_course_import_format` and fix payload |
| Tag rejected | Invented tags | Call `list_tags` and pass returned labels or slugs only |
| Not found / no access | Wrong slug or no ownership | Use `list_my_labs` / `search_public_*`; org keys only see that org’s content |
| Rate limited | Freemium daily quota or burst caps | See [API keys](/docs/developers/api-keys) and [API Playground](/docs/developers/api-playground) |
| Expected publish via MCP | Publish is Studio-only | Open `draft_url`, polish, then [publish](/docs/labs/publish-and-share) |
## What stays in Studio
Publishing, visibility, domain / branding, billing checkouts, and irreversible org admin actions stay in Studio, not MCP.
## Rate limits
| Limit | Value |
| --- | --- |
| Freemium daily quota | 50 requests / UTC day |
| Paid plans | Unlimited daily quota |
| Burst | Per-route caps: see [API Playground](/docs/developers/api-playground) |
## Troubleshooting
| Symptom | Check |
| --- | --- |
| Auth failures | Key active; header exactly `stepwik-api-key` |
| Empty workspace | Key matches the intended personal/org workspace |
| Cannot create drafts | Key has `labs:write` / `courses:write` |
| Stale after config change | Reload / reconnect MCP in the client |
| Rate limited | [API keys](/docs/developers/api-keys) limits |
## Next steps
Add Stepwik to `~/.cursor/mcp.json` and reload MCP in Settings.
Pick scopes, copy the secret once, and review plan rate limits.
Call the same Enterprise API routes MCP uses: with live responses.
Review or revoke OAuth grants for Claude.ai and similar clients.
---
## List labs
URL: https://stepwik.com/docs/developers/api-labs-list
Paginated list of labs in the key’s workspace. Requires labs:read.
## Related
Try this route interactively in Studio.
Create keys and choose scopes.
Read a full lab by slug.
Create a private draft lab.
---
## Windsurf
URL: https://stepwik.com/docs/developers/mcp-windsurf
Connect Stepwik MCP in Windsurf using mcp_config.json.
## Steps
Create an [API key](/docs/developers/api-keys) in Studio.
Open Windsurf MCP settings, or edit `mcp_config.json` directly.
Paste the config below and substitute your real API key.
Reload MCP servers in Windsurf.
## Config path
```text
~/.codeium/windsurf/mcp_config.json
```
## Config
```json
{
"mcpServers": {
"stepwik": {
"url": "https://mcp.stepwik.com/mcp",
"headers": {
"stepwik-api-key": "stepwik__"
}
}
}
}
```
## Verify
Confirm the Stepwik server shows as connected in Windsurf MCP settings, then ask the agent to run Stepwik `whoami`.
## Related
Endpoint, auth header, clients, and troubleshooting.
Create keys and scopes for your workspace.
Connect Stepwik MCP in Cursor with mcp.json and an API key.
---
## Google Antigravity
URL: https://stepwik.com/docs/developers/mcp-antigravity
Connect Stepwik MCP in Google Antigravity using serverUrl.
Antigravity expects **`serverUrl`** (not `url`) for HTTP MCP servers.
## Steps
Create an [API key](/docs/developers/api-keys) in Studio.
In Antigravity: **Agent panel → ⋯ → MCP Servers → Manage → View raw config**.
Add the block below.
Click **Refresh** under Customizations → MCP Servers, or restart Antigravity.
## Config paths
```text
~/.gemini/antigravity/mcp_config.json
~/.gemini/config/mcp_config.json
```
## Config
```json
{
"mcpServers": {
"stepwik": {
"serverUrl": "https://mcp.stepwik.com/mcp",
"headers": {
"stepwik-api-key": "stepwik__"
}
}
}
}
```
If you paste a Cursor-style `url` field, Antigravity may not connect. Use `serverUrl`.
## Related
Endpoint, auth header, clients, and troubleshooting.
Create keys and scopes for your workspace.
Add Stepwik MCP to Gemini CLI with httpUrl in settings.json.
---
## Lab format
URL: https://stepwik.com/docs/developers/api-labs-format
JSON schema for LLM / MCP lab import. Requires labs:write.
Requires `labs:write` even though this is a GET: the schema is for create flows.
## Related
Try this route interactively in Studio.
Create keys and choose scopes.
Create a private draft from the schema.
---
## Gemini CLI
URL: https://stepwik.com/docs/developers/mcp-gemini-cli
Add Stepwik MCP to Gemini CLI with httpUrl in settings.json.
Use a Stepwik API key that is **separate** from your Gemini auth.
## Steps
Create a Stepwik [API key](/docs/developers/api-keys) in Studio.
Add the `mcpServers` block to `~/.gemini/settings.json` (or project `.gemini/settings.json`).
Gemini CLI uses **`httpUrl`** for Streamable HTTP MCP servers.
Restart the CLI and verify with `/mcp list`.
## Config path
```text
~/.gemini/settings.json
.gemini/settings.json
```
## Config
```json
{
"mcpServers": {
"stepwik": {
"httpUrl": "https://mcp.stepwik.com/mcp",
"headers": {
"stepwik-api-key": "stepwik__"
}
}
}
}
```
Field name is `httpUrl`, not `url` or `serverUrl`.
## Related
Endpoint, auth header, clients, and troubleshooting.
Create keys and scopes for your workspace.
Connect Stepwik MCP in Antigravity using serverUrl.
---
## Get lab
URL: https://stepwik.com/docs/developers/api-labs-get
Full lab with markdown sections. Requires labs:read.
## Related
Try this route interactively in Studio.
Create keys and choose scopes.
Paginated list of labs.
Update a lab by slug.
---
## Codex
URL: https://stepwik.com/docs/developers/mcp-codex
Connect Stepwik MCP in Codex CLI or IDE extension with TOML config.
## Steps
Create a Stepwik [API key](/docs/developers/api-keys) in Studio.
Add the TOML block below to `~/.codex/config.toml` (or project `.codex/config.toml`).
Or run `codex mcp add stepwik --url https://mcp.stepwik.com/mcp` and set headers in config.
Restart Codex CLI or the IDE extension, then run `codex mcp list`.
## Config path
```text
~/.codex/config.toml
.codex/config.toml
```
## Config
```toml
[mcp_servers.stepwik]
url = "https://mcp.stepwik.com/mcp"
enabled = true
[mcp_servers.stepwik.http_headers]
stepwik-api-key = "stepwik__"
```
## Verify
```bash
codex mcp list
```
Confirm `stepwik` is listed and enabled.
## Related
Endpoint, auth header, clients, and troubleshooting.
Create keys and scopes for your workspace.
Add Stepwik as a remote MCP server in OpenCode.
---
## Create lab
URL: https://stepwik.com/docs/developers/api-labs-create
Create a private draft lab with markdown sections. Requires labs:write.
This endpoint never publishes. Drafts stay private until you publish in Studio.
## Related
Try this route interactively in Studio.
Create keys and choose scopes.
JSON schema for create payloads.
Update an existing draft.
---
## OpenCode
URL: https://stepwik.com/docs/developers/mcp-opencode
Add Stepwik as a remote MCP server in OpenCode with opencode.jsonc.
## Steps
Create a Stepwik [API key](/docs/developers/api-keys) in Studio.
Add the `mcp.remote` entry to your `opencode.jsonc` config file.
Set `oauth` to `false` if your OpenCode version supports it for API-key servers.
Restart OpenCode and run `opencode mcp list`.
## Config path
```text
~/.config/opencode/opencode.jsonc
opencode.jsonc (project root)
```
## Config
```json
{
"$schema": "https://opencode.ai/config.json",
"mcp": {
"stepwik": {
"type": "remote",
"url": "https://mcp.stepwik.com/mcp",
"enabled": true,
"oauth": false,
"headers": {
"stepwik-api-key": "stepwik__"
}
}
}
}
```
## Related
Endpoint, auth header, clients, and troubleshooting.
Create keys and scopes for your workspace.
Connect Stepwik MCP in Codex CLI or IDE extension with TOML.
---
## Update lab
URL: https://stepwik.com/docs/developers/api-labs-update
Partial update of a lab. Requires labs:write. Owner or co-author only.
Does not publish: open the draft in Studio to publish.
## Related
Try this route interactively in Studio.
Create keys and choose scopes.
Read the lab before updating.
Create a new private draft.
---
## Google Jules
URL: https://stepwik.com/docs/developers/mcp-jules
Use Stepwik MCP alongside Google Jules through your host editor’s MCP config.
Jules uses MCP through a **host** editor or assistant (for example Cursor or Claude Desktop). Add Stepwik on that host, not as a Jules cloud API key from jules.google.
## Steps
Create a Stepwik [API key](/docs/developers/api-keys) in Studio (not your Jules API key).
Paste the `mcpServers` block into your host’s MCP config (e.g. `~/.cursor/mcp.json` or Claude Desktop config).
Reload MCP in the host app.
Use Jules and Stepwik tools together from that host.
## Config path
```text
MCP host config (e.g. ~/.cursor/mcp.json or Claude Desktop config)
```
## Config
```json
{
"mcpServers": {
"stepwik": {
"url": "https://mcp.stepwik.com/mcp",
"headers": {
"stepwik-api-key": "stepwik__"
}
}
}
}
```
Prefer following the host-specific guide: [Cursor](/docs/developers/mcp-cursor) or [Claude Desktop](/docs/developers/mcp-claude-desktop).
## Related
Endpoint, auth header, clients, and troubleshooting.
Create keys and scopes for your workspace.
Connect Stepwik MCP in Cursor with mcp.json and an API key.
---
## List courses
URL: https://stepwik.com/docs/developers/api-courses-list
Paginated list of courses in the key’s workspace. Requires courses:read.
## Related
Try this route interactively in Studio.
Create keys and choose scopes.
Read a course with ordered labs.
Create a private draft course.
---
## Course format
URL: https://stepwik.com/docs/developers/api-courses-format
JSON schema for creating courses (MCP create_course). Requires courses:write.
Requires `courses:write` even though this is a GET: the schema is for create flows.
## Related
Try this route interactively in Studio.
Create keys and choose scopes.
Create a private draft from the schema.
---
## Kimi Code
URL: https://stepwik.com/docs/developers/mcp-kimi-code
Connect Stepwik MCP in Kimi Code with mcp.json or /mcp-config.
## Steps
Create a Stepwik [API key](/docs/developers/api-keys) in Studio.
Add the `mcpServers` entry to `~/.kimi-code/mcp.json` (HTTP servers use `url` + `headers`).
Or run `/mcp-config` in Kimi Code CLI to add the server interactively.
Start a new session and run `/mcp` to verify the connection.
## Config path
```text
~/.kimi-code/mcp.json
.kimi-code/mcp.json
```
## Config
```json
{
"mcpServers": {
"stepwik": {
"url": "https://mcp.stepwik.com/mcp",
"headers": {
"stepwik-api-key": "stepwik__"
}
}
}
}
```
## Related
Endpoint, auth header, clients, and troubleshooting.
Create keys and scopes for your workspace.
Connect any Streamable HTTP MCP client with url and stepwik-api-key.
---
## Get course
URL: https://stepwik.com/docs/developers/api-courses-get
Course with ordered labs. Requires courses:read.
## Related
Try this route interactively in Studio.
Create keys and choose scopes.
Paginated list of courses.
Update a course by slug.
---
## Other clients
URL: https://stepwik.com/docs/developers/mcp-other
Connect any Streamable HTTP MCP client to Stepwik with url and stepwik-api-key.
Any client that supports **remote HTTP MCP** (Streamable HTTP) can call Stepwik.
## Steps
Use a remote HTTP MCP server transport.
Set the server URL to `https://mcp.stepwik.com/mcp`.
Send header `stepwik-api-key` with your Studio API key on every request.
If your client uses the `mcpServers` JSON format, use the Cursor-compatible config below.
## Generic config
```json
{
"mcpServers": {
"stepwik": {
"url": "https://mcp.stepwik.com/mcp",
"headers": {
"stepwik-api-key": "stepwik__"
}
}
}
}
```
Some clients rename fields (`serverUrl`, `httpUrl`, `type: "http"`). Prefer the dedicated guide when your IDE is listed under [MCP setup](/docs/developers/mcp).
## Related
Endpoint, auth header, clients, and troubleshooting.
Create keys and scopes for your workspace.
Try Stepwik API calls interactively in Studio.
---
## Create course
URL: https://stepwik.com/docs/developers/api-courses-create
Create a private draft course and attach labs by slug. Requires courses:write.
This endpoint never publishes. Drafts stay private until you publish in Studio.
Labs referenced by slug must already exist (and be accessible) in the workspace.
## Related
Try this route interactively in Studio.
Create keys and choose scopes.
JSON schema for create payloads.
Update an existing draft.
---
## Update course
URL: https://stepwik.com/docs/developers/api-courses-update
Partial update of a course. Requires courses:write. Owner or co-author only.
Does not publish: open the draft in Studio to publish.
## Related
Try this route interactively in Studio.
Create keys and choose scopes.
Read the course before updating.
Create a new private draft.
---
## Integrations overview
URL: https://stepwik.com/docs/developers/integrations
Connect Claude, GitHub, Google Slides, editor embeds, and Google Analytics from Studio Developer tools.
## Overview
Studio → **Developer → Integrations** is the control center for connecting external tools to your workspace.
| Group | Examples | Connection |
| --- | --- | --- |
| **MCP / assistants** | Claude | OAuth / MCP authorize |
| **AI generation sources** | GitHub, Google Slides | OAuth |
| **Editor embeds** | YouTube, Figma, Mermaid, CodePen, … | Slash command only, no OAuth |
| **Analytics** | Google Analytics | Measurement ID |
## Connectable integrations
Authorize Claude Desktop / Claude.ai via MCP (OAuth / MCP).
Generate labs from repositories via OAuth.
Generate labs from presentations via OAuth.
Track subdomain portal traffic with a Measurement ID.
## Editor embeds
These are available in the lab editor without connecting an account. Use the slash command or Embeds menu.
Embed with `/youtube`.
Embed with `/twitter`.
Embed with `/codepen`.
Embed with `/replit`.
Embed with `/codesandbox`.
Embed with `/figma`.
Embed with `/mermaid`.
## Also in Developer tools
Create scoped keys for MCP and automations.
Connect AI clients over Model Context Protocol.
Try authenticated Enterprise API requests in Studio.
Review and revoke OAuth grants.
## Related
Map of Developer tools under Build with Stepwik.
AI generation from GitHub, PDF, slides, and more.
---
## API Playground
URL: https://stepwik.com/docs/developers/api-playground
Interactive Enterprise API catalog in Studio: auth, limits, and links to every endpoint.
The **API Playground** is the interactive catalog of Stepwik’s Enterprise API (`/v1/eapi/...`). It mirrors what MCP and automations can call with a `stepwik_*` key. Open it from Studio → **Developer → API Keys** (Playground) or from the MCP setup guide.
## Before you start
Create an [API key](/docs/developers/api-keys) in the workspace you want to automate (personal or organization).
Enable the scopes required by each endpoint (see the API reference pages below).
Open the playground, paste the key, and optionally **Remember** it in this browser only.
Pick an endpoint, fill path / query / body fields, and **Send**.
Inspect status, latency, and JSON; copy **curl**, fetch, or other samples from the code tab.
Auth header used by the playground and all clients:
```http
stepwik-api-key: stepwik__
```
Base URL is your Stepwik API host (same origin the playground uses), with paths under `/v1/eapi/...`.
Creates and updates always produce **private drafts**. Publishing stays in Studio.
## Limits (plan + rate)
Two layers apply to playground, curl, SDKs, and MCP (MCP hops count toward the same daily quota as HTTP):
### Daily plan quota
| Plan | Daily Enterprise API requests (UTC day) |
| --- | --- |
| **Freemium** | **50** / day |
| **Pro / Organization** (and other paid plans with API access) | Unlimited (`null` / ∞) |
Studio shows remaining requests on the playground when your plan has a numeric limit. When you hit the cap, further calls return `PLAN_API_DAILY_LIMIT_EXCEEDED` until the next UTC day.
### Per-endpoint rate limits (burst)
Sliding window per API key (15 minutes):
| Endpoints | Max requests / 15 min |
| --- | --- |
| `GET /whoami` | 300 |
| `GET /organizations`, `GET /billing` | 120 |
| Labs list / get / format | 100 |
| Courses list / get / format | 100 |
| `PUT` lab or course (update) | 60 |
| `POST` lab or course (create) | 30 |
If you exceed a window you get a rate-limit error: wait or reduce traffic.
### Other guardrails
- Key must match an **active** user (and org, for org keys) with API access on the subscription.
- Missing scopes → forbidden / missing-scope errors.
- Prefer least-privilege scopes; clear remembered keys on shared machines.
- Monitor traffic under API Keys → **Usage** and **Logs** (org keys can include `logs:read`).
## API reference
Each route below has its own page with method, scope, parameters, and examples, matching the Studio playground categories **Account**, **Labs**, and **Courses**.
### Account
Account context for the key: user id, organization id, and scopes.
List organizations for the authenticated user (`account:read`).
Subscription and billing summary (`billing:read`).
### Labs
Paginated list of labs (`labs:read`).
JSON schema for LLM / MCP lab import (`labs:write`).
Full lab with markdown sections (`labs:read`).
Create a private draft lab (`labs:write`).
Update a lab (partial) (`labs:write`).
### Courses
Paginated list of courses (`courses:read`).
JSON schema for MCP course create (`courses:write`).
Course with ordered labs (`courses:read`).
Create a private draft course (`courses:write`).
Update a course (partial) (`courses:write`).
## Suggested walkthrough
[GET /whoami](/docs/developers/api-whoami) to confirm workspace and scopes.
[GET /labs](/docs/developers/api-labs-list) to list content (needs `labs:read`).
[GET /labs/format](/docs/developers/api-labs-format) to inspect the create schema (needs `labs:write`).
[POST /labs](/docs/developers/api-labs-create) to create a draft, then open the Studio URL from the response.
Polish and [publish](/docs/labs/publish-and-share) in Studio.
## Related
Scopes, rotation, usage, and plan limits.
Same API surface from AI clients over Model Context Protocol.
Map of Developer tools under Build with Stepwik.
Product overview for Enterprise API access.
---
## Connected apps
URL: https://stepwik.com/docs/developers/connected-apps
Review and revoke OAuth apps (such as Claude) that can access your workspace via MCP.
## Overview
**Connected apps** lists OAuth authorizations that can access your Stepwik workspace through MCP, for example Claude.ai sessions.
Open Studio → **Developer → Connected apps** (also linked from Integrations and the MCP guide).
## What you see
For each grant:
- App name
- Workspace context (personal or organization)
- Scopes granted
- Connected date
## Revoke access
Open **Connected apps** in Studio → **Developer**.
Find the authorization you want to remove.
Click **Revoke** / disconnect and confirm.
Effects are immediate: that app can no longer call Stepwik MCP for this workspace. Existing labs are unchanged.
## Tips
Revoke unused Claude or other MCP grants regularly.
After revoking, reconnect from the [MCP guide](/docs/developers/mcp) or [Claude integration](/docs/developers/claude) if needed.
Prefer separate keys/workspaces for personal vs organization automation.
## Related
Authorize Claude Desktop / Claude.ai via MCP.
Connect AI clients and manage MCP setup guides.
Control center for OAuth, embeds, and analytics connections.
---
## Claude
URL: https://stepwik.com/docs/developers/claude
Authorize Claude Desktop or Claude.ai via MCP to work with your Stepwik content.
## Overview
**Type:** MCP connection: connect Claude to Stepwik over the Model Context Protocol (MCP). Once authorized, Claude can search labs, read courses, and help you create or update content in your workspace without leaving the assistant.
Open Studio → **Developer → Integrations** to manage this integration for the current workspace.
## What you can do
- Ask Claude to find and summarize labs or courses in your workspace
- Draft new labs from a prompt and import them into Studio
- Update owned labs with edits suggested in Claude Desktop or Claude.ai
- Inspect billing, organizations, and account context while working in Claude
## How to set it up
Set up the Stepwik MCP server in Claude, then authorize this workspace.
Open Studio → Developer → MCP and follow the Claude setup guide
Add the Stepwik MCP server URL in Claude Desktop or Claude.ai
Complete the OAuth authorization prompt for this workspace
Confirm the connection appears as Connected on this Integrations page
In Studio, open [MCP guide](/studio/developer/mcp?client=claude).
## Disconnect
This removes Claude’s MCP access to this workspace. Existing labs and content stay intact.
Effects:
- Claude Desktop and Claude.ai can no longer read or edit Stepwik content
- Active MCP sessions for this authorization will stop working
- You can reconnect anytime from the MCP guide
## Related
All editor embeds, AI sources, and connected apps in one place.
Endpoint, auth header, clients, and troubleshooting.
Add Stepwik MCP to Claude Desktop via claude_desktop_config.json.
---
## GitHub
URL: https://stepwik.com/docs/developers/github
Generate labs from public or private repositories with AI.
## Overview
**Type:** AI generation source: connect your GitHub account so Stepwik can read repositories and turn docs, READMEs, and source structure into step-by-step labs with Generate with AI.
Open Studio → **Developer → Integrations** to manage this integration for the current workspace.
## What you can do
- Turn a repository README and docs into a publishable lab
- Generate onboarding guides from private internal repos
- Create tutorial labs that walk through a codebase
- Refresh lab drafts when repository content changes
## How to set it up
Connect GitHub with OAuth, then generate labs from a repository.
Click Connect on this page and approve GitHub access
Open Studio → Labs → Generate with AI and choose GitHub as the source
Select a public or private repository you can access
Review the generated lab draft and publish when ready
After connecting, generate from Studio → Labs → [Generate with AI](/studio/labs/generate?source=repo).
## Disconnect
Stepwik will lose access to your GitHub account for AI lab generation.
Effects:
- You won’t be able to generate labs from GitHub repositories
- Private and public repo access used by Generate with AI will be removed
- You can reconnect GitHub anytime from this page
## Related
All editor embeds, AI sources, and connected apps in one place.
Turn GitHub, Slides, and other sources into draft labs with AI.
Slash commands, embeds, and authoring in the lab editor.
---
## Google Slides
URL: https://stepwik.com/docs/developers/google-slides
Generate labs from Google Slides presentations with AI.
## Overview
**Type:** AI generation source: connect Google Slides so Stepwik can import presentation content and convert decks into structured labs with Generate with AI.
Open Studio → **Developer → Integrations** to manage this integration for the current workspace.
## What you can do
- Convert training decks into interactive Stepwik labs
- Turn workshop slides into step-by-step learning paths
- Reuse existing Google Slides content without rewriting from scratch
- Generate draft labs quickly from presentation outlines
## How to set it up
Connect Google, pick a presentation, then generate a lab.
Click Connect on this page and approve Google access
Open Studio → Labs → Generate with AI and choose Google Slides as the source
Use Google Picker to select a presentation
Review the generated lab draft and publish when ready
After connecting, generate from Studio → Labs → [Generate with AI](/studio/labs/generate?source=slides).
## Disconnect
Stepwik will lose access to your Google account for Slides-based lab generation.
Effects:
- You won’t be able to generate labs from Google Slides presentations
- Google Picker access for selecting presentations will be removed
- You can reconnect Google Slides anytime from this page
## Related
All editor embeds, AI sources, and connected apps in one place.
Turn GitHub, Slides, and other sources into draft labs with AI.
Slash commands, embeds, and authoring in the lab editor.
---
## YouTube
URL: https://stepwik.com/docs/developers/youtube
Embed YouTube videos in lab sections via slash command.
## Overview
No account connection is required. Type `/youtube` (or use the Embeds menu) to insert a video player, then paste a YouTube URL.
**Slash command:** `/youtube`
**Type:** Editor embed
Open Studio → **Developer → Integrations** to manage this integration for the current workspace.
## What you can do
- Add demo walkthroughs or product videos next to written steps
- Embed conference talks or tutorial clips in a lab
- Show recorded setup videos without leaving Stepwik
- Keep learners on-page instead of linking out to YouTube
## How to set it up
Insert a YouTube embed from the lab editor slash menu.
Open a lab in the Studio editor
Type /youtube or open slash commands and choose YouTube under Embeds
Paste a YouTube watch or share URL into the embed field
Publish the lab: learners see the video inline
## Related
All editor embeds, AI sources, and connected apps in one place.
Slash commands, embeds, and authoring in the lab editor.
---
## X (formerly Twitter)
URL: https://stepwik.com/docs/developers/twitter
Embed posts from X in lab sections via slash command.
## Overview
No account connection is required. Type `/twitter` to insert a tweet embed, then paste a public post URL.
**Slash command:** `/twitter`
**Type:** Editor embed
Open Studio → **Developer → Integrations** to manage this integration for the current workspace.
## What you can do
- Quote announcements or launch threads inside a lab
- Reference community tips without leaving the guide
- Show product updates shared on X next to related steps
- Keep social proof and discussion context in-line
## How to set it up
Insert an X post embed from the lab editor slash menu.
Open a lab in the Studio editor
Type /twitter or open slash commands and choose X under Embeds
Paste a public post URL into the embed field
Publish the lab: learners see the post inline
## Related
All editor embeds, AI sources, and connected apps in one place.
Slash commands, embeds, and authoring in the lab editor.
---
## CodePen
URL: https://stepwik.com/docs/developers/codepen
Embed CodePen demos in lab sections via slash command.
## Overview
No account connection is required. Type `/codepen` to insert a Pen embed, then paste a CodePen URL.
**Slash command:** `/codepen`
**Type:** Editor embed
Open Studio → **Developer → Integrations** to manage this integration for the current workspace.
## What you can do
- Show live HTML/CSS/JS examples beside instructions
- Let learners explore interactive front-end demos
- Reuse existing Pens instead of pasting static code only
- Illustrate UI patterns with a runnable preview
## How to set it up
Insert a CodePen embed from the lab editor slash menu.
Open a lab in the Studio editor
Type /codepen or open slash commands and choose CodePen under Embeds
Paste a CodePen URL into the embed field
Publish the lab: learners can interact with the Pen inline
## Related
All editor embeds, AI sources, and connected apps in one place.
Slash commands, embeds, and authoring in the lab editor.
---
## Replit
URL: https://stepwik.com/docs/developers/replit
Embed Repls in lab sections via slash command.
## Overview
No account connection is required. Type `/replit` to insert a Repl embed, then paste a Replit URL.
**Slash command:** `/replit`
**Type:** Editor embed
Open Studio → **Developer → Integrations** to manage this integration for the current workspace.
## What you can do
- Give learners a runnable environment next to the steps
- Embed starter projects for coding exercises
- Demo multi-file apps without leaving the lab
- Share collaborative Repls as part of a tutorial
## How to set it up
Insert a Replit embed from the lab editor slash menu.
Open a lab in the Studio editor
Type /replit or open slash commands and choose Replit under Embeds
Paste a Replit project URL into the embed field
Publish the lab: learners can open the Repl inline
## Related
All editor embeds, AI sources, and connected apps in one place.
Slash commands, embeds, and authoring in the lab editor.
---
## CodeSandbox
URL: https://stepwik.com/docs/developers/codesandbox
Embed CodeSandbox projects in lab sections via slash command.
## Overview
No account connection is required. Type `/codesandbox` to insert a sandbox embed, then paste a CodeSandbox URL.
**Slash command:** `/codesandbox`
**Type:** Editor embed
Open Studio → **Developer → Integrations** to manage this integration for the current workspace.
## What you can do
- Embed full-stack or front-end sandboxes in tutorials
- Share starter templates learners can fork and edit
- Show multi-file projects with live preview
- Keep coding exercises inside the lab experience
## How to set it up
Insert a CodeSandbox embed from the lab editor slash menu.
Open a lab in the Studio editor
Type /codesandbox or open slash commands and choose CodeSandbox under Embeds
Paste a CodeSandbox URL into the embed field
Publish the lab: learners can explore the sandbox inline
## Related
All editor embeds, AI sources, and connected apps in one place.
Slash commands, embeds, and authoring in the lab editor.
---
## Figma
URL: https://stepwik.com/docs/developers/figma
Embed Figma files, prototypes, and FigJam boards via slash command.
## Overview
No account connection is required. Type `/figma` to insert a Figma embed, then paste a shareable file, prototype, or FigJam URL.
**Slash command:** `/figma`
**Type:** Editor embed
Open Studio → **Developer → Integrations** to manage this integration for the current workspace.
## What you can do
- Show UI designs next to implementation steps
- Embed interactive prototypes for walkthroughs
- Reference FigJam boards and flows inside a lab
- Keep design context on-page instead of linking out
## How to set it up
Insert a Figma embed from the lab editor slash menu.
Open a lab in the Studio editor
Type /figma or open slash commands and choose Figma under Embeds
Paste a shareable Figma file, prototype, or FigJam URL
Publish the lab: learners see the Figma canvas inline
## Related
All editor embeds, AI sources, and connected apps in one place.
Slash commands, embeds, and authoring in the lab editor.
---
## Mermaid
URL: https://stepwik.com/docs/developers/mermaid
Insert Mermaid flowcharts, sequence diagrams, and more via slash command.
## Overview
No account connection is required. Type `/mermaid` to insert a diagram block, then edit the Mermaid source. Diagrams render inline. No mermaid.live link needed.
**Slash command:** `/mermaid`
**Type:** Editor embed
Open Studio → **Developer → Integrations** to manage this integration for the current workspace.
## What you can do
- Document architecture with flowcharts
- Show sequence diagrams for APIs and workflows
- Add ER diagrams or state machines next to steps
- Keep diagrams editable as text inside the lab
## How to set it up
Insert a Mermaid diagram from the lab editor slash menu.
Open a lab in the Studio editor
Type /mermaid or open slash commands and choose Mermaid under Advanced
Edit the diagram source and save
Publish the lab: learners see the rendered diagram inline
## Related
All editor embeds, AI sources, and connected apps in one place.
Slash commands, embeds, and authoring in the lab editor.
---
## Google Analytics
URL: https://stepwik.com/docs/developers/google-analytics
Add a GA4 Measurement ID to track traffic on your Stepwik subdomain portal.
## Overview
**Google Analytics** connects a GA4 Measurement ID (`G-…`) to your public subdomain portal so you can measure learner traffic outside Studio.
Configure it in Studio → **Developer → Integrations → Analytics** (or Domain / SEO settings depending on workspace).
## What gets tracked
- Public portal and published lab visits on your subdomain
- After visitor consent, when enabled for the workspace
Studio and admin pages are not included in portal analytics.
## How to set it up
Open Studio → **Developer → Integrations**
Open the **Analytics** tab
Enter your GA4 Measurement ID (`G-XXXXXXXX`)
Enable tracking and save
## Tips
- Use a dedicated GA4 property for your learning portal
- Confirm the Measurement ID format starts with `G-`
- Pair with [portal branding](/docs/teams-and-portals/branding) so shared links stay on your domain
## Related
All editor embeds, AI sources, and connected apps in one place.
Learner progress, completions, and portal traffic.
Customize your public learning hub and subdomain.
---
## Webhooks
URL: https://stepwik.com/docs/developers/webhooks
Outbound webhooks for organization events. Coming soon.
Webhooks will let an organization send workspace events to your HTTPS endpoints — for example when content is published or membership changes.
## Current status
Webhooks are **coming soon**. The feature is in the pipeline and is not available in Studio yet.
When it ships, this page will cover endpoint URLs, signing secrets, event types, retries, and delivery logs.
Until then, use [API keys](/docs/developers/api-keys) for automations and the [API playground](/docs/developers/api-playground) to explore the API.
## Related
Map of Developer tools under Build with Stepwik.
Scoped keys for MCP, automations, and the playground.
Review and revoke OAuth grants for MCP clients.
Org workspace context where webhooks will apply.
---
# Teams and Portals
Organizations, courses, custom domains, and branded learning hubs.
## Overview
URL: https://stepwik.com/docs/teams-and-portals/overview
Run Stepwik with organizations, courses, roles, and branded learning portals.
Use an **organization** workspace when content should be owned by a team, with members, roles, submissions, and a shared hub.
## What teams get
- Shared labs, courses, and stepflows
- [Members and roles](/docs/teams-and-portals/members-and-roles) (system + custom)
- [Lab submissions](/docs/teams-and-portals/lab-submissions) from personal workspaces
- [Domain and SEO](/docs/teams-and-portals/domain-and-seo) for the org hub
- [Branding](/docs/teams-and-portals/branding) via **Manage → General**
- [Billing](/docs/getting-started/billing) and seats
## Choose the right surface
| Need | Use |
| --- | --- |
| Shared ownership | [Organizations](/docs/teams-and-portals/organizations) |
| Ordered curriculum | [Courses](/docs/teams-and-portals/courses) |
| Hub subdomain + SEO | [Domain and SEO](/docs/teams-and-portals/domain-and-seo) |
| Org profile look | [Branding](/docs/teams-and-portals/branding) |
| Certificates | [Certifications](/docs/analytics/certifications) |
| Quiet stakeholder review | Lab visibility **Unlisted** (Pro+) |
## Recommended rollout
[Create or join an organization](/docs/teams-and-portals/create-and-join-organization), then switch Studio to that workspace.
Invite members and assign roles.
Author drafts, publish (or use moderation / submissions when required).
Group labs into courses.
Set subdomain and portal SEO before sharing widely.
## Personal vs org
| | Personal | Organization |
| --- | --- | --- |
| Catalog ownership | Individual | Shared |
| Access model | Co-authors on content | Members + roles |
| Portal settings | Domain / SEO | Manage → Domain / SEO / General |
| Best for | Personal brand, experiments | Customer education, enablement |
## Guides in this section
Create a team workspace or join with an invite.
Manage menu map and org settings overview.
Transfer ownership or delete the org.
Invite teammates and control permissions.
Sequence labs into learning paths.
Logo, cover, and org profile appearance.
Subdomain, portal metadata, and appearance.
Move personal labs into an org catalog.
---
## Create and join an organization
URL: https://stepwik.com/docs/teams-and-portals/create-and-join-organization
Create a team workspace from Studio, set a subdomain, or join an existing organization with an invite code.
Use an **organization** when several people need a shared Studio workspace for labs, courses, branding, and billing. Personal content stays in your personal workspace unless you [submit a lab](/docs/teams-and-portals/lab-submissions) to the org.
## Create an organization
Path: Studio org switcher → **Create organization** (`/studio/create-organization`)
In Studio, open the workspace switcher and click **Create organization**, or go to `/studio/create-organization`.
Enter the fields below, then click **Create organization**.
After create, Studio sends you to **Manage → Pricing** so you can pick an organization plan.
Switch to the org workspace, then invite people from [Members and roles](/docs/teams-and-portals/members-and-roles).
### Fields
| Field | Notes |
| --- | --- |
| **Organization name** | Required, 2-100 characters |
| **Subdomain** | Required: becomes `{subdomain}.stepwik.com`. Lowercase letters and numbers only, 3-15 characters. Some names are reserved (for example `studio`, `admin`) |
| **Contact email** | Required: often prefilled from your account |
| **Category** | Required: Technology, Education, Healthcare, Finance, E-commerce, Entertainment, Non-profit, Government, or Other |
You become the **Owner** of the new organization.
### Limits
Creating an org requires a personal plan that includes organization creation. Studio also enforces a **max organizations** limit (counted for workspaces where you are Owner or Co-Owner). If you hit the cap, Studio shows **Organization Limit Reached** and asks you to upgrade or contact support.
## Join an organization
Path: Studio org switcher → **Join organization** (`/studio/join-organization`)
You need an **invite code** from an org admin (email invite or Members invite flow).
Check your email for an invite, or ask an admin to invite you from **Manage → Members**.
In Studio, open the workspace switcher → **Join organization**, or open the invite link (it may include `?invite=` and fill the code for you).
Paste the code and click **Join organization**.
After joining, Studio switches you into the org. Use the org switcher anytime to move between personal and org workspaces.
Create content in the workspace that should own it. Labs created in personal stay personal until you submit them to the org.
## After you are in
| Next step | Docs |
| --- | --- |
| Invite members and assign roles | [Members and roles](/docs/teams-and-portals/members-and-roles) |
| Branding, domain, SEO | [Branding](/docs/teams-and-portals/branding), [Domain and SEO](/docs/teams-and-portals/domain-and-seo) |
| Transfer ownership or delete the org | [Organization settings](/docs/teams-and-portals/organization-settings) |
| Org billing and seats | [Billing](/docs/getting-started/billing) |
## Related
Manage menu map and what each org page is for.
Invites, system roles, and custom permissions.
Org switcher and Organization settings entry.
---
## Organizations
URL: https://stepwik.com/docs/teams-and-portals/organizations
Shared Studio workspaces for teams: Manage menu map, My Progress, and links to create, join, and admin settings.
An **organization** is a shared Studio workspace. Members create labs, courses, and stepflows together; admins control membership, billing, domain, and branding.
## Endpoint
```text
https://mcp.stepwik.com/mcp
```
Authenticate with:
```http
stepwik-api-key: stepwik__
```
Create the key in Studio → **Developer → API Keys** for the workspace you want to automate. See [API keys](/docs/developers/api-keys) for scopes and limits.
## Prerequisites
A Stepwik account ([sign up](/signup) if needed).
An [API key](/docs/developers/api-keys) (`labs:read` / `courses:read` to start; add write scopes for drafts).
An MCP-capable client from the list below.
## Client setup guides
| Client | Config style | Guide |
| --- | --- | --- |
|  Cursor | `mcpServers` + `url` | [Cursor](/docs/developers/mcp-cursor) |
|  VS Code | `servers` + `type: http` | [VS Code](/docs/developers/mcp-vscode) |
|  Claude Desktop | `mcpServers` + `url` | [Claude Desktop](/docs/developers/mcp-claude-desktop) |
|  Windsurf | `mcpServers` + `url` | [Windsurf](/docs/developers/mcp-windsurf) |
|  Google Antigravity | `serverUrl` | [Antigravity](/docs/developers/mcp-antigravity) |
|  Gemini CLI | `httpUrl` | [Gemini CLI](/docs/developers/mcp-gemini-cli) |
|  Codex | TOML `mcp_servers` | [Codex](/docs/developers/mcp-codex) |
|  OpenCode | `mcp.remote` | [OpenCode](/docs/developers/mcp-opencode) |
|  Google Jules | Host editor MCP | [Jules](/docs/developers/mcp-jules) |
|  Kimi Code | `mcpServers` + `url` | [Kimi Code](/docs/developers/mcp-kimi-code) |
| Other | Streamable HTTP | [Other clients](/docs/developers/mcp-other) |
Studio → **Developer → MCP** also shows copy-paste snippets for the same clients.
## Personal vs organization
The **API key** chooses the workspace. For both contexts in one client, use separate servers:
```text
https://mcp.stepwik.com/mcp?account=personal
https://mcp.stepwik.com/mcp?account=organization
```
## OAuth clients
Some clients (for example Claude.ai) can connect without pasting a key. Authorize in the client, approve in Stepwik, and revoke from [Connected apps](/docs/developers/connected-apps).
## What works well
- `whoami` to confirm account / org context
- Search public labs and courses
- List workspace labs
- Create or update **private** drafts, then open the Studio `draft_url`
First prompts: “Who am I in Stepwik?”, “Search public labs about API onboarding.”, “Create a private draft lab that walks through X.”
## Tool catalog
MCP tool names still use **codelab** for labs (for example `create_codelab`). In Studio and the rest of the product docs, the same content is a **lab**. Prefer approved tags from `list_tags`; never invent tag labels.
### Discovery (public, no write scopes)
| Tool | Params | Returns / notes |
| --- | --- | --- |
| `get_stepwik_overview` | _(none)_ | Platform overview and public lab index (`llms.txt`) |
| `list_tags` | `q?`, `group?` | Approved tag catalog. Call before create/update. |
| `search_public_labs` | `q?`, `tags?`, `page?`, `per_page?` (max 50) | Public published labs |
| `search_public_courses` | `q?`, `tags?`, `page?`, `per_page?` | Public published courses |
| `get_public_lab` | `slug` | Full public lab by slug |
| `get_public_course` | `slug` | Full public course by slug |
| `get_public_stepflow` | `slug` | Public stepflow by slug |
### Account and workspace (API key)
| Tool | Scope | Params | Notes |
| --- | --- | --- | --- |
| `whoami` | valid key | _(none)_ | User/org id, account type, key id, scopes |
| `list_my_organizations` | `account:read` | _(none)_ | Memberships (personal key) or key’s org |
| `get_billing_info` | `billing:read` | _(none)_ | Plan / billing summary for the key’s account |
| `list_my_labs` | `labs:read` | `q?`, `tags?`, `page?`, `per_page?`, `type?` | Workspace labs (`type` e.g. `published` / `draft`) |
| `list_my_courses` | `courses:read` | `q?`, `tags?`, `page?`, `per_page?`, `type?` | Workspace courses |
| `get_lab_metadata` | `labs:read` | `slug` | Lab metadata; prefer `get_codelab` for full markdown |
| `get_course_metadata` | `courses:read` | `slug` | Course metadata; prefer `get_course` for ordered labs |
### Create and update drafts (API key)
| Tool | Scope | Required params | Important rules |
| --- | --- | --- | --- |
| `get_codelab_import_format` | `labs:read` / write flows | _(none)_ | Call before `create_codelab` for schema and writing guidelines |
| `create_codelab` | `labs:write` | `title`, `description_short`, `level`, `sections` | Private draft only. `title` 5–70 chars; `description_short` 25–160; `level` Beginner/Intermediate/Advanced; each section needs `title`, `content`, `order`; **section `content` must start with `##` matching the section title**. Optional `tags` (max 5 from `list_tags`), `duration`, `category`. Always show returned `draft_url`. |
| `get_codelab` | `labs:read` | `slug` | Full owned/co-authored/org lab with markdown sections |
| `update_codelab` | `labs:write` | `slug` | Send only fields to change. To change body, send full `sections` array (read first with `get_codelab`). |
| `get_course_import_format` | `courses:read` / write flows | _(none)_ | Call before `create_course` |
| `create_course` | `courses:write` | `title`, `description_short`, `level`, `tags` | Private draft. `tags` min 1 max 10 from `list_tags`. Optional `labs` (`slug` or `_id` + `order`). Show `draft_url`. |
| `get_course` | `courses:read` | `slug` | Full course + ordered labs |
| `update_course` | `courses:write` | `slug` | Partial updates. To replace the path, send full `labs` array. |
### Common failures
| Symptom | Likely cause | What to do |
| --- | --- | --- |
| Auth / invalid token | Missing or wrong `stepwik-api-key` header | Create an active key in Studio → **Developer → API Keys**; header name must be exact |
| Empty workspace / wrong org | Key bound to another account | Confirm with `whoami`; use `?account=personal` or `?account=organization` if you run two servers |
| Cannot create or update drafts | Missing `labs:write` / `courses:write` | Add write scopes on the key and reconnect the client |
| Validation error on create | Title/description length, empty sections, or section markdown not starting with `## Title` | Call `get_codelab_import_format` / `get_course_import_format` and fix payload |
| Tag rejected | Invented tags | Call `list_tags` and pass returned labels or slugs only |
| Not found / no access | Wrong slug or no ownership | Use `list_my_labs` / `search_public_*`; org keys only see that org’s content |
| Rate limited | Freemium daily quota or burst caps | See [API keys](/docs/developers/api-keys) and [API Playground](/docs/developers/api-playground) |
| Expected publish via MCP | Publish is Studio-only | Open `draft_url`, polish, then [publish](/docs/labs/publish-and-share) |
## What stays in Studio
Publishing, visibility, domain / branding, billing checkouts, and irreversible org admin actions stay in Studio, not MCP.
## Rate limits
| Limit | Value |
| --- | --- |
| Freemium daily quota | 50 requests / UTC day |
| Paid plans | Unlimited daily quota |
| Burst | Per-route caps: see [API Playground](/docs/developers/api-playground) |
## Troubleshooting
| Symptom | Check |
| --- | --- |
| Auth failures | Key active; header exactly `stepwik-api-key` |
| Empty workspace | Key matches the intended personal/org workspace |
| Cannot create drafts | Key has `labs:write` / `courses:write` |
| Stale after config change | Reload / reconnect MCP in the client |
| Rate limited | [API keys](/docs/developers/api-keys) limits |
## Next steps
Add Stepwik to `~/.cursor/mcp.json` and reload MCP in Settings.
Pick scopes, copy the secret once, and review plan rate limits.
Call the same Enterprise API routes MCP uses: with live responses.
Review or revoke OAuth grants for Claude.ai and similar clients.
---
## List labs
URL: https://stepwik.com/docs/developers/api-labs-list
Paginated list of labs in the key’s workspace. Requires labs:read.
## Related
Try this route interactively in Studio.
Create keys and choose scopes.
Read a full lab by slug.
Create a private draft lab.
---
## Windsurf
URL: https://stepwik.com/docs/developers/mcp-windsurf
Connect Stepwik MCP in Windsurf using mcp_config.json.
## Steps
Create an [API key](/docs/developers/api-keys) in Studio.
Open Windsurf MCP settings, or edit `mcp_config.json` directly.
Paste the config below and substitute your real API key.
Reload MCP servers in Windsurf.
## Config path
```text
~/.codeium/windsurf/mcp_config.json
```
## Config
```json
{
"mcpServers": {
"stepwik": {
"url": "https://mcp.stepwik.com/mcp",
"headers": {
"stepwik-api-key": "stepwik__"
}
}
}
}
```
## Verify
Confirm the Stepwik server shows as connected in Windsurf MCP settings, then ask the agent to run Stepwik `whoami`.
## Related
Endpoint, auth header, clients, and troubleshooting.
Create keys and scopes for your workspace.
Connect Stepwik MCP in Cursor with mcp.json and an API key.
---
## Google Antigravity
URL: https://stepwik.com/docs/developers/mcp-antigravity
Connect Stepwik MCP in Google Antigravity using serverUrl.
Antigravity expects **`serverUrl`** (not `url`) for HTTP MCP servers.
## Steps
Create an [API key](/docs/developers/api-keys) in Studio.
In Antigravity: **Agent panel → ⋯ → MCP Servers → Manage → View raw config**.
Add the block below.
Click **Refresh** under Customizations → MCP Servers, or restart Antigravity.
## Config paths
```text
~/.gemini/antigravity/mcp_config.json
~/.gemini/config/mcp_config.json
```
## Config
```json
{
"mcpServers": {
"stepwik": {
"serverUrl": "https://mcp.stepwik.com/mcp",
"headers": {
"stepwik-api-key": "stepwik__"
}
}
}
}
```
If you paste a Cursor-style `url` field, Antigravity may not connect. Use `serverUrl`.
## Related
Endpoint, auth header, clients, and troubleshooting.
Create keys and scopes for your workspace.
Add Stepwik MCP to Gemini CLI with httpUrl in settings.json.
---
## Lab format
URL: https://stepwik.com/docs/developers/api-labs-format
JSON schema for LLM / MCP lab import. Requires labs:write.
Requires `labs:write` even though this is a GET: the schema is for create flows.
## Related
Try this route interactively in Studio.
Create keys and choose scopes.
Create a private draft from the schema.
---
## Gemini CLI
URL: https://stepwik.com/docs/developers/mcp-gemini-cli
Add Stepwik MCP to Gemini CLI with httpUrl in settings.json.
Use a Stepwik API key that is **separate** from your Gemini auth.
## Steps
Create a Stepwik [API key](/docs/developers/api-keys) in Studio.
Add the `mcpServers` block to `~/.gemini/settings.json` (or project `.gemini/settings.json`).
Gemini CLI uses **`httpUrl`** for Streamable HTTP MCP servers.
Restart the CLI and verify with `/mcp list`.
## Config path
```text
~/.gemini/settings.json
.gemini/settings.json
```
## Config
```json
{
"mcpServers": {
"stepwik": {
"httpUrl": "https://mcp.stepwik.com/mcp",
"headers": {
"stepwik-api-key": "stepwik__"
}
}
}
}
```
Field name is `httpUrl`, not `url` or `serverUrl`.
## Related
Endpoint, auth header, clients, and troubleshooting.
Create keys and scopes for your workspace.
Connect Stepwik MCP in Antigravity using serverUrl.
---
## Get lab
URL: https://stepwik.com/docs/developers/api-labs-get
Full lab with markdown sections. Requires labs:read.
## Related
Try this route interactively in Studio.
Create keys and choose scopes.
Paginated list of labs.
Update a lab by slug.
---
## Codex
URL: https://stepwik.com/docs/developers/mcp-codex
Connect Stepwik MCP in Codex CLI or IDE extension with TOML config.
## Steps
Create a Stepwik [API key](/docs/developers/api-keys) in Studio.
Add the TOML block below to `~/.codex/config.toml` (or project `.codex/config.toml`).
Or run `codex mcp add stepwik --url https://mcp.stepwik.com/mcp` and set headers in config.
Restart Codex CLI or the IDE extension, then run `codex mcp list`.
## Config path
```text
~/.codex/config.toml
.codex/config.toml
```
## Config
```toml
[mcp_servers.stepwik]
url = "https://mcp.stepwik.com/mcp"
enabled = true
[mcp_servers.stepwik.http_headers]
stepwik-api-key = "stepwik__"
```
## Verify
```bash
codex mcp list
```
Confirm `stepwik` is listed and enabled.
## Related
Endpoint, auth header, clients, and troubleshooting.
Create keys and scopes for your workspace.
Add Stepwik as a remote MCP server in OpenCode.
---
## Create lab
URL: https://stepwik.com/docs/developers/api-labs-create
Create a private draft lab with markdown sections. Requires labs:write.
This endpoint never publishes. Drafts stay private until you publish in Studio.
## Related
Try this route interactively in Studio.
Create keys and choose scopes.
JSON schema for create payloads.
Update an existing draft.
---
## OpenCode
URL: https://stepwik.com/docs/developers/mcp-opencode
Add Stepwik as a remote MCP server in OpenCode with opencode.jsonc.
## Steps
Create a Stepwik [API key](/docs/developers/api-keys) in Studio.
Add the `mcp.remote` entry to your `opencode.jsonc` config file.
Set `oauth` to `false` if your OpenCode version supports it for API-key servers.
Restart OpenCode and run `opencode mcp list`.
## Config path
```text
~/.config/opencode/opencode.jsonc
opencode.jsonc (project root)
```
## Config
```json
{
"$schema": "https://opencode.ai/config.json",
"mcp": {
"stepwik": {
"type": "remote",
"url": "https://mcp.stepwik.com/mcp",
"enabled": true,
"oauth": false,
"headers": {
"stepwik-api-key": "stepwik__"
}
}
}
}
```
## Related
Endpoint, auth header, clients, and troubleshooting.
Create keys and scopes for your workspace.
Connect Stepwik MCP in Codex CLI or IDE extension with TOML.
---
## Update lab
URL: https://stepwik.com/docs/developers/api-labs-update
Partial update of a lab. Requires labs:write. Owner or co-author only.
Does not publish: open the draft in Studio to publish.
## Related
Try this route interactively in Studio.
Create keys and choose scopes.
Read the lab before updating.
Create a new private draft.
---
## Google Jules
URL: https://stepwik.com/docs/developers/mcp-jules
Use Stepwik MCP alongside Google Jules through your host editor’s MCP config.
Jules uses MCP through a **host** editor or assistant (for example Cursor or Claude Desktop). Add Stepwik on that host, not as a Jules cloud API key from jules.google.
## Steps
Create a Stepwik [API key](/docs/developers/api-keys) in Studio (not your Jules API key).
Paste the `mcpServers` block into your host’s MCP config (e.g. `~/.cursor/mcp.json` or Claude Desktop config).
Reload MCP in the host app.
Use Jules and Stepwik tools together from that host.
## Config path
```text
MCP host config (e.g. ~/.cursor/mcp.json or Claude Desktop config)
```
## Config
```json
{
"mcpServers": {
"stepwik": {
"url": "https://mcp.stepwik.com/mcp",
"headers": {
"stepwik-api-key": "stepwik__"
}
}
}
}
```
Prefer following the host-specific guide: [Cursor](/docs/developers/mcp-cursor) or [Claude Desktop](/docs/developers/mcp-claude-desktop).
## Related
Endpoint, auth header, clients, and troubleshooting.
Create keys and scopes for your workspace.
Connect Stepwik MCP in Cursor with mcp.json and an API key.
---
## List courses
URL: https://stepwik.com/docs/developers/api-courses-list
Paginated list of courses in the key’s workspace. Requires courses:read.
## Related
Try this route interactively in Studio.
Create keys and choose scopes.
Read a course with ordered labs.
Create a private draft course.
---
## Course format
URL: https://stepwik.com/docs/developers/api-courses-format
JSON schema for creating courses (MCP create_course). Requires courses:write.
Requires `courses:write` even though this is a GET: the schema is for create flows.
## Related
Try this route interactively in Studio.
Create keys and choose scopes.
Create a private draft from the schema.
---
## Kimi Code
URL: https://stepwik.com/docs/developers/mcp-kimi-code
Connect Stepwik MCP in Kimi Code with mcp.json or /mcp-config.
## Steps
Create a Stepwik [API key](/docs/developers/api-keys) in Studio.
Add the `mcpServers` entry to `~/.kimi-code/mcp.json` (HTTP servers use `url` + `headers`).
Or run `/mcp-config` in Kimi Code CLI to add the server interactively.
Start a new session and run `/mcp` to verify the connection.
## Config path
```text
~/.kimi-code/mcp.json
.kimi-code/mcp.json
```
## Config
```json
{
"mcpServers": {
"stepwik": {
"url": "https://mcp.stepwik.com/mcp",
"headers": {
"stepwik-api-key": "stepwik__"
}
}
}
}
```
## Related
Endpoint, auth header, clients, and troubleshooting.
Create keys and scopes for your workspace.
Connect any Streamable HTTP MCP client with url and stepwik-api-key.
---
## Get course
URL: https://stepwik.com/docs/developers/api-courses-get
Course with ordered labs. Requires courses:read.
## Related
Try this route interactively in Studio.
Create keys and choose scopes.
Paginated list of courses.
Update a course by slug.
---
## Other clients
URL: https://stepwik.com/docs/developers/mcp-other
Connect any Streamable HTTP MCP client to Stepwik with url and stepwik-api-key.
Any client that supports **remote HTTP MCP** (Streamable HTTP) can call Stepwik.
## Steps
Use a remote HTTP MCP server transport.
Set the server URL to `https://mcp.stepwik.com/mcp`.
Send header `stepwik-api-key` with your Studio API key on every request.
If your client uses the `mcpServers` JSON format, use the Cursor-compatible config below.
## Generic config
```json
{
"mcpServers": {
"stepwik": {
"url": "https://mcp.stepwik.com/mcp",
"headers": {
"stepwik-api-key": "stepwik__"
}
}
}
}
```
Some clients rename fields (`serverUrl`, `httpUrl`, `type: "http"`). Prefer the dedicated guide when your IDE is listed under [MCP setup](/docs/developers/mcp).
## Related
Endpoint, auth header, clients, and troubleshooting.
Create keys and scopes for your workspace.
Try Stepwik API calls interactively in Studio.
---
## Create course
URL: https://stepwik.com/docs/developers/api-courses-create
Create a private draft course and attach labs by slug. Requires courses:write.
This endpoint never publishes. Drafts stay private until you publish in Studio.
Labs referenced by slug must already exist (and be accessible) in the workspace.
## Related
Try this route interactively in Studio.
Create keys and choose scopes.
JSON schema for create payloads.
Update an existing draft.
---
## Update course
URL: https://stepwik.com/docs/developers/api-courses-update
Partial update of a course. Requires courses:write. Owner or co-author only.
Does not publish: open the draft in Studio to publish.
## Related
Try this route interactively in Studio.
Create keys and choose scopes.
Read the course before updating.
Create a new private draft.
---
## Integrations overview
URL: https://stepwik.com/docs/developers/integrations
Connect Claude, GitHub, Google Slides, editor embeds, and Google Analytics from Studio Developer tools.
## Overview
Studio → **Developer → Integrations** is the control center for connecting external tools to your workspace.
| Group | Examples | Connection |
| --- | --- | --- |
| **MCP / assistants** | Claude | OAuth / MCP authorize |
| **AI generation sources** | GitHub, Google Slides | OAuth |
| **Editor embeds** | YouTube, Figma, Mermaid, CodePen, … | Slash command only, no OAuth |
| **Analytics** | Google Analytics | Measurement ID |
## Connectable integrations
Authorize Claude Desktop / Claude.ai via MCP (OAuth / MCP).
Generate labs from repositories via OAuth.
Generate labs from presentations via OAuth.
Track subdomain portal traffic with a Measurement ID.
## Editor embeds
These are available in the lab editor without connecting an account. Use the slash command or Embeds menu.
Embed with `/youtube`.
Embed with `/twitter`.
Embed with `/codepen`.
Embed with `/replit`.
Embed with `/codesandbox`.
Embed with `/figma`.
Embed with `/mermaid`.
## Also in Developer tools
Create scoped keys for MCP and automations.
Connect AI clients over Model Context Protocol.
Try authenticated Enterprise API requests in Studio.
Review and revoke OAuth grants.
## Related
Map of Developer tools under Build with Stepwik.
AI generation from GitHub, PDF, slides, and more.
---
## API Playground
URL: https://stepwik.com/docs/developers/api-playground
Interactive Enterprise API catalog in Studio: auth, limits, and links to every endpoint.
The **API Playground** is the interactive catalog of Stepwik’s Enterprise API (`/v1/eapi/...`). It mirrors what MCP and automations can call with a `stepwik_*` key. Open it from Studio → **Developer → API Keys** (Playground) or from the MCP setup guide.
## Before you start
Create an [API key](/docs/developers/api-keys) in the workspace you want to automate (personal or organization).
Enable the scopes required by each endpoint (see the API reference pages below).
Open the playground, paste the key, and optionally **Remember** it in this browser only.
Pick an endpoint, fill path / query / body fields, and **Send**.
Inspect status, latency, and JSON; copy **curl**, fetch, or other samples from the code tab.
Auth header used by the playground and all clients:
```http
stepwik-api-key: stepwik__
```
Base URL is your Stepwik API host (same origin the playground uses), with paths under `/v1/eapi/...`.
Creates and updates always produce **private drafts**. Publishing stays in Studio.
## Limits (plan + rate)
Two layers apply to playground, curl, SDKs, and MCP (MCP hops count toward the same daily quota as HTTP):
### Daily plan quota
| Plan | Daily Enterprise API requests (UTC day) |
| --- | --- |
| **Freemium** | **50** / day |
| **Pro / Organization** (and other paid plans with API access) | Unlimited (`null` / ∞) |
Studio shows remaining requests on the playground when your plan has a numeric limit. When you hit the cap, further calls return `PLAN_API_DAILY_LIMIT_EXCEEDED` until the next UTC day.
### Per-endpoint rate limits (burst)
Sliding window per API key (15 minutes):
| Endpoints | Max requests / 15 min |
| --- | --- |
| `GET /whoami` | 300 |
| `GET /organizations`, `GET /billing` | 120 |
| Labs list / get / format | 100 |
| Courses list / get / format | 100 |
| `PUT` lab or course (update) | 60 |
| `POST` lab or course (create) | 30 |
If you exceed a window you get a rate-limit error: wait or reduce traffic.
### Other guardrails
- Key must match an **active** user (and org, for org keys) with API access on the subscription.
- Missing scopes → forbidden / missing-scope errors.
- Prefer least-privilege scopes; clear remembered keys on shared machines.
- Monitor traffic under API Keys → **Usage** and **Logs** (org keys can include `logs:read`).
## API reference
Each route below has its own page with method, scope, parameters, and examples, matching the Studio playground categories **Account**, **Labs**, and **Courses**.
### Account
Account context for the key: user id, organization id, and scopes.
List organizations for the authenticated user (`account:read`).
Subscription and billing summary (`billing:read`).
### Labs
Paginated list of labs (`labs:read`).
JSON schema for LLM / MCP lab import (`labs:write`).
Full lab with markdown sections (`labs:read`).
Create a private draft lab (`labs:write`).
Update a lab (partial) (`labs:write`).
### Courses
Paginated list of courses (`courses:read`).
JSON schema for MCP course create (`courses:write`).
Course with ordered labs (`courses:read`).
Create a private draft course (`courses:write`).
Update a course (partial) (`courses:write`).
## Suggested walkthrough
[GET /whoami](/docs/developers/api-whoami) to confirm workspace and scopes.
[GET /labs](/docs/developers/api-labs-list) to list content (needs `labs:read`).
[GET /labs/format](/docs/developers/api-labs-format) to inspect the create schema (needs `labs:write`).
[POST /labs](/docs/developers/api-labs-create) to create a draft, then open the Studio URL from the response.
Polish and [publish](/docs/labs/publish-and-share) in Studio.
## Related
Scopes, rotation, usage, and plan limits.
Same API surface from AI clients over Model Context Protocol.
Map of Developer tools under Build with Stepwik.
Product overview for Enterprise API access.
---
## Connected apps
URL: https://stepwik.com/docs/developers/connected-apps
Review and revoke OAuth apps (such as Claude) that can access your workspace via MCP.
## Overview
**Connected apps** lists OAuth authorizations that can access your Stepwik workspace through MCP, for example Claude.ai sessions.
Open Studio → **Developer → Connected apps** (also linked from Integrations and the MCP guide).
## What you see
For each grant:
- App name
- Workspace context (personal or organization)
- Scopes granted
- Connected date
## Revoke access
Open **Connected apps** in Studio → **Developer**.
Find the authorization you want to remove.
Click **Revoke** / disconnect and confirm.
Effects are immediate: that app can no longer call Stepwik MCP for this workspace. Existing labs are unchanged.
## Tips
Revoke unused Claude or other MCP grants regularly.
After revoking, reconnect from the [MCP guide](/docs/developers/mcp) or [Claude integration](/docs/developers/claude) if needed.
Prefer separate keys/workspaces for personal vs organization automation.
## Related
Authorize Claude Desktop / Claude.ai via MCP.
Connect AI clients and manage MCP setup guides.
Control center for OAuth, embeds, and analytics connections.
---
## Claude
URL: https://stepwik.com/docs/developers/claude
Authorize Claude Desktop or Claude.ai via MCP to work with your Stepwik content.
## Overview
**Type:** MCP connection: connect Claude to Stepwik over the Model Context Protocol (MCP). Once authorized, Claude can search labs, read courses, and help you create or update content in your workspace without leaving the assistant.
Open Studio → **Developer → Integrations** to manage this integration for the current workspace.
## What you can do
- Ask Claude to find and summarize labs or courses in your workspace
- Draft new labs from a prompt and import them into Studio
- Update owned labs with edits suggested in Claude Desktop or Claude.ai
- Inspect billing, organizations, and account context while working in Claude
## How to set it up
Set up the Stepwik MCP server in Claude, then authorize this workspace.
Open Studio → Developer → MCP and follow the Claude setup guide
Add the Stepwik MCP server URL in Claude Desktop or Claude.ai
Complete the OAuth authorization prompt for this workspace
Confirm the connection appears as Connected on this Integrations page
In Studio, open [MCP guide](/studio/developer/mcp?client=claude).
## Disconnect
This removes Claude’s MCP access to this workspace. Existing labs and content stay intact.
Effects:
- Claude Desktop and Claude.ai can no longer read or edit Stepwik content
- Active MCP sessions for this authorization will stop working
- You can reconnect anytime from the MCP guide
## Related
All editor embeds, AI sources, and connected apps in one place.
Endpoint, auth header, clients, and troubleshooting.
Add Stepwik MCP to Claude Desktop via claude_desktop_config.json.
---
## GitHub
URL: https://stepwik.com/docs/developers/github
Generate labs from public or private repositories with AI.
## Overview
**Type:** AI generation source: connect your GitHub account so Stepwik can read repositories and turn docs, READMEs, and source structure into step-by-step labs with Generate with AI.
Open Studio → **Developer → Integrations** to manage this integration for the current workspace.
## What you can do
- Turn a repository README and docs into a publishable lab
- Generate onboarding guides from private internal repos
- Create tutorial labs that walk through a codebase
- Refresh lab drafts when repository content changes
## How to set it up
Connect GitHub with OAuth, then generate labs from a repository.
Click Connect on this page and approve GitHub access
Open Studio → Labs → Generate with AI and choose GitHub as the source
Select a public or private repository you can access
Review the generated lab draft and publish when ready
After connecting, generate from Studio → Labs → [Generate with AI](/studio/labs/generate?source=repo).
## Disconnect
Stepwik will lose access to your GitHub account for AI lab generation.
Effects:
- You won’t be able to generate labs from GitHub repositories
- Private and public repo access used by Generate with AI will be removed
- You can reconnect GitHub anytime from this page
## Related
All editor embeds, AI sources, and connected apps in one place.
Turn GitHub, Slides, and other sources into draft labs with AI.
Slash commands, embeds, and authoring in the lab editor.
---
## Google Slides
URL: https://stepwik.com/docs/developers/google-slides
Generate labs from Google Slides presentations with AI.
## Overview
**Type:** AI generation source: connect Google Slides so Stepwik can import presentation content and convert decks into structured labs with Generate with AI.
Open Studio → **Developer → Integrations** to manage this integration for the current workspace.
## What you can do
- Convert training decks into interactive Stepwik labs
- Turn workshop slides into step-by-step learning paths
- Reuse existing Google Slides content without rewriting from scratch
- Generate draft labs quickly from presentation outlines
## How to set it up
Connect Google, pick a presentation, then generate a lab.
Click Connect on this page and approve Google access
Open Studio → Labs → Generate with AI and choose Google Slides as the source
Use Google Picker to select a presentation
Review the generated lab draft and publish when ready
After connecting, generate from Studio → Labs → [Generate with AI](/studio/labs/generate?source=slides).
## Disconnect
Stepwik will lose access to your Google account for Slides-based lab generation.
Effects:
- You won’t be able to generate labs from Google Slides presentations
- Google Picker access for selecting presentations will be removed
- You can reconnect Google Slides anytime from this page
## Related
All editor embeds, AI sources, and connected apps in one place.
Turn GitHub, Slides, and other sources into draft labs with AI.
Slash commands, embeds, and authoring in the lab editor.
---
## YouTube
URL: https://stepwik.com/docs/developers/youtube
Embed YouTube videos in lab sections via slash command.
## Overview
No account connection is required. Type `/youtube` (or use the Embeds menu) to insert a video player, then paste a YouTube URL.
**Slash command:** `/youtube`
**Type:** Editor embed
Open Studio → **Developer → Integrations** to manage this integration for the current workspace.
## What you can do
- Add demo walkthroughs or product videos next to written steps
- Embed conference talks or tutorial clips in a lab
- Show recorded setup videos without leaving Stepwik
- Keep learners on-page instead of linking out to YouTube
## How to set it up
Insert a YouTube embed from the lab editor slash menu.
Open a lab in the Studio editor
Type /youtube or open slash commands and choose YouTube under Embeds
Paste a YouTube watch or share URL into the embed field
Publish the lab: learners see the video inline
## Related
All editor embeds, AI sources, and connected apps in one place.
Slash commands, embeds, and authoring in the lab editor.
---
## X (formerly Twitter)
URL: https://stepwik.com/docs/developers/twitter
Embed posts from X in lab sections via slash command.
## Overview
No account connection is required. Type `/twitter` to insert a tweet embed, then paste a public post URL.
**Slash command:** `/twitter`
**Type:** Editor embed
Open Studio → **Developer → Integrations** to manage this integration for the current workspace.
## What you can do
- Quote announcements or launch threads inside a lab
- Reference community tips without leaving the guide
- Show product updates shared on X next to related steps
- Keep social proof and discussion context in-line
## How to set it up
Insert an X post embed from the lab editor slash menu.
Open a lab in the Studio editor
Type /twitter or open slash commands and choose X under Embeds
Paste a public post URL into the embed field
Publish the lab: learners see the post inline
## Related
All editor embeds, AI sources, and connected apps in one place.
Slash commands, embeds, and authoring in the lab editor.
---
## CodePen
URL: https://stepwik.com/docs/developers/codepen
Embed CodePen demos in lab sections via slash command.
## Overview
No account connection is required. Type `/codepen` to insert a Pen embed, then paste a CodePen URL.
**Slash command:** `/codepen`
**Type:** Editor embed
Open Studio → **Developer → Integrations** to manage this integration for the current workspace.
## What you can do
- Show live HTML/CSS/JS examples beside instructions
- Let learners explore interactive front-end demos
- Reuse existing Pens instead of pasting static code only
- Illustrate UI patterns with a runnable preview
## How to set it up
Insert a CodePen embed from the lab editor slash menu.
Open a lab in the Studio editor
Type /codepen or open slash commands and choose CodePen under Embeds
Paste a CodePen URL into the embed field
Publish the lab: learners can interact with the Pen inline
## Related
All editor embeds, AI sources, and connected apps in one place.
Slash commands, embeds, and authoring in the lab editor.
---
## Replit
URL: https://stepwik.com/docs/developers/replit
Embed Repls in lab sections via slash command.
## Overview
No account connection is required. Type `/replit` to insert a Repl embed, then paste a Replit URL.
**Slash command:** `/replit`
**Type:** Editor embed
Open Studio → **Developer → Integrations** to manage this integration for the current workspace.
## What you can do
- Give learners a runnable environment next to the steps
- Embed starter projects for coding exercises
- Demo multi-file apps without leaving the lab
- Share collaborative Repls as part of a tutorial
## How to set it up
Insert a Replit embed from the lab editor slash menu.
Open a lab in the Studio editor
Type /replit or open slash commands and choose Replit under Embeds
Paste a Replit project URL into the embed field
Publish the lab: learners can open the Repl inline
## Related
All editor embeds, AI sources, and connected apps in one place.
Slash commands, embeds, and authoring in the lab editor.
---
## CodeSandbox
URL: https://stepwik.com/docs/developers/codesandbox
Embed CodeSandbox projects in lab sections via slash command.
## Overview
No account connection is required. Type `/codesandbox` to insert a sandbox embed, then paste a CodeSandbox URL.
**Slash command:** `/codesandbox`
**Type:** Editor embed
Open Studio → **Developer → Integrations** to manage this integration for the current workspace.
## What you can do
- Embed full-stack or front-end sandboxes in tutorials
- Share starter templates learners can fork and edit
- Show multi-file projects with live preview
- Keep coding exercises inside the lab experience
## How to set it up
Insert a CodeSandbox embed from the lab editor slash menu.
Open a lab in the Studio editor
Type /codesandbox or open slash commands and choose CodeSandbox under Embeds
Paste a CodeSandbox URL into the embed field
Publish the lab: learners can explore the sandbox inline
## Related
All editor embeds, AI sources, and connected apps in one place.
Slash commands, embeds, and authoring in the lab editor.
---
## Figma
URL: https://stepwik.com/docs/developers/figma
Embed Figma files, prototypes, and FigJam boards via slash command.
## Overview
No account connection is required. Type `/figma` to insert a Figma embed, then paste a shareable file, prototype, or FigJam URL.
**Slash command:** `/figma`
**Type:** Editor embed
Open Studio → **Developer → Integrations** to manage this integration for the current workspace.
## What you can do
- Show UI designs next to implementation steps
- Embed interactive prototypes for walkthroughs
- Reference FigJam boards and flows inside a lab
- Keep design context on-page instead of linking out
## How to set it up
Insert a Figma embed from the lab editor slash menu.
Open a lab in the Studio editor
Type /figma or open slash commands and choose Figma under Embeds
Paste a shareable Figma file, prototype, or FigJam URL
Publish the lab: learners see the Figma canvas inline
## Related
All editor embeds, AI sources, and connected apps in one place.
Slash commands, embeds, and authoring in the lab editor.
---
## Mermaid
URL: https://stepwik.com/docs/developers/mermaid
Insert Mermaid flowcharts, sequence diagrams, and more via slash command.
## Overview
No account connection is required. Type `/mermaid` to insert a diagram block, then edit the Mermaid source. Diagrams render inline. No mermaid.live link needed.
**Slash command:** `/mermaid`
**Type:** Editor embed
Open Studio → **Developer → Integrations** to manage this integration for the current workspace.
## What you can do
- Document architecture with flowcharts
- Show sequence diagrams for APIs and workflows
- Add ER diagrams or state machines next to steps
- Keep diagrams editable as text inside the lab
## How to set it up
Insert a Mermaid diagram from the lab editor slash menu.
Open a lab in the Studio editor
Type /mermaid or open slash commands and choose Mermaid under Advanced
Edit the diagram source and save
Publish the lab: learners see the rendered diagram inline
## Related
All editor embeds, AI sources, and connected apps in one place.
Slash commands, embeds, and authoring in the lab editor.
---
## Google Analytics
URL: https://stepwik.com/docs/developers/google-analytics
Add a GA4 Measurement ID to track traffic on your Stepwik subdomain portal.
## Overview
**Google Analytics** connects a GA4 Measurement ID (`G-…`) to your public subdomain portal so you can measure learner traffic outside Studio.
Configure it in Studio → **Developer → Integrations → Analytics** (or Domain / SEO settings depending on workspace).
## What gets tracked
- Public portal and published lab visits on your subdomain
- After visitor consent, when enabled for the workspace
Studio and admin pages are not included in portal analytics.
## How to set it up
Open Studio → **Developer → Integrations**
Open the **Analytics** tab
Enter your GA4 Measurement ID (`G-XXXXXXXX`)
Enable tracking and save
## Tips
- Use a dedicated GA4 property for your learning portal
- Confirm the Measurement ID format starts with `G-`
- Pair with [portal branding](/docs/teams-and-portals/branding) so shared links stay on your domain
## Related
All editor embeds, AI sources, and connected apps in one place.
Learner progress, completions, and portal traffic.
Customize your public learning hub and subdomain.
---
## Webhooks
URL: https://stepwik.com/docs/developers/webhooks
Outbound webhooks for organization events. Coming soon.
Webhooks will let an organization send workspace events to your HTTPS endpoints — for example when content is published or membership changes.
## Current status
Webhooks are **coming soon**. The feature is in the pipeline and is not available in Studio yet.
When it ships, this page will cover endpoint URLs, signing secrets, event types, retries, and delivery logs.
Until then, use [API keys](/docs/developers/api-keys) for automations and the [API playground](/docs/developers/api-playground) to explore the API.
## Related
Map of Developer tools under Build with Stepwik.
Scoped keys for MCP, automations, and the playground.
Review and revoke OAuth grants for MCP clients.
Org workspace context where webhooks will apply.
---
# Teams and Portals
Organizations, courses, custom domains, and branded learning hubs.
## Overview
URL: https://stepwik.com/docs/teams-and-portals/overview
Run Stepwik with organizations, courses, roles, and branded learning portals.
Use an **organization** workspace when content should be owned by a team, with members, roles, submissions, and a shared hub.
## What teams get
- Shared labs, courses, and stepflows
- [Members and roles](/docs/teams-and-portals/members-and-roles) (system + custom)
- [Lab submissions](/docs/teams-and-portals/lab-submissions) from personal workspaces
- [Domain and SEO](/docs/teams-and-portals/domain-and-seo) for the org hub
- [Branding](/docs/teams-and-portals/branding) via **Manage → General**
- [Billing](/docs/getting-started/billing) and seats
## Choose the right surface
| Need | Use |
| --- | --- |
| Shared ownership | [Organizations](/docs/teams-and-portals/organizations) |
| Ordered curriculum | [Courses](/docs/teams-and-portals/courses) |
| Hub subdomain + SEO | [Domain and SEO](/docs/teams-and-portals/domain-and-seo) |
| Org profile look | [Branding](/docs/teams-and-portals/branding) |
| Certificates | [Certifications](/docs/analytics/certifications) |
| Quiet stakeholder review | Lab visibility **Unlisted** (Pro+) |
## Recommended rollout
[Create or join an organization](/docs/teams-and-portals/create-and-join-organization), then switch Studio to that workspace.
Invite members and assign roles.
Author drafts, publish (or use moderation / submissions when required).
Group labs into courses.
Set subdomain and portal SEO before sharing widely.
## Personal vs org
| | Personal | Organization |
| --- | --- | --- |
| Catalog ownership | Individual | Shared |
| Access model | Co-authors on content | Members + roles |
| Portal settings | Domain / SEO | Manage → Domain / SEO / General |
| Best for | Personal brand, experiments | Customer education, enablement |
## Guides in this section
Create a team workspace or join with an invite.
Manage menu map and org settings overview.
Transfer ownership or delete the org.
Invite teammates and control permissions.
Sequence labs into learning paths.
Logo, cover, and org profile appearance.
Subdomain, portal metadata, and appearance.
Move personal labs into an org catalog.
---
## Create and join an organization
URL: https://stepwik.com/docs/teams-and-portals/create-and-join-organization
Create a team workspace from Studio, set a subdomain, or join an existing organization with an invite code.
Use an **organization** when several people need a shared Studio workspace for labs, courses, branding, and billing. Personal content stays in your personal workspace unless you [submit a lab](/docs/teams-and-portals/lab-submissions) to the org.
## Create an organization
Path: Studio org switcher → **Create organization** (`/studio/create-organization`)
In Studio, open the workspace switcher and click **Create organization**, or go to `/studio/create-organization`.
Enter the fields below, then click **Create organization**.
After create, Studio sends you to **Manage → Pricing** so you can pick an organization plan.
Switch to the org workspace, then invite people from [Members and roles](/docs/teams-and-portals/members-and-roles).
### Fields
| Field | Notes |
| --- | --- |
| **Organization name** | Required, 2-100 characters |
| **Subdomain** | Required: becomes `{subdomain}.stepwik.com`. Lowercase letters and numbers only, 3-15 characters. Some names are reserved (for example `studio`, `admin`) |
| **Contact email** | Required: often prefilled from your account |
| **Category** | Required: Technology, Education, Healthcare, Finance, E-commerce, Entertainment, Non-profit, Government, or Other |
You become the **Owner** of the new organization.
### Limits
Creating an org requires a personal plan that includes organization creation. Studio also enforces a **max organizations** limit (counted for workspaces where you are Owner or Co-Owner). If you hit the cap, Studio shows **Organization Limit Reached** and asks you to upgrade or contact support.
## Join an organization
Path: Studio org switcher → **Join organization** (`/studio/join-organization`)
You need an **invite code** from an org admin (email invite or Members invite flow).
Check your email for an invite, or ask an admin to invite you from **Manage → Members**.
In Studio, open the workspace switcher → **Join organization**, or open the invite link (it may include `?invite=` and fill the code for you).
Paste the code and click **Join organization**.
After joining, Studio switches you into the org. Use the org switcher anytime to move between personal and org workspaces.
Create content in the workspace that should own it. Labs created in personal stay personal until you submit them to the org.
## After you are in
| Next step | Docs |
| --- | --- |
| Invite members and assign roles | [Members and roles](/docs/teams-and-portals/members-and-roles) |
| Branding, domain, SEO | [Branding](/docs/teams-and-portals/branding), [Domain and SEO](/docs/teams-and-portals/domain-and-seo) |
| Transfer ownership or delete the org | [Organization settings](/docs/teams-and-portals/organization-settings) |
| Org billing and seats | [Billing](/docs/getting-started/billing) |
## Related
Manage menu map and what each org page is for.
Invites, system roles, and custom permissions.
Org switcher and Organization settings entry.
---
## Organizations
URL: https://stepwik.com/docs/teams-and-portals/organizations
Shared Studio workspaces for teams: Manage menu map, My Progress, and links to create, join, and admin settings.
An **organization** is a shared Studio workspace. Members create labs, courses, and stepflows together; admins control membership, billing, domain, and branding.
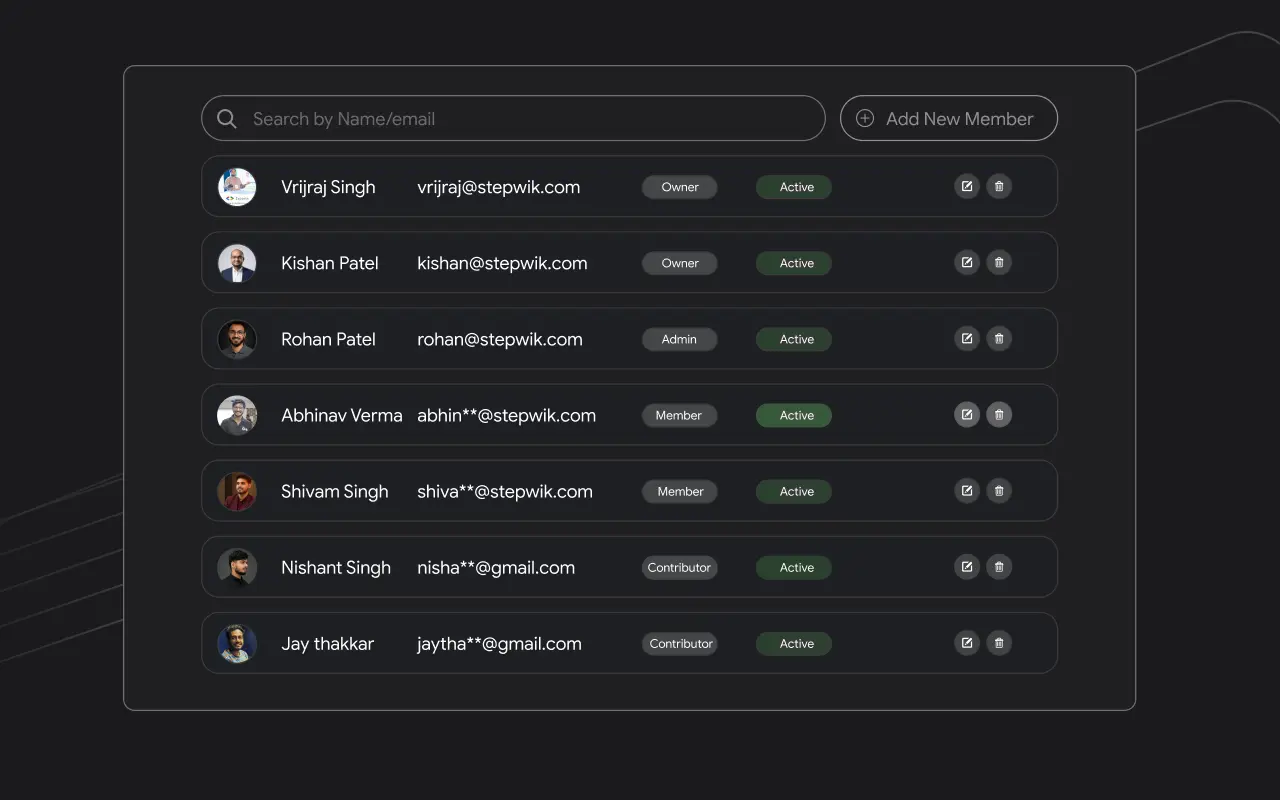 ## Create or join
| Action | Where |
| --- | --- |
| Create | Org switcher → **Create organization** |
| Join | Org switcher → **Join organization** (invite code or email link) |
Full walkthrough: [Create and join an organization](/docs/teams-and-portals/create-and-join-organization).
After you create or join, switch to the org from the Studio org switcher. Content stays in the workspace where it was created unless you [submit a lab](/docs/teams-and-portals/lab-submissions) from personal to org.
## Organization settings (Manage)
Path: **Organization settings** (`Manage`)
| Page | Purpose |
| --- | --- |
| Overview | Org usage snapshot |
| General | Profile, logo, cover, socials, category |
| Members | Invite and manage people |
| Roles | System and custom roles |
| Submissions | Review personal→org lab submissions |
| Domain | Subdomain (custom domain coming soon) |
| SEO | Portal metadata and social image |
| Billing | Plan, seats, invoices |
| Settings | [Ownership transfer and delete](/docs/teams-and-portals/organization-settings) |
Create a workspace, set a subdomain, or join with an invite code.
Transfer ownership or permanently delete the org.
Invite people and assign system or custom roles.
Review personal→org lab submissions.
Configure the org hub subdomain and metadata.
Logo, cover, and org profile fields.
Plan, seats, and invoices for the org.
## My Progress (org)
Org workspaces include **My Progress** for labs you started as a learner: in progress vs completed, with continue / review actions. See [My Progress](/docs/getting-started/my-progress).
## Related
When to use an org and how to roll out.
Group labs into structured learning paths.
Co-authors and shared editing on labs.
Messages from learners on published labs.
Sidebar layout and workspace switching.
---
## Courses
URL: https://stepwik.com/docs/teams-and-portals/courses
Create and manage courses in Studio: add labs as modules, order the path, publish, and track stats.
A **course** groups labs into one learning path with shared title, description, cover, and progress. Manage courses under Studio → **Courses** (when enabled on your plan).
Course creation requires a **Pro plan or above**. The free plan supports unlimited standalone labs but not courses.
## Studio Courses list
| Action | Purpose |
| --- | --- |
| **Create** | Start a new course |
| Open a course | Edit structure, publish, share |
| **Stats** | Course-level views and learner progress |
| **View** | Preview the course as learners see it |
## Create a course
In Studio, open **Courses**, then **Create**.
Write an action-oriented title and short description for the course card.
Attach existing labs from your workspace library. Each lab becomes one module.
Drag modules to set the learning sequence.
Choose visibility and publish. You can keep editing and republish later.
## Course editor
In the course editor you can:
- Change title, description, and cover
- Add, remove, and reorder labs
- Open **Publish** / visibility controls
- **Share** with collaborators
- Jump to **Stats** for engagement
Learners typically follow modules in order. Reordering does not reset someone mid-course; they resume where they left off.
## Visibility
| Visibility | Who can access |
| --- | --- |
| Public | Anyone with the link; discoverable when indexed |
| Unlisted | Direct link only (Pro+) |
| Private | You and invited collaborators (Pro+) |
| Internal | Inside your organization |
Lab-level **Course only** visibility can restrict a lab so it is reachable mainly through a course. See [Publish and share](/docs/labs/publish-and-share).
## Stats
Open **Stats** on a course for:
- Views over time, geo, and referrals
- Progress: completed / in progress, completion rate
- Per-lab breakdown inside the course
- Learner table
Details: [Analytics overview](/docs/analytics/overview). Organization plans can also issue [certificates](/docs/analytics/certifications).
## Courses vs labs
| | Lab | Course |
| --- | --- | --- |
| Scope | One task | Ordered collection of labs |
| Studio path | **Labs** | **Courses** |
| Progress | Per-lab | Course-level (+ per-lab inside) |
| Plan | Free+ | Pro+ |
## Use cases
- Customer or employee onboarding sequences
- Certification paths with multiple modules
- Workshop curricula learners revisit after a live session
## Related
Structure and publish individual labs.
Course Stats tabs and progress tables.
Digital certificates on Organization plans.
Co-authors on labs inside a course.
Team workspaces for shared curricula.
---
## Members and roles
URL: https://stepwik.com/docs/teams-and-portals/members-and-roles
Invite teammates, assign system or custom roles, and control what people can do in an organization workspace.
Organization access is managed under **Organization settings → Members** and **→ Roles**.
## Members
Path: **Manage → Members**
| Tab | Purpose |
| --- | --- |
| **Members** | People who already joined |
| **Invited members** | Pending email invites (if you can invite) |
### Invite someone
Open **Members**.
Enter an email and choose a role (system or custom). You cannot invite someone as **Owner**.
Send the invite. They join after accepting with a Stepwik account.
### Manage members
- Change role from the member row
- **Remove** a member
- **Revoke** a pending invite
Owner accounts are protected: you cannot remove or demote the last Owner without transferring ownership first.
Seat limits follow your plan. If you hit the cap, Studio prompts you to upgrade via **Manage → Pricing**.
## System roles
Studio ships with ranked system roles (exact labels can include Co-Owner depending on your workspace):
| Role | Typical access |
| --- | --- |
| **Owner** | Full control, including ownership transfer and delete |
| **Co-Owner / Admin** | Broad admin access to members, billing, and settings |
| **Editor** | Create and edit content; limited org settings |
| **Contributor** | Contribute within granted permissions |
Custom roles sit alongside these when your plan supports them.
## Custom roles
Path: **Manage → Roles**
When unlocked on your plan:
Create a role (name 3-15 characters, optional description).
Enable permission checkboxes from the template.
Assign the role when inviting or editing members.
### Permission areas
| Area | Example actions |
| --- | --- |
| Labs / Courses / Stepflows | view, create, update, delete, publish, collaboration, analytics |
| Members / Roles | view, create, update, delete |
| Organization | config, billing, domain, stats, manage, delete, transfer ownership |
| Content moderation | view, request, manage, publish |
| Lab submissions | view, review, decide |
| API | view, create, update, delete |
| Analytics | view, export |
| Webhooks | view |
Many content permissions require a base **view** permission. Enabling member/role/submission management often also requires organization **config**.
## Related
Create a workspace or join with an invite code.
Transfer ownership or delete the organization.
Manage menu map for the org workspace.
Review personal labs submitted to the org.
Co-authors on individual labs.
Seats and plan limits for invites.
---
## Branding
URL: https://stepwik.com/docs/teams-and-portals/branding
Configure organization profile branding and your public learning hub appearance on a Stepwik subdomain.
Branding controls how your workspace looks on its public hub and in Studio org settings. Portal hosting uses a Stepwik subdomain today; custom domains are marked **Coming soon** in Studio.
## Organization profile (General)
Path: **Manage → General**
Typical fields:
- Organization name and about
- Logo, icon, and cover image
- Social links
- Category
Logo and favicon for the org hub are managed here (personal workspaces use **SEO → Appearance** instead; see [Domain and SEO](/docs/teams-and-portals/domain-and-seo)).
## Public hub
| Item | Where |
| --- | --- |
| Subdomain | **Manage → Domain** (or personal **Domain**) |
| Portal SEO + OG image | **Manage → SEO** (or personal **SEO**) |
| Custom domain | Coming soon in Studio |
Published public labs and courses appear on the hub for that workspace.
## Plan notes
| Capability | Typical availability |
| --- | --- |
| `*.stepwik.com` subdomain | All plans |
| Custom domain | Planned (UI placeholder today) |
| Advanced white-label | Organization plan: see sales / plan details |
Until custom domains ship, use your `*.stepwik.com` subdomain for the public hub.
## Related
Subdomain, portal SEO, and appearance uploads.
Manage → General and other org settings.
Personal profile and plan overview.
Visibility options that appear on your hub.
---
## Lab submissions
URL: https://stepwik.com/docs/teams-and-portals/lab-submissions
Submit personal labs to an organization, review pending submissions, and understand content moderation review.
Organizations can accept labs from personal workspaces and, separately, require editors to request approval before publishing. Studio supports both flows.
## Submit a lab to an organization
Use this when you own a lab in your **personal** workspace and want it listed on an org you belong to.
Open the lab in your personal workspace.
Choose **Submit to organization**.
Pick the organization and optionally add a message.
Submit. The lab appears under the org’s **Manage → Submissions**.
### Author actions
| Status | What you can do |
| --- | --- |
| Pending | Withdraw the submission |
| Accepted | Lab is published on the org portal as public; you keep ownership. You can unpublish the accepted listing later |
| Rejected / Withdrawn / Removed | Review feedback (if any) and resubmit when ready |
## Review submissions (organization)
Path: **Organization settings → Submissions**
Tabs typically include **Pending**, **Accepted**, and **History**.
Reviewers with submission permissions can:
- **Accept & publish**: lists the lab on the org portal
- **Reject**: optionally leave feedback
- **Remove** an accepted listing
Statuses: `PENDING_REVIEW`, `ACCEPTED`, `REJECTED`, `WITHDRAWN`, `REMOVED`.
## Content moderation (publish approval)
Some orgs require editors to **request review** before a lab or stepflow goes live.
In the editor, start publish and choose **Request review** (when moderation is enabled for your role).
Moderators find items under Labs / Stepflows **Pending review**.
Moderators can **Approve & publish** (comments required) or update status to **In review**, **Edits requested**, or **Declined**.
This is separate from personal→org submissions. It governs publish approval inside the organization workspace.
## Related
Org settings including Submissions.
Permissions for review and decide.
Visibility and publish flows.
Co-authors on labs before submit.
---
## Domain and SEO
URL: https://stepwik.com/docs/teams-and-portals/domain-and-seo
Set your Stepwik subdomain, portal SEO metadata, and appearance for personal or organization hubs.
Every workspace can publish a learning hub on a Stepwik subdomain. Portal SEO and appearance are configured in Studio separately from per-lab SEO.
## Create or join
| Action | Where |
| --- | --- |
| Create | Org switcher → **Create organization** |
| Join | Org switcher → **Join organization** (invite code or email link) |
Full walkthrough: [Create and join an organization](/docs/teams-and-portals/create-and-join-organization).
After you create or join, switch to the org from the Studio org switcher. Content stays in the workspace where it was created unless you [submit a lab](/docs/teams-and-portals/lab-submissions) from personal to org.
## Organization settings (Manage)
Path: **Organization settings** (`Manage`)
| Page | Purpose |
| --- | --- |
| Overview | Org usage snapshot |
| General | Profile, logo, cover, socials, category |
| Members | Invite and manage people |
| Roles | System and custom roles |
| Submissions | Review personal→org lab submissions |
| Domain | Subdomain (custom domain coming soon) |
| SEO | Portal metadata and social image |
| Billing | Plan, seats, invoices |
| Settings | [Ownership transfer and delete](/docs/teams-and-portals/organization-settings) |
Create a workspace, set a subdomain, or join with an invite code.
Transfer ownership or permanently delete the org.
Invite people and assign system or custom roles.
Review personal→org lab submissions.
Configure the org hub subdomain and metadata.
Logo, cover, and org profile fields.
Plan, seats, and invoices for the org.
## My Progress (org)
Org workspaces include **My Progress** for labs you started as a learner: in progress vs completed, with continue / review actions. See [My Progress](/docs/getting-started/my-progress).
## Related
When to use an org and how to roll out.
Group labs into structured learning paths.
Co-authors and shared editing on labs.
Messages from learners on published labs.
Sidebar layout and workspace switching.
---
## Courses
URL: https://stepwik.com/docs/teams-and-portals/courses
Create and manage courses in Studio: add labs as modules, order the path, publish, and track stats.
A **course** groups labs into one learning path with shared title, description, cover, and progress. Manage courses under Studio → **Courses** (when enabled on your plan).
Course creation requires a **Pro plan or above**. The free plan supports unlimited standalone labs but not courses.
## Studio Courses list
| Action | Purpose |
| --- | --- |
| **Create** | Start a new course |
| Open a course | Edit structure, publish, share |
| **Stats** | Course-level views and learner progress |
| **View** | Preview the course as learners see it |
## Create a course
In Studio, open **Courses**, then **Create**.
Write an action-oriented title and short description for the course card.
Attach existing labs from your workspace library. Each lab becomes one module.
Drag modules to set the learning sequence.
Choose visibility and publish. You can keep editing and republish later.
## Course editor
In the course editor you can:
- Change title, description, and cover
- Add, remove, and reorder labs
- Open **Publish** / visibility controls
- **Share** with collaborators
- Jump to **Stats** for engagement
Learners typically follow modules in order. Reordering does not reset someone mid-course; they resume where they left off.
## Visibility
| Visibility | Who can access |
| --- | --- |
| Public | Anyone with the link; discoverable when indexed |
| Unlisted | Direct link only (Pro+) |
| Private | You and invited collaborators (Pro+) |
| Internal | Inside your organization |
Lab-level **Course only** visibility can restrict a lab so it is reachable mainly through a course. See [Publish and share](/docs/labs/publish-and-share).
## Stats
Open **Stats** on a course for:
- Views over time, geo, and referrals
- Progress: completed / in progress, completion rate
- Per-lab breakdown inside the course
- Learner table
Details: [Analytics overview](/docs/analytics/overview). Organization plans can also issue [certificates](/docs/analytics/certifications).
## Courses vs labs
| | Lab | Course |
| --- | --- | --- |
| Scope | One task | Ordered collection of labs |
| Studio path | **Labs** | **Courses** |
| Progress | Per-lab | Course-level (+ per-lab inside) |
| Plan | Free+ | Pro+ |
## Use cases
- Customer or employee onboarding sequences
- Certification paths with multiple modules
- Workshop curricula learners revisit after a live session
## Related
Structure and publish individual labs.
Course Stats tabs and progress tables.
Digital certificates on Organization plans.
Co-authors on labs inside a course.
Team workspaces for shared curricula.
---
## Members and roles
URL: https://stepwik.com/docs/teams-and-portals/members-and-roles
Invite teammates, assign system or custom roles, and control what people can do in an organization workspace.
Organization access is managed under **Organization settings → Members** and **→ Roles**.
## Members
Path: **Manage → Members**
| Tab | Purpose |
| --- | --- |
| **Members** | People who already joined |
| **Invited members** | Pending email invites (if you can invite) |
### Invite someone
Open **Members**.
Enter an email and choose a role (system or custom). You cannot invite someone as **Owner**.
Send the invite. They join after accepting with a Stepwik account.
### Manage members
- Change role from the member row
- **Remove** a member
- **Revoke** a pending invite
Owner accounts are protected: you cannot remove or demote the last Owner without transferring ownership first.
Seat limits follow your plan. If you hit the cap, Studio prompts you to upgrade via **Manage → Pricing**.
## System roles
Studio ships with ranked system roles (exact labels can include Co-Owner depending on your workspace):
| Role | Typical access |
| --- | --- |
| **Owner** | Full control, including ownership transfer and delete |
| **Co-Owner / Admin** | Broad admin access to members, billing, and settings |
| **Editor** | Create and edit content; limited org settings |
| **Contributor** | Contribute within granted permissions |
Custom roles sit alongside these when your plan supports them.
## Custom roles
Path: **Manage → Roles**
When unlocked on your plan:
Create a role (name 3-15 characters, optional description).
Enable permission checkboxes from the template.
Assign the role when inviting or editing members.
### Permission areas
| Area | Example actions |
| --- | --- |
| Labs / Courses / Stepflows | view, create, update, delete, publish, collaboration, analytics |
| Members / Roles | view, create, update, delete |
| Organization | config, billing, domain, stats, manage, delete, transfer ownership |
| Content moderation | view, request, manage, publish |
| Lab submissions | view, review, decide |
| API | view, create, update, delete |
| Analytics | view, export |
| Webhooks | view |
Many content permissions require a base **view** permission. Enabling member/role/submission management often also requires organization **config**.
## Related
Create a workspace or join with an invite code.
Transfer ownership or delete the organization.
Manage menu map for the org workspace.
Review personal labs submitted to the org.
Co-authors on individual labs.
Seats and plan limits for invites.
---
## Branding
URL: https://stepwik.com/docs/teams-and-portals/branding
Configure organization profile branding and your public learning hub appearance on a Stepwik subdomain.
Branding controls how your workspace looks on its public hub and in Studio org settings. Portal hosting uses a Stepwik subdomain today; custom domains are marked **Coming soon** in Studio.
## Organization profile (General)
Path: **Manage → General**
Typical fields:
- Organization name and about
- Logo, icon, and cover image
- Social links
- Category
Logo and favicon for the org hub are managed here (personal workspaces use **SEO → Appearance** instead; see [Domain and SEO](/docs/teams-and-portals/domain-and-seo)).
## Public hub
| Item | Where |
| --- | --- |
| Subdomain | **Manage → Domain** (or personal **Domain**) |
| Portal SEO + OG image | **Manage → SEO** (or personal **SEO**) |
| Custom domain | Coming soon in Studio |
Published public labs and courses appear on the hub for that workspace.
## Plan notes
| Capability | Typical availability |
| --- | --- |
| `*.stepwik.com` subdomain | All plans |
| Custom domain | Planned (UI placeholder today) |
| Advanced white-label | Organization plan: see sales / plan details |
Until custom domains ship, use your `*.stepwik.com` subdomain for the public hub.
## Related
Subdomain, portal SEO, and appearance uploads.
Manage → General and other org settings.
Personal profile and plan overview.
Visibility options that appear on your hub.
---
## Lab submissions
URL: https://stepwik.com/docs/teams-and-portals/lab-submissions
Submit personal labs to an organization, review pending submissions, and understand content moderation review.
Organizations can accept labs from personal workspaces and, separately, require editors to request approval before publishing. Studio supports both flows.
## Submit a lab to an organization
Use this when you own a lab in your **personal** workspace and want it listed on an org you belong to.
Open the lab in your personal workspace.
Choose **Submit to organization**.
Pick the organization and optionally add a message.
Submit. The lab appears under the org’s **Manage → Submissions**.
### Author actions
| Status | What you can do |
| --- | --- |
| Pending | Withdraw the submission |
| Accepted | Lab is published on the org portal as public; you keep ownership. You can unpublish the accepted listing later |
| Rejected / Withdrawn / Removed | Review feedback (if any) and resubmit when ready |
## Review submissions (organization)
Path: **Organization settings → Submissions**
Tabs typically include **Pending**, **Accepted**, and **History**.
Reviewers with submission permissions can:
- **Accept & publish**: lists the lab on the org portal
- **Reject**: optionally leave feedback
- **Remove** an accepted listing
Statuses: `PENDING_REVIEW`, `ACCEPTED`, `REJECTED`, `WITHDRAWN`, `REMOVED`.
## Content moderation (publish approval)
Some orgs require editors to **request review** before a lab or stepflow goes live.
In the editor, start publish and choose **Request review** (when moderation is enabled for your role).
Moderators find items under Labs / Stepflows **Pending review**.
Moderators can **Approve & publish** (comments required) or update status to **In review**, **Edits requested**, or **Declined**.
This is separate from personal→org submissions. It governs publish approval inside the organization workspace.
## Related
Org settings including Submissions.
Permissions for review and decide.
Visibility and publish flows.
Co-authors on labs before submit.
---
## Domain and SEO
URL: https://stepwik.com/docs/teams-and-portals/domain-and-seo
Set your Stepwik subdomain, portal SEO metadata, and appearance for personal or organization hubs.
Every workspace can publish a learning hub on a Stepwik subdomain. Portal SEO and appearance are configured in Studio separately from per-lab SEO.
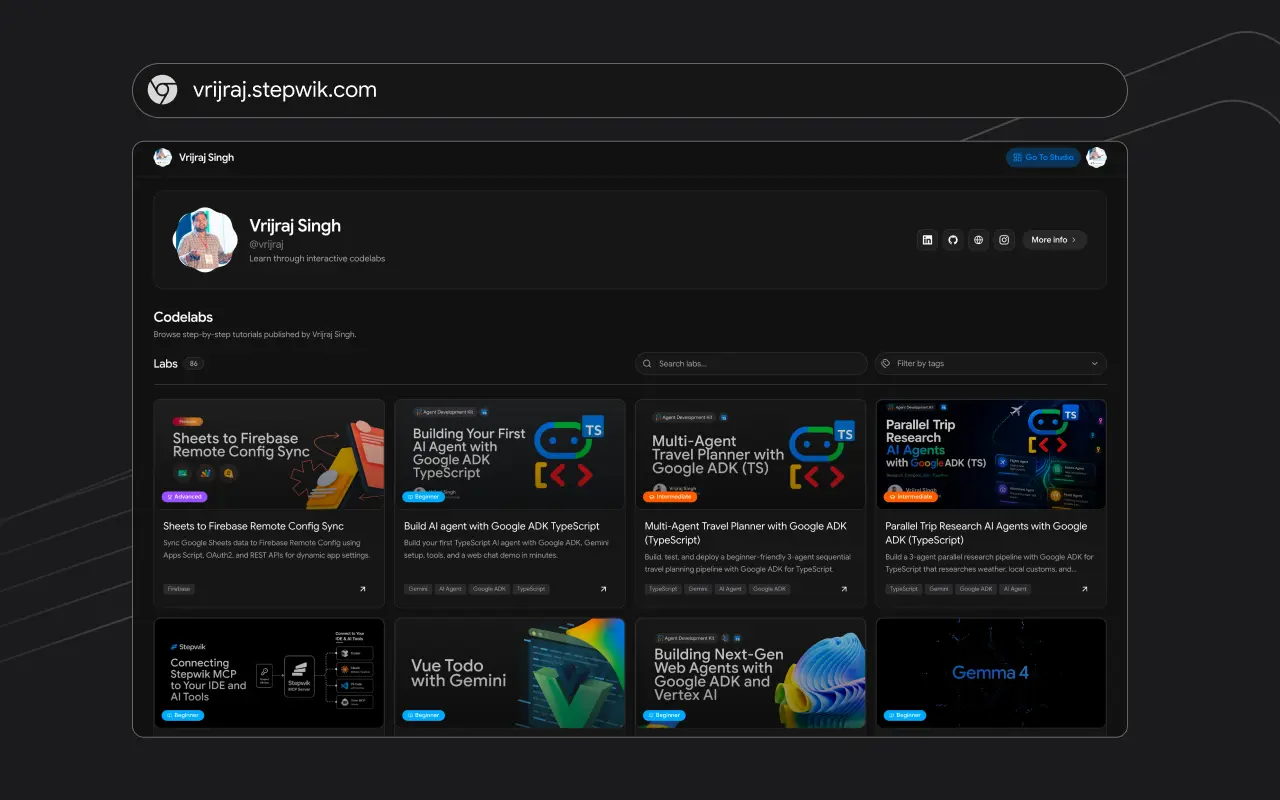 ## Domain
| Workspace | Path |
| --- | --- |
| Personal | **Domain** |
| Organization | **Manage → Domain** |
### Subdomain
Open the **Subdomain** tab.
Enter a handle (3-15 characters, lowercase letters and numbers only).
Save **Update subdomain**.
Use **Open Subdomain** to preview the live hub.
Changing a subdomain does **not** redirect the old URL. Update shared links after you rename.
### Custom domain
The **Custom Domain** tab is in Studio as **Coming soon**. Until it ships, use your `*.stepwik.com` subdomain for the public hub. See plan notes on [Branding](/docs/teams-and-portals/branding).
## Portal SEO
| Workspace | Path |
| --- | --- |
| Personal | **SEO** |
| Organization | **Manage → SEO** |
### Fields
| Field | Limit | Notes |
| --- | --- |
| SEO title | 140 | Falls back to publication name if empty |
| Meta description | 320 | Falls back to about text if empty |
| Keywords | 500 | Comma-separated |
| Open Graph image | 3 MB | Cropped ~1.91:1; used for social previews |
Studio shows Google and social live previews while you edit.
### Appearance (personal workspace)
On personal SEO you can also upload:
- **Logo** (about 4:1, ≤1 MB)
- **Favicon** (1:1, ≤0.5 MB)
For organizations, logo and related branding live under **Manage → General**. See [Branding](/docs/teams-and-portals/branding).
## Lab-level SEO
Title, description, and share previews for a single lab are set when you [publish](/docs/labs/publish-and-share), not on the portal SEO page.
## Related
Org profile logo, cover, and hub appearance.
Manage → Domain and SEO for team hubs.
Where personal Domain lives in Studio.
Per-lab SEO set at publish time.
---
## Organization settings
URL: https://stepwik.com/docs/teams-and-portals/organization-settings
Transfer organization ownership, cancel or accept a transfer, and permanently delete an organization from Studio.
Path: Studio (org workspace) → **Organization settings** → **Settings**
Use this page for high-impact admin actions: **transfer ownership** and **delete organization**. You can also copy the **Organization ID** (`soid`) for support.
Toolbar subtitle: *Manage ownership transfers and organization deletion.*
## Who can open Settings
The **Settings** item appears if you are the **Owner**, or your role includes `organization.delete` or `organization.transfer_ownership`.
| Action | Who |
| --- | --- |
| Start a transfer | Current **Owner** (and plan allows more than one member seat) |
| Cancel a pending transfer | Current **Owner** |
| Accept or reject a transfer | The member named as the new owner |
| Delete the organization | **Owner** with delete permission |
Transfer is disabled on plans where total members included is **1** (solo-seat style). Add seats / upgrade before transferring.
## Transfer ownership
Ownership does **not** change until the new owner accepts. You remain Owner until then.
Switch to the org → **Organization settings** → **Settings**.
Under **Transfer organization ownership**, click **Transfer ownership**.
The dialog reminds you: the new owner must already be a member; they will accept or decline; you stay Owner until they accept.
Fill **New owner email** (required) and an optional **Comment**, then submit **Transfer ownership**.
Pending requests appear under **Requests for ownership transfer**. You can **Cancel** while still Owner.
### Accept or reject (new owner)
When someone transfers ownership to you:
- A Studio banner **Pending ownership transfer** offers **Accept**, **Reject**, and **View details**
- Or open **Manage → Accept ownership** (`…/manage/acceptOwnership`) for the full page
After **Accept**, you become Owner. After **Reject**, the current Owner keeps control and can start again later.
You cannot remove or demote the last Owner without transferring ownership first. See [Members and roles](/docs/teams-and-portals/members-and-roles).
## Delete organization
Deleting an organization is **permanent**.
On **Settings**, open the **Delete organization** section.
Confirm you understand: all org content (labs, courses, and related data) is removed; members lose access immediately; custom domains and public hub links stop working; the action cannot be undone.
Type the organization **subdomain** exactly, then click **Delete organization**.
On success, Studio returns you to `/studio/user/personal/overview`.
Delete cannot be reversed. Export or move anything you need before confirming.
## Related
Create a workspace or join with an invite code.
Invites, Owner protections, and permissions.
Full Manage menu map.
Org plans, seats, and invoices.
---
## Domain
| Workspace | Path |
| --- | --- |
| Personal | **Domain** |
| Organization | **Manage → Domain** |
### Subdomain
Open the **Subdomain** tab.
Enter a handle (3-15 characters, lowercase letters and numbers only).
Save **Update subdomain**.
Use **Open Subdomain** to preview the live hub.
Changing a subdomain does **not** redirect the old URL. Update shared links after you rename.
### Custom domain
The **Custom Domain** tab is in Studio as **Coming soon**. Until it ships, use your `*.stepwik.com` subdomain for the public hub. See plan notes on [Branding](/docs/teams-and-portals/branding).
## Portal SEO
| Workspace | Path |
| --- | --- |
| Personal | **SEO** |
| Organization | **Manage → SEO** |
### Fields
| Field | Limit | Notes |
| --- | --- |
| SEO title | 140 | Falls back to publication name if empty |
| Meta description | 320 | Falls back to about text if empty |
| Keywords | 500 | Comma-separated |
| Open Graph image | 3 MB | Cropped ~1.91:1; used for social previews |
Studio shows Google and social live previews while you edit.
### Appearance (personal workspace)
On personal SEO you can also upload:
- **Logo** (about 4:1, ≤1 MB)
- **Favicon** (1:1, ≤0.5 MB)
For organizations, logo and related branding live under **Manage → General**. See [Branding](/docs/teams-and-portals/branding).
## Lab-level SEO
Title, description, and share previews for a single lab are set when you [publish](/docs/labs/publish-and-share), not on the portal SEO page.
## Related
Org profile logo, cover, and hub appearance.
Manage → Domain and SEO for team hubs.
Where personal Domain lives in Studio.
Per-lab SEO set at publish time.
---
## Organization settings
URL: https://stepwik.com/docs/teams-and-portals/organization-settings
Transfer organization ownership, cancel or accept a transfer, and permanently delete an organization from Studio.
Path: Studio (org workspace) → **Organization settings** → **Settings**
Use this page for high-impact admin actions: **transfer ownership** and **delete organization**. You can also copy the **Organization ID** (`soid`) for support.
Toolbar subtitle: *Manage ownership transfers and organization deletion.*
## Who can open Settings
The **Settings** item appears if you are the **Owner**, or your role includes `organization.delete` or `organization.transfer_ownership`.
| Action | Who |
| --- | --- |
| Start a transfer | Current **Owner** (and plan allows more than one member seat) |
| Cancel a pending transfer | Current **Owner** |
| Accept or reject a transfer | The member named as the new owner |
| Delete the organization | **Owner** with delete permission |
Transfer is disabled on plans where total members included is **1** (solo-seat style). Add seats / upgrade before transferring.
## Transfer ownership
Ownership does **not** change until the new owner accepts. You remain Owner until then.
Switch to the org → **Organization settings** → **Settings**.
Under **Transfer organization ownership**, click **Transfer ownership**.
The dialog reminds you: the new owner must already be a member; they will accept or decline; you stay Owner until they accept.
Fill **New owner email** (required) and an optional **Comment**, then submit **Transfer ownership**.
Pending requests appear under **Requests for ownership transfer**. You can **Cancel** while still Owner.
### Accept or reject (new owner)
When someone transfers ownership to you:
- A Studio banner **Pending ownership transfer** offers **Accept**, **Reject**, and **View details**
- Or open **Manage → Accept ownership** (`…/manage/acceptOwnership`) for the full page
After **Accept**, you become Owner. After **Reject**, the current Owner keeps control and can start again later.
You cannot remove or demote the last Owner without transferring ownership first. See [Members and roles](/docs/teams-and-portals/members-and-roles).
## Delete organization
Deleting an organization is **permanent**.
On **Settings**, open the **Delete organization** section.
Confirm you understand: all org content (labs, courses, and related data) is removed; members lose access immediately; custom domains and public hub links stop working; the action cannot be undone.
Type the organization **subdomain** exactly, then click **Delete organization**.
On success, Studio returns you to `/studio/user/personal/overview`.
Delete cannot be reversed. Export or move anything you need before confirming.
## Related
Create a workspace or join with an invite code.
Invites, Owner protections, and permissions.
Full Manage menu map.
Org plans, seats, and invoices.
---